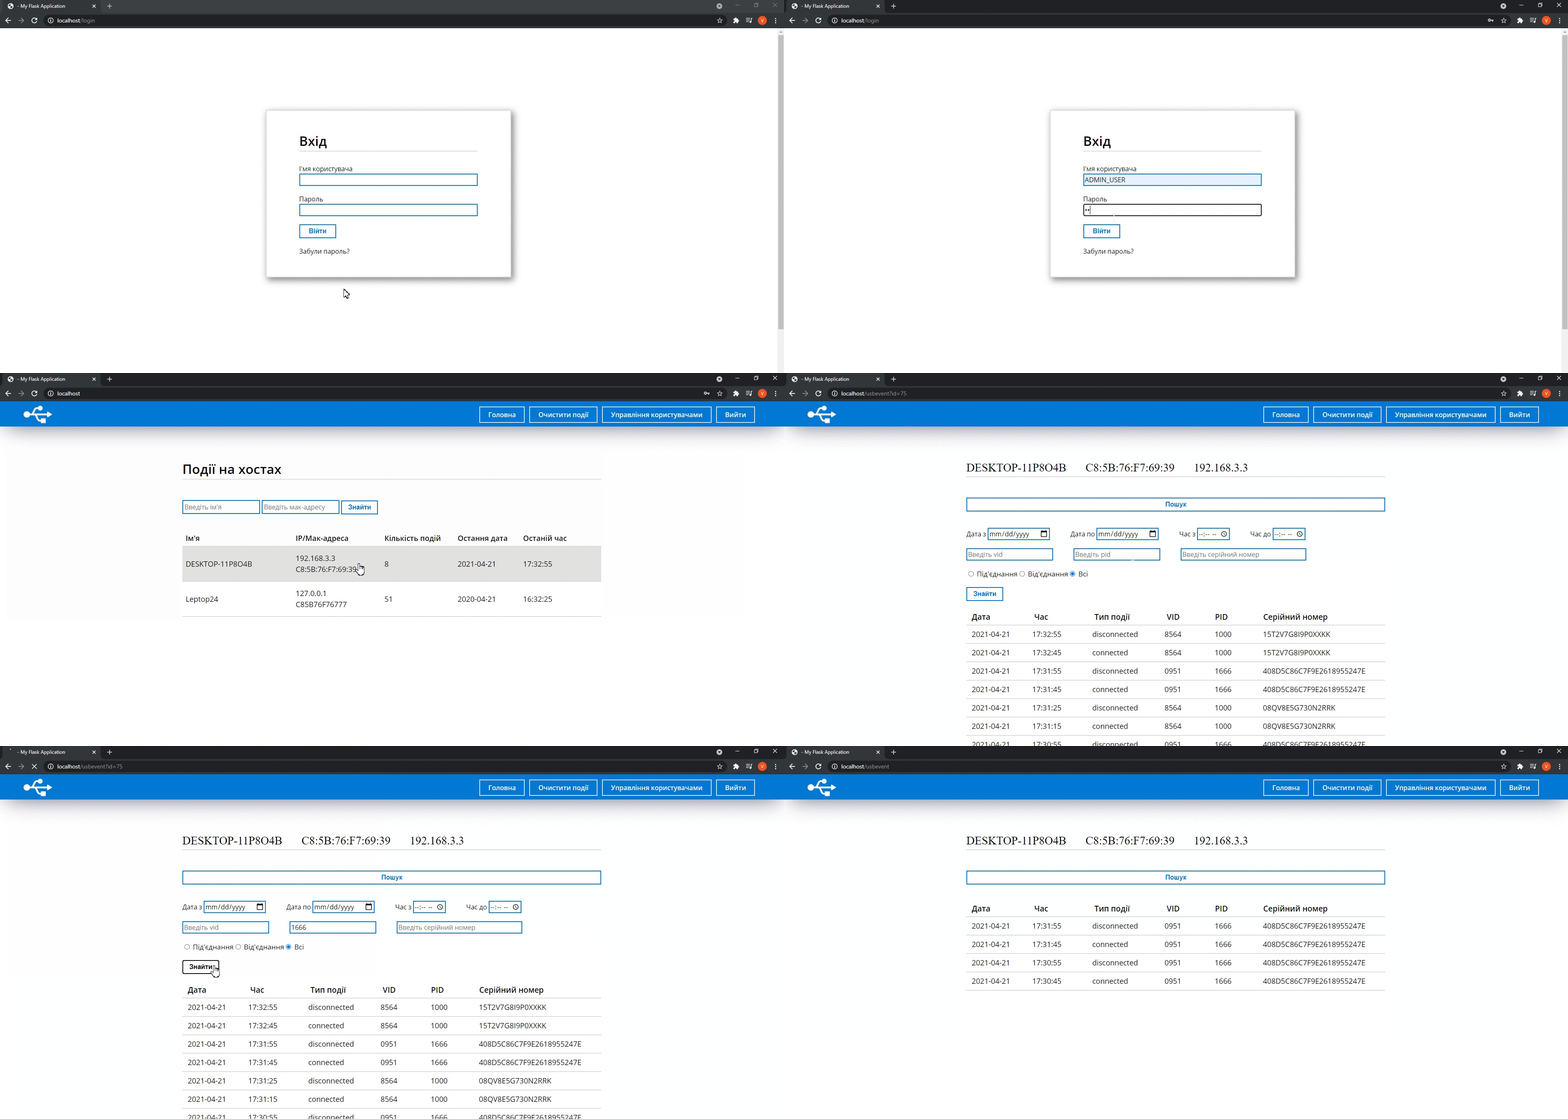
USB Monitoring System is software that allows you to keep track of the connection of USB devices to computers in your company.
The small size and significant storage capacity make the USB stick an ideal tool for carrying out cyberattacks that prompt more and more companies to think about measures to protect against this threat. This project aims to simplify the usage controlling of USB sticks and meet the needs of small companies that can't afford to purchase SIEM systems.
This system can allow you to:
- track connection events on corporate computers;
- collect and store events for further analysis in a centralized way;
- view and analyze events with an intuitive web interface;
- find the particular events.
If your account has administrator rights you can:
- create or delete users;
- delete irrelevant or unnecessary information.
- The client service is installed on the computer nodes which will be monitored. It catches USB connection events and sends gathered data to the server service. The code of client service is located in the USBClientService folder.
- The server service is responsible for receiving data and writing them to the database. The code of this component you can find in the USBServerService folder.
- The client service setting tool configures the network parameters for client service. The code of the tool is located in the USBClientServiceSettingTool folder.
- The server service setting tool configures the network parameters for server service. There is the code of the tool in the USBServerServiceSettingTool folder.
- Web application allows users to conveniently analyze events. The code of the web app you can find in the WebApp folder.
.
├── USBSClientService
│   ├── USBClientService
│   │   └── ...
│   ├── USBClientServiceInstaller
│   │   └── ...
│   └── ...
├── USBClientServiceSettingTool
│   └── ...
├── USBServerService
│   ├── USBServerService
│   │   └── ...
│   ├── USBServerServiceInstaller
│   └── ...
├── USBServerServiceSettingTool
│   └── USBServerServiceSettingTool
│       └── ...
└── WebApp
    ├── database
    │   └── ...
    ├── flask
    │   └── ...
    ├── nginx
    │   └── ...
    └── docker-compose.yml
Demonstration of how user can view and analyze events:
After authorization, users go to the main page where they can see a list of computers on which USB device connection events occurred. A particular computer can be chosen to review detailed information about host events. If this is necessary to filter the data, users can click on the Search button and enter the necessary parameters.
Demonstration of how user can delete irrelevant or unnecessary information:
Only users with admin permissions have access to this feature. To remove unneeded data, you can click the Clean Event button. After that, you can delete all the information about the host or choose the particular host to delete the events using the time parameter.
User management demonstration:
Users with admin rights have access to the User Management Panel, which allows them to create and delete users. To add a new user's account, complete the form and click Add. To delete the user's account, select the required accounts and click the Remove button.
Service setting tools demonstration:
After service installation, it is necessary to set network parameters otherwise default parameters will be unchanged. Run the tools with the administrator rights, complete the form and click the Apply button. After that parameter will be applied and services relaunched.
- Download the latest release.
- Install server service on your corporate server. If you just want to test a system, install the client and server services on the same computer. This will allow you to avoid additional network settings.

- Install client service on hosts which will be monitored.

- Configure network parameters for installed services. For this you can use USBClientServiceSettingTool.exe and USBServerServiceSettingTool.exe tools. Skip this step if you just want to test a system.
- Download and install Docker to deploy the web application.
- Before web application deployment change default configuration in docker-compose.yml and db_script.sql files. Skip this step if you just want to test a system.
- Run web app with docker-compose. In command line enter:
docker-compose up --build
Database
- port : 5433
- username : postgres;
- password : example
- database : usbapp
Nginx
- port : 80
Web App login
- login : ADMIN_USER
- password : 12345
pgadmin
- port : 81
- email : [email protected]
- password : example
Server service
- port : 8889


