✅ See this blogpost and this follow-up for a complete (and technical) explanation.
Services :
- Authelia — an Apache 2.0 OIDC provider
- Filebrowser — An Apache 2.0 simple web files browser / uploader and sharing interface
- Passbolt — A free, open-source, extensible, OpenPGP-based password manager
- Linkding — A MIT simple bookmarking service
- Davis — A MIT WebDAV, CalDAV and CardDAV server, based on sabre/dav
- kvtiles — An open-source map tiles server in Go, Apache 2.0 License
- Cryptpad — An AGPLv3 encrypted collaboration suite
- Docker Mailserver — a MIT fullstack mail server
- Snappymail — an AGPLv3 simple and lightweight webmail forked from RainLoop
- Gitea — a MIT self-hosted git service with a web UI
- Outline — a BSL 1.1 knowledge base app with a web UI, akin to Notion
All services are served through the Træfik reverse-proxy, certificates are provided by Let's Encrypt, and renewed automatically via Træfik.
source openrc.sh
docker-machine create -d openstack \
--openstack-flavor-name="b2-7" \
--openstack-region="GRA5" \
--openstack-image-name="Debian 9" \
--openstack-net-name="Ext-Net" \
--openstack-ssh-user="debian" \
--openstack-keypair-name="MY_KEY_NAME_IN_OPENSTACK" \
--openstack-private-key-file="/path/to/.ssh/id_rsa" \
default
docker-machine ssh default 'sudo apt update && sudo apt install -y -f software-properties-common fail2ban haveged'
software-properties-commonis a common package providing standard libsfail2banis to prevent unwanted accesshavegedis for Passbolt - to generate entropy
Note: if you don't use
docker-machine, you can just SSH to the host normally too
The volumes must be attached beforehand in the OpenStack console
docker-machine ssh default 'sudo fdisk /dev/sdb # n, p, w'
docker-machine ssh default 'sudo mkfs.ext4 /dev/sdb1'
docker-machine ssh default 'sudo mkdir /mnt/databases && sudo mount /dev/sdb1 /mnt/databases'
docker-machine ssh default 'sudo mkdir /mnt/databases/mysql /mnt/databases/pgsql /mnt/databases/filebrowser'
docker-machine ssh default 'sudo fdisk /dev/sdc # n, p, w'
docker-machine ssh default 'sudo mkfs.ext4 /dev/sdc1'
docker-machine ssh default 'sudo mkdir /mnt/files && sudo mount /dev/sdc1 /mnt/files'
docker-machine ssh default 'sudo mkdir /mnt/files/filebrowser /mnt/files/cryptpad /mnt/files/mails/data /mnt/files/mails/state /mnt/files/gitea /mnt/files/passbolt /mnt/files/webdav /mnt/files/linkding /mnt/files/outline'
eval $(docker-machine env default)
First, get the host from your docker-machine env:
docker-machine env | grep HOST
Which will return something like:
export DOCKER_HOST="tcp://xx.yy.zz.aa:2376"
Use this remote host to create a new context (you can name it how you like, I used cloud here):
docker context create cloud --docker "host=tcp://xx.yy.zz.aa:2376,cert=~/.docker/machine/certs/cert.pem,key=~/.docker/machine/certs/key.pem,ca=~/.docker/machine/certs/ca.pem"
Then, you just have to docker context use cloud before being able to run commands as usual.
You will find all your contexts with
docker context ls:$ docker context ls NAME DESCRIPTION DOCKER ENDPOINT KUBERNETES ENDPOINT ORCHESTRATOR cloud * tcp://xx.yy.zz.aa:2376 default Current DOCKER_HOST based configuration unix:///var/run/docker.sock swarm
Pay attention!
docker-composedoes not know of contexts ...
git submodule update --init
When rebuilding, don't forget to update submodules with
git submodule update --recursive --remote
Build configuration files first (so that environment variables are replaced correctly):
./scripts/build-configuration-files.sh
And then build the images :
docker compose build
If you want to extend the Docker Compose services definitions, you can create an addendum
docker-compose.supplementary.yamlfile for instance, and rundocker composeusing both files to merge the configurations:docker compose -f docker-compose.yaml -f docker-compose.supplementary.yaml psYou can check that your configuration is merged correctly with:
docker compose -f docker-compose.yaml -f docker-compose.supplementary.yaml configSee this Medium post for more details
docker compose up -d
🎉
./scripts/passbolt/init-admin-user.sh
./scripts/gitea/init-admin-user.sh
./scripts/linkding/init-user.sh
These files resides in configurations/gitea; copy the public and templates folders to /mnt/files/gitea/gitea/. before provisionning the container, or restart it after doing it.
How to enable SSH passthrough for Gitea
If you want to be able to use the standard port 22 for git, you need to create a passthrough between your Docker host and the gitea container. In order to do so, you have many options as outlined in https://docs.gitea.io/en-us/install-with-docker/#ssh-container-passthrough.
The container is setup for the first option (the shim), and you need to run
./scripts/gitea/init-ssh-passthrough.shon your host if you want to set it up in full. Be wary that the UID and GID used are2022and if you want to change it, you need to do it both in thedocker-compose.ymlfile and in this script.If all succeeds, you will be able to test the SSH connection with
ssh -T git@${GIT_DOMAIN}and you will be granted a message like so:Hi there, {your_username}! You've successfully authenticated with the key named {your_ssh_key_name}, but Gitea does not provide shell access.
./scripts/davis/init-mysql-tables.sh
And finally, create a rule so that all the traffic of mail containers (SMTPD mainly) goes out by the MAIL_HOST_IP defined in your .env file
./scripts/mail/create-iptables-rule.sh
⚠️ WARNING⚠️ : On Debian Buster (10),iptablesnow usesnftunder the hood, and it just doesn't work in this case. You need to select the legacy iptables viaupdate-alternatives --config iptablesfirst, restart the Docker engine, and recreate the networks (so that the rules are re-applied) before playing the script above. See for instance docker-mailserver/docker-mailserver#1356.
In the event of a burning datacenter, you might want to backup all your data to some other provider / server so that you can recover (most of) your data.
We're going to incrementally backup /mnt/database and /mnt/files — that should be sufficient to help us recover from a disaster.
We use duplicity for this, and a S3-compatible backend to store the backups remotely (but with duplicity, you can use pretty much whatever service you want).
See https://www.scaleway.com/en/docs/store-object-with-duplicity/#-Installing-Software-Requirements for more info on their Object Storage solutions and the way it works with duplicity
On the Docker host:
sudo apt install --no-install-recommends wget build-essential libreadline-gplv2-dev libncursesw5-dev \
 libssl-dev libsqlite3-dev tk-dev libgdbm-dev libc6-dev libbz2-dev libffi-dev zlib1g-dev

wget https://www.python.org/ftp/python/3.9.2/Python-3.9.2.tgz
tar xzf Python-3.9.2.tgz
cd Python-3.9.2
./configure --enable-optimizations
sudo make install # with 'sudo', we replace the original Python provided with the distro
sudo apt update && sudo apt install -y -f gettext librsync-dev
wget https://launchpad.net/duplicity/0.8-series/0.8.21/+download/duplicity-0.8.21.tar.gz
tar xaf duplicity-0.8.21.tar.gz
cd duplicity-0.8.21
pip3 install -r requirements.txt
pip3 install boto # for S3 remote target
sudo python3 setup.py install
You must create a
/root/.aws/credentialsfile with your S3 credentials:[default] aws_access_key_id=EXAMPLE_KEY aws_secret_access_key=EXAMPLE_SECRETThe user in which "home" you set these credentials will need to be the one running the cron task obviously. A simple solution would be to use
root, since duplicity must be able to read all the files that you want to backup
Create /etc/cron.d/backup_daily with :
PATH=/usr/local/sbin:/usr/local/bin:/usr/sbin:/usr/bin:/sbin:/bin
42 01 * * * root duplicity incr --full-if-older-than 365D --volsize 1024 --asynchronous-upload --no-encryption --include /mnt/databases --include /mnt/files --file-prefix "cloud_" --exclude '**' /mnt/ s3://<S3_HOST>/<S3_BUCKET_NAME> >> /var/log/duplicity.log 2>&1
This will run every day, at 01:42 AM, as the
rootuser.
Options (see http://duplicity.nongnu.org/vers8/duplicity.1.html):
--volsize 1024: Use chunks of 1Go--asynchronous-upload: Try to speed up uploads using CPU and bandwidth more efficiently--no-encryption: Do not encrypt remote backups--include /mnt/databases --include /mnt/files --exclude '**': Only backup/mnt/filesand/mnt/databases
duplicity full --volsize 1024 --asynchronous-upload --file-prefix "cloud_" --no-encryption --include /mnt/databases --include /mnt/files --exclude '**' --progress /mnt/ s3://<S3_HOST>/<S3_BUCKET_NAME>
duplicity list-current-files --file-prefix "cloud_" s3://<S3_HOST>/<S3_BUCKET_NAME>
duplicity verify \
    --no-encryption \
    --include /mnt/databases \
    --include /mnt/files \
    --file-prefix "cloud_" \
    --exclude '**' \
    --compare-data \
    s3://<S3_HOST>/<S3_BUCKET_NAME> /mnt/
With s3cmd:
s3cmd put file.zip s3://{bucket}/{path}/file.zip --storage-class=GLACIER --multipart-chunk-size-mb=100
It's important to set a multipart chunk size so that the original file size divided by the chunk size doesn't exceed 1000 (chunks) since an upload can have at most 1000 chunks.
With aws cli:
aws --profile scw_profile s3 cp file.zip s3://{bucket}/{path}/file.zip
You need to install
pip3 install awscli-plugin-endpointand create a profile in~/.aws/configbeforehand:[plugins] endpoint = awscli_plugin_endpoint [profile scw_profile] region = fr-par s3 = endpoint_url = https://s3.fr-par.scw.cloud multipart_chunksize = 100MB s3api = endpoint_url = https://s3.fr-par.scw.cloud
With s3cmd:
s3cmd cp s3://{bucket}/{path} s3://{bucket}/{path} --storage-class=GLACIER --add-header=x-amz-metadata-directive:REPLACE
With aws cli:
aws s3 cp s3://{bucket}/{path} s3://{bucket}/{path} --storage-class GLACIER
Update Dockerfiles or the docker-compose.yml file, then rebuild the images with docker compose build. You can then recreate each container with the newly built images with docker compose up -d {container}.
For some containers using a shared volume such as Davis (/var/www/davis) or Snappymail, you need to scrap the underlying volume before updating so that the code is really updated on rebuild.
For instance:
docker rm -f davis davis-proxy && docker volume rm davis_www
docker container prune && docker image prune
docker compose up -d --force-recreate --build davis-proxy davis
or
docker rm -f snappymail snappymail-proxy && docker volume rm snappymail_www
docker container prune && docker image prune
docker compose up -d --force-recreate --build webmail-proxy webmail
Tip
For the MySQL container to be updated correctly, you absolutely need to do a complete normal shutdown before bringing the new container up:
- Update the MySQL version in the `Dockerfile-mysql`` Dockerfile
- Build the image:
docker compose build mysql - In the actual, running MySQL container,
mysql -uroot -p - Issue a graceful shutdown with
shutdown; - The container will then stop by itself
- Bring the new container up:
docker compose up -d
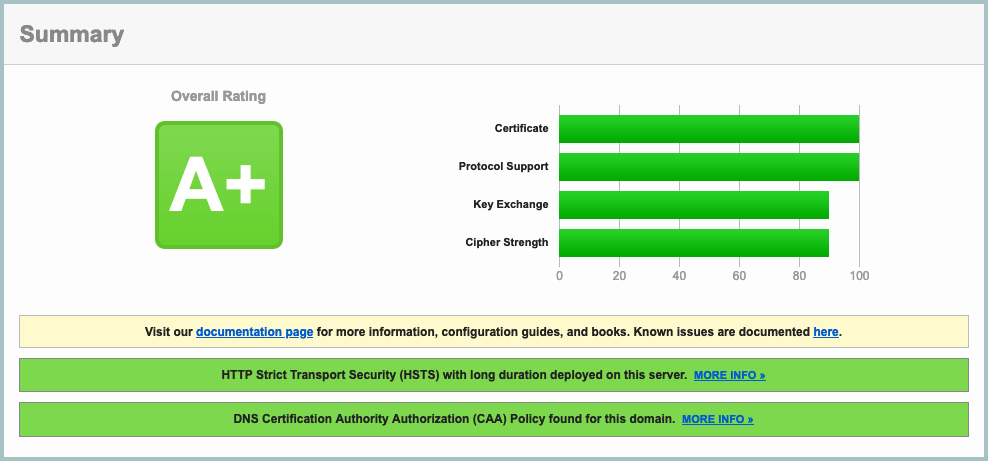
The given Traefik V2.0 configuration (SSL params, etc), along with a proper DNS configuration (including a correct CAA entry — see here), will result in a A+ rating in SSLLabs :
You have to add some DNS entries to make your setup work. Run the following scripts to have them listed according to your environment values:
./scripts/mail/show-dns-entries.sh
Test that your SMTP endpoint works as expected:
openssl s_client -starttls smtp -connect mail.mydomain.com:587
and:
openssl s_client -connect mail.mydomain.com:465
Both should yield a prompt, and say that the certificate is ok (Verify return code: 0 (ok))
Test your IMAP endpoint (Dovecot) with:
openssl s_client -connect mail.mydomain.com:993
You can try to login with A LOGIN {user} {password} by replacing {user} and {password} with the real strings, which should yield something along those lines:
A OK [CAPABILITY IMAP4rev1 SASL-IR LOGIN-REFERRALS ID ENABLE IDLE SORT SORT=DISPLAY THREAD=REFERENCES THREAD=REFS THREAD=ORDEREDSUBJECT MULTIAPPEND URL-PARTIAL CATENATE UNSELECT CHILDREN NAMESPACE UIDPLUS LIST-EXTENDED I18NLEVEL=1 CONDSTORE QRESYNC ESEARCH ESORT SEARCHRES WITHIN CONTEXT=SEARCH LIST-STATUS BINARY MOVE SNIPPET=FUZZY PREVIEW=FUZZY STATUS=SIZE LITERAL+ NOTIFY] Logged in
When using a separate IP for the mail server, we need to add a rule to the POSTROUTING chain in the nat table to allow traffic originating from the mail network to go through the correct IP; On the Docker host, run:
sudo iptables -t nat -I POSTROUTING -s 172.100.0.0/16 -j SNAT --to $MAIL_HOST_IP
Don't forget to set
MAIL_HOST_IPbeforehand if not done already. "172.100.0.0/16" is the subnet indicated in the docker-compose.yml file for the mail network.
To list all the rules in the nat table:
sudo iptables -t nat -L --line-numbers
To see the disk usage :
docker-machine ssh default "df -h | grep '^/dev'"
When making a block storage bigger :
- First stop the container using it (filebrowser for instance, or many more if it's the databases)
- Unmount the
/dev/sd*1volume - Change the size in the Public Cloud interface
- WARNING The volume name will likely change
sudo fdisk /dev/sd*(no number here): Delete (d,w) / recreate the partition (n,p,w) /sudo e2fsck -f /dev/sd*1/sudo resize2fs /dev/sd*1- Remount it
- Restart the container
- 🎉
See https://www.cloudberrylab.com/resources/blog/linux-resize-partition/ for more info
If you change databases.sh, you need to clear the content of
/mnt/databases/mysql(andcouchtoo if needed) on the host for the entrypoint script to be replayed entirely
It's easy as to add rules to the traefik container. Example if you want to redirect calendar.mydomain.com to dav.mydomain.com:
- "traefik.http.routers.legacy_calendar_to_dav.rule=Host(`calendar.mydomain.com`)"
- "traefik.http.routers.legacy_calendar_to_dav.service=noop@internal"
- "traefik.http.routers.legacy_calendar_to_dav.middlewares=to_dav"
- "traefik.http.routers.legacy_calendar_to_dav.tls=true"
- "traefik.http.middlewares.to_dav.redirectregex.regex=^https://calendar.mydomain.com/(.*)"
- "traefik.http.middlewares.to_dav.redirectregex.replacement=https://dav.mydomain.com/$${1}"
- "traefik.http.middlewares.to_dav.redirectregex.permanent=true"In order to create a password for the status page (Traefik's default status page that will reside at https://status.mydomain.com), you need to create a username/password combo with:
htpasswd -nB username
> New password: ...
Supposing an alias of 1, and an interface of ens3 :
Disable auto configuration on boot by adding :
network: {config: disabled}
in /etc/cloud/cloud.cfg.d/99-disable-network-config.cfg
Edit /etc/network/interfaces.d/50-cloud-init.cfg and add :
auto ens3:1
iface ens3:1 inet static
address YOUR.FAILOVER.IP
netmask 255.255.255.255
You can change the region, just grab a tag at https://hub.docker.com/r/akhenakh/kvtiles/tags, such as france-13-latest for instance.
The tiles server is available directly at https://{MAPS_DOMAIN}/. You can see a handy map at https://{MAPS_DOMAIN}/static/?key={MAPS_API_KEY}.
echo "Creating destination volume ..."
docker volume create --name new_volume_name
echo "Copying data from source volume to destination volume ..."
docker run --rm \
           -i \
           -t \
           -v old_volume_name:/from \
           -v new_volume_name:/to \
           alpine ash -c "cd /from ; cp -av . /to"
You might need this if Traefik does not manage to get certificates with a tls challenge (and if you don't have any ipv6 dns created)
sysctl -w net.ipv6.conf.all.disable_ipv6=1
sysctl -w net.ipv6.conf.default.disable_ipv6=1
sysctl -w net.ipv6.conf.lo.disable_ipv6=1
- Docker best practices : https://blog.docker.com/2019/07/intro-guide-to-dockerfile-best-practices/
- Nginx Reverse proxy : https://www.thepolyglotdeveloper.com/2017/03/nginx-reverse-proxy-containerized-docker-applications/
- nginx TLS / SSL configuration options : https://gist.github.com/konklone/6532544
- Lets Encrypt with Docker : https://devsidestory.com/lets-encrypt-with-docker/
- Lets Encrypt with Docker (alt) : https://medium.com/@pentacent/nginx-and-lets-encrypt-with-docker-in-less-than-5-minutes-b4b8a60d3a71
- Create and configure a block volume in OVH Public Cloud : https://docs.ovh.com/fr/public-cloud/creer-et-configurer-un-disque-supplementaire-sur-une-instance/
- Shell command / Entrypoint in Docker : https://stackoverflow.com/questions/41512237/how-to-execute-a-shell-command-before-the-entrypoint-via-the-dockerfile
- Ignore files for Cozy drive : https://github.com/cozy-labs/cozy-desktop/blob/master/doc/usage/ignore_files.md
- Deploy your own SAAS : https://github.com/Atarity/deploy-your-own-saas/blob/master/README.md
- A set of Ansible playbooks to build and maintain your own private cloud : https://github.com/sovereign/sovereign/blob/master/README.md
- How to run your own mail server : https://www.c0ffee.net/blog/mail-server-guide/
- Mail servers are not hard : https://poolp.org/posts/2019-08-30/you-should-not-run-your-mail-server-because-mail-is-hard/
- NSA-proof your e-mail in 2 hours : https://sealedabstract.com/code/nsa-proof-your-e-mail-in-2-hours/
- Mail-in-a-Box : https://mailinabox.email/
- Setting up a mailserver with OpenSMTPD and Dovecot : https://poolp.org/posts/2019-09-14/setting-up-a-mail-server-with-opensmtpd-dovecot-and-rspamd/
- OpenSMTPD: Setting up a mailserver : http://z5t1.com:8080/cucumber_releases/cucumber-1.1/source/net-extra/opensmtpd/doc/example1.html
- Test a SMTP server : https://www.stevenrombauts.be/2018/12/test-smtp-with-telnet-or-openssl/
- A simple mailserver with Docker : https://tvi.al/simple-mail-server-with-docker/
- A set of Ansible playbooks to build and maintain your own private cloud : https://github.com/sovereign/sovereign/blob/master/README.md
- Setting up an email server in 2020 with OpenSMTPD and Dovecot https://prefetch.eu/blog/2020/email-server/
- How to self-host your email server : https://www.garron.blog/posts/host-your-email-server.html
- About changing the outgoing address for a network of containers : https://medium.com/@havloujian.joachim/advanced-docker-networking-outgoing-ip-921fc3090b09
- An OpenBSD E-Mail Server Using OpenSMTPD, Dovecot, Rspamd, and RainLoop https://www.vultr.com/docs/an-openbsd-e-mail-server-using-opensmtpd-dovecot-rspamd-and-rainloop
- Cozy : https://github.com/cozy/cozy-stack/blob/master/docs/INSTALL.md
- Passbolt : https://hub.docker.com/r/passbolt/passbolt/
- Standard Notes : https://github.com/arugifa/standardnotes-server-docker/blob/master/Dockerfile
- MariaDB : https://github.com/docker-library/mariadb/blob/master/10.4/docker-entrypoint.sh
- x-browser-sync : https://github.com/xbrowsersync/api-docker
See https://github.com/Kickball/awesome-selfhosted for more awesome self-hosted alternatives.
- SoGo : https://sogo.nu/support/faq/how-to-install-sogo-on-debian.html
- Radicale : https://radicale.org/
- Calendar Server: https://www.calendarserver.org/ (Apple)
- An android client app for CalDav / CardDav : https://gitlab.com/bitfireAT/davx5-ose - https://f-droid.org/packages/at.bitfire.davdroid/
- The blog post : https://blog.nobugware.com/post/2020/free-maps-for-all/
- The repository : https://github.com/akhenakh/kvtiles