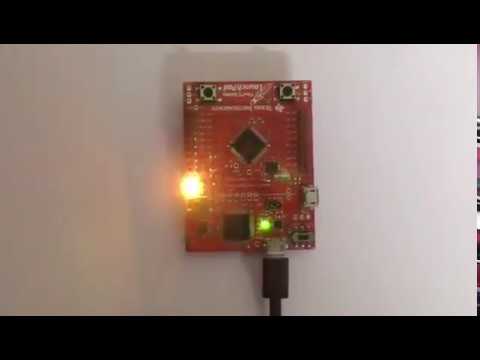
Implementation of a Round-Robin schedular and generic compilation environment for TM4C123GH6PM. As below there are three threads for blinking RED, GREEN and BLUE LED each at different rate.
The build system presented here has the minimal possible set of files to get started with TM4C123GH6PM (ARM Cortex M4) the TIVA C Launchpad board by Texas Instruments. The code was tested on Ubuntu 16.04 64 Bit machine.
In order to use the build system correctly you will need:
- ARM GCC tool-chain
- OpenOCD
The code has been compiled and tested using 'The GNU Embedded Toolchain for Arm Version 8-2018-q4-major Linux 64-bit'. To setup the tools. Navigate to a location where would want to save the tools. I prefer to save in ~/Documents/arm_tools/ directory. If you prefer to do the same execute the following in a terminal window:
$ cd ~/Documents
$ mkdir arm_tools
$ cd arm_tools
$ wget https://armkeil.blob.core.windows.net/developer/Files/downloads/gnu-rm/8-2018q4/gcc-arm-none-eabi-8-2018-q4-major-linux.tar.bz2
$ tar -xvf gcc-arm-none-eabi-8-2018-q4-major-linux.tar.bz2
The tools will be extracted into 'gcc-arm-none-eabi-8-2018-q4-major' directory.
To enable access to the binaries by the make file execute the following in the terminal you shall use to build the source. Note that you'd need to execute this everytime you build from a new/different terminal. The PATH varible is changed local to the active terminal session.
$ PATH=$PATH:Documents/arm_tools/gcc-arm-none-eabi-8-2018-q4-major/bin
Open up a terminal window in the source directory of this repository and simple execute:
$ sudo make setup
This shall install all dependencies for OpenOCD followed by downloading the latest source for OpenOCD from github, compiling it and installing it into the system. OpenOCD is required to be able to upload the generated binaries to the board.
Once the setup is complete the source code for OpenOCD will be deleted.
The Repo is divided into three sub-directories: inc, src and .msc (hidden). As below the 'inc' directory has all the header files (.h), 'src' has all the implementation files (.c) and the '.msc' directory has supporting files like the linker sript (.ld) and the setup script for openOCD.
.
│── inc
│ ├── mem_layout.h
│ ├── os_config.h
│ └── os.h
│── Makefile
│── .msc
│ ├── scatter.ld
│ └── setup_openocd.sh
│── README.md
│── src
│ ├── main.c
│ └── os.c
It shall help to know that 'main.c' implements three tasks to be executed simultaneously in a preemptive round-robin fashion. These tasks blink the 'Red', 'Blue' and 'Green' on board LED with varying period. The schedular itself is implemented within the 'os.c' file.
The header files include definitions of the Task Control Block and the various configurable parameters like the stack size, total number of allowed thread etc.
The 'scatter.ld' file is a linker script that dectates the placement of various memory sections in the final binary.
The 'Makefile' dictates the rules of compilation, debugging, setting up OpenOCD and uploading the binary to the board. The rules are set of commands that the user would otherwise have to type into the terminal manually.
If you'd want to change the name of the final binary that gets generated, simple change the value of 'PROJECT' variable in the 'Makefile'.
You can add header files and source files into the 'inc' and 'src' directories and used them from within the main.c file. The build system will automatically pickup the files and compile. The steps would be as follows:
- Edit main.c under the folder src.
- Add any of the new source (.c) files in (src) folder.
- Add header (.h) files in the inc folder.
- Modify the PROJECT and ICDI variables in the Makefile as per your needs or system configuration.
- Generate the binary file using the following command:
$ make
This shall generate a .elf and a .hex file. The .elf file has debug symbols and can be used for debugging, on the other hand .hex file is devoid of any debug symbols and is uploaded to the board by using the following command:
$ sudo make upload
To clean the source code use:
$ make clean
You'd need to start a openOCD server that connects to the board and then allows ARM GDB to control the board vai gdb commands.
To start the openOCD server, open a new terminal window (this is important since you'd need the old one to run gdb), navigate to the source code of this repo and then execute the following command:
$ sudo make openOCD
This shall result in a link eastablishment with the hardware. The terminal may now be minimized as it needs to stay open but cannot be used for anything else. Also, using 'Ctrl + c' you can exit the server.
Once OpenOCD server is running, from the old terminal (where you had set the PATH variable) run the following:
$ make debug
This should launch the arm-gdb console. You should see the (gdb) prompt. Enter the following gdb commands to connect to the server:
(gdb) target extended-remote :3333
(gdb) monitor reset halt
This shall establish a connection and halt the CPU execution. You'd now want to upload the debug symbols. To do so execute the following on the (gdb) prompt: Set the break points as you like (using the usual gdb commands) and then use:
(gdb) file <the elf file>.elf
This shall upload the debug sysmbols, and gdb will now upderstand any reference you make to function names etc. You can use the started gdb commands. For example you can set a break point on the 'main()' function by using the following command:
(gdb) break main
Post this you can issue a reset and allow the execution to continue. The CPU is paused once the break point is hit. You can then use commands like list, info reg, next, step etc for furter debugging
(gdb) monitor reset init
(gdb) continue
- Impelment the RMS algorithm to make the OS realtime.
- CMSIS Support.
- More examples.
Below are the links I used for learning the concepts and implementing the source code.
- Concepts: http://www.state-machine.com/quickstart/ and https://www.youtube.com/watch?v=3V9eqvkMzHA&list=PLPW8O6W-1chwyTzI3BHwBLbGQoPFxPAPM
- Linker Script/Makefile: https://github.com/martinjaros/tm4c-gcc
- ARM Cortex Internals: http://users.ece.utexas.edu/~valvano/arm/
1.0.2
There were different licences on the various sources listed above. Each file has it's own licence. Please follow the terms on the source as well.
- NOTE: This repo was created with an intention to learn the build system and bare-metal programming. The purpose was pure educational adventure. In case you wish to use this repo for any other pusposes, kindly reachout to the refrences listed above and in each file to consult them. Please respect the license terms.