This plugin makes it easy to setup and tear down GameLift deployments within Unreal Editor. It uses the FleetManagerPlugin.
The backend design is based on Amazon's video series Building Games on AWS: Amazon GameLift & UE4.
The following will take you from start to finish to building and deploy a UE 5.1 GameLift server. These steps are also demonstrated in the YouTube video Demo: How to get from Zero to Gamelift Multiplayer project in UE5.1.
- Starting with a source build of Unreal engine
- Have an AWS account setup and can run the AWS cli using a Named profile
- to confirm, run the following in a windows cmd shell:
aws --version # should show something like: aws-cli/2.13.17 Python/3.11.5 Windows/10 exe/AMD64 prompt/off # if you want to update, follow https://docs.aws.amazon.com/cli/latest/userguide/getting-started-install.html aws configure list-profiles aws gamelift list-fleets --profile [NamedProfileName] --region us-west-2 - Install boto3
- to confirm, run the following in a windows cmd shell:
pip show boto3
- Create a new third person template C++ project
- Create your project Plugins folder at the same level as Source and clone the following into it:
git clone https://github.com/spayne/FleetManagerPlugin.git FleetManager
git clone https://github.com/spayne/GameLiftStarterPlugin GameLiftStarter
git clone https://github.com/spayne/AWSGameLiftServerSDK GameLiftServerSDK
- Generate Visual Studio project files and then build the Development Editor | Win64 target for your project.
- Open the Platforms menu and confirm that you can now see the Fleet Manager GUI from the Platforms menu. Note that opening the Fleet Manager will generate warnings until you specify project settings for it in Step 5 below.

- Follow Epic's instructions on Setting Up Dedicated Servers. Once you have finished that you will have:
- the server target,
- a packaged server build (in the Packaged folder if you used their example)
- a ProjectNameServer.exe,
- an Entry Map that Opens 127.0.0.1 on BeginPlay
- a Server Default map (e.g. Third Person Example Map)
- Notes:
- Epic's instructions:"Step 6. Package the Project again..." have you package and build a standalone NoEditor Client. If you prefer you can just use an Editor build instead. ie.
- Tou can do all client side development, including connecting to the servers deployed on AWS, with an Editor build (ake PIE) using the "Play Standalone" netmode with a single client using the EntryMap as the initial map.
- You can worry about multiple clients and the NoEditor client later.
- The link above is to the older 4.27/pre-Lyra era instructions because it's more lightweight. Let me know if Lyra is a priority to you.
- Epic's instructions:"Step 6. Package the Project again..." have you package and build a standalone NoEditor Client. If you prefer you can just use an Editor build instead. ie.
- Make sure it works on a single machine
-
We will now update your project to get the deploy on GameLift:
-
Fill in the GameLiftStarter project settings in the Plugins category:

- Modify the Entry Map Level Blueprint to open GameLiftOfflineMainMenu (Use CreateWidget and then choose the GameLiftOfflineMainMenu as the class):

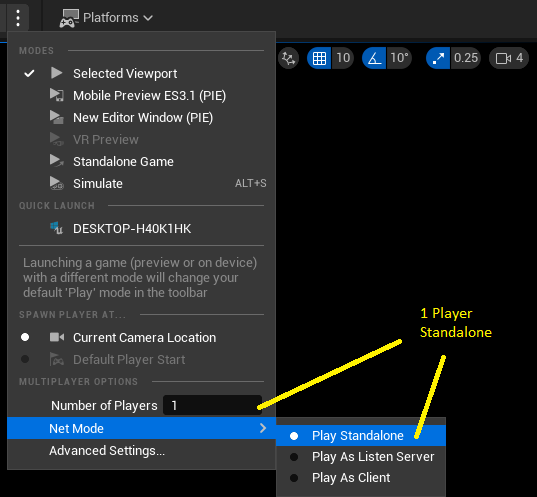
- Compile and Save that map. Now from the Main Editor, click on the three 'vertical buttons' and confirm you have Num Players: 1 and Play Standalone selected:
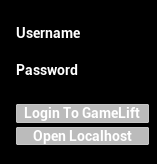
- Press the Play button in the Editor and confirm you have Login Options on the bottom right in game:
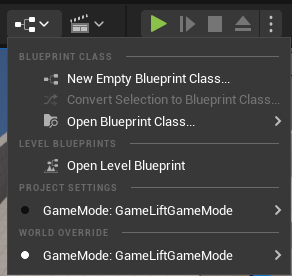
- Open the ThirdPersonMap and select the World Override Options, use "Select GameModeBase Class" to select GameLiftGameMode. Remember to save this map*
-
Copy the Plugins/GameLiftStarter/Scripts/install.bat file to the Server Package Root.
-
From within the editor, re-package the server package to make sure everything is going to be in sync between what is on your local machine and the server side. (e.g. the modifications to the ThirdPersonMap).
-
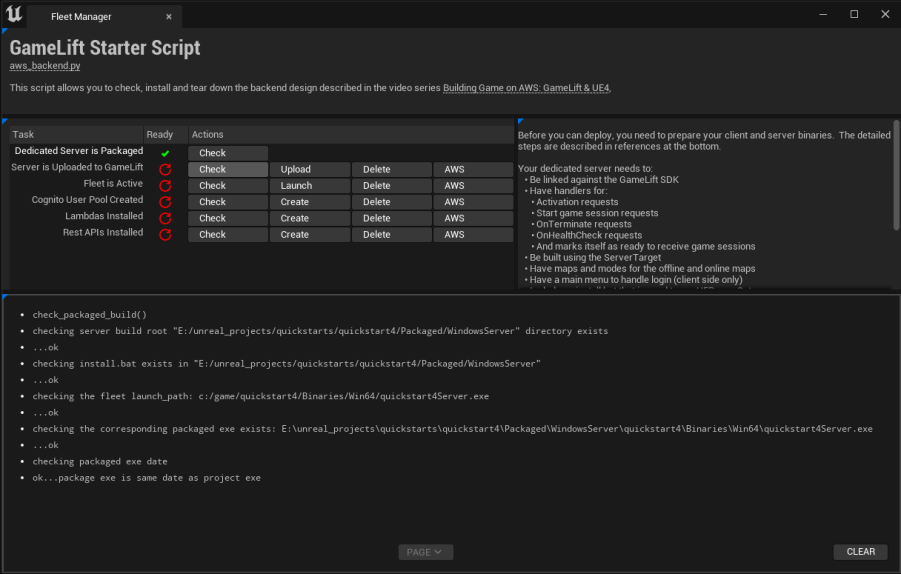
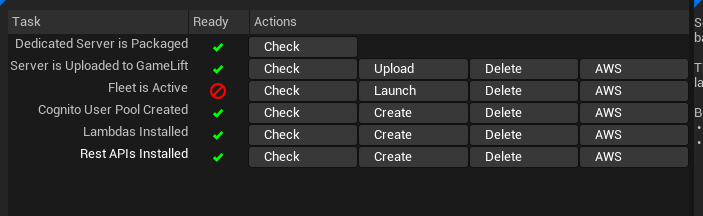
Run the Fleet Manager and click on "Check" to check the Dedicated Server is Packaged. Confirm that the Ready column shows OK:

-
Click on Upload to upload the Server to GameLift. This will open a blank window and take a moment (30s-1min) to start uploading. Keep an eye on both the fleet manager window as well as the popup window to see upload progress. Eventually the popup window will close and the checkmark for this will go green.
-
Click on Launch to start the fleet. This will show fleet status is NEW and the status will not turn to a checkmark. This is expected. Fleet deployment can take about 30 minutes to continue.
-
While the fleet is deploying, click on Create for the remaining 3 items (Cognito, Lambdas, Rest API). They will all go green and your status should look like this:
- Take note of the invoke_url from the Rest API step. Close the Fleet Manager. Copy this URL into the APIGatewayEndpoint value in UGameLiftOfflineMenuBase::UGameLiftOfflineMenuBase in the Plugins/GameLiftStarter/Source/Fleeterator/Private/GameLiftOfflineMenuBase.cpp. We will figure out a better way to do this later.

-
Rebuild the Development Editor target (to build the update to UGameLiftOfflineMenuBase)
-
Wait for the Fleet to become Active. You can press the "Check" button to check, or the 'AWS' button to view the status from the AWS console.
-
When the fleet is active, run multiple instances of the Windows client. If you are using PIE clients, then disable 'Run under one process' in Advanced Settings. Login using 'user0' and 'test12' as the password

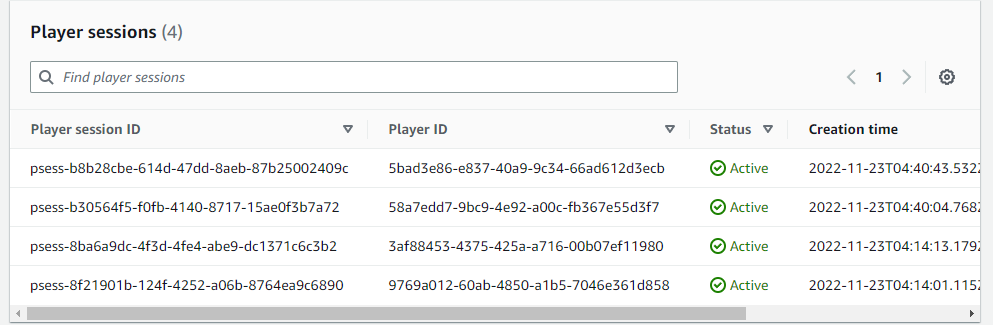
- Click on the AWS button on the Fleet Row. Then choose the fleet and then game sessions. You will see a game session. From there select Player Session and you will see the player details:
- When you are done, remember to shutdown all of the AWS service to avoid unnecessary usage charges.
Now that you have a working server on Windows you could try cross compiling and testing on Linux and WSL. My notes on how to do this are linux_server_build.md