


This Telegram Bot can perform various tasks with media files, such as :-
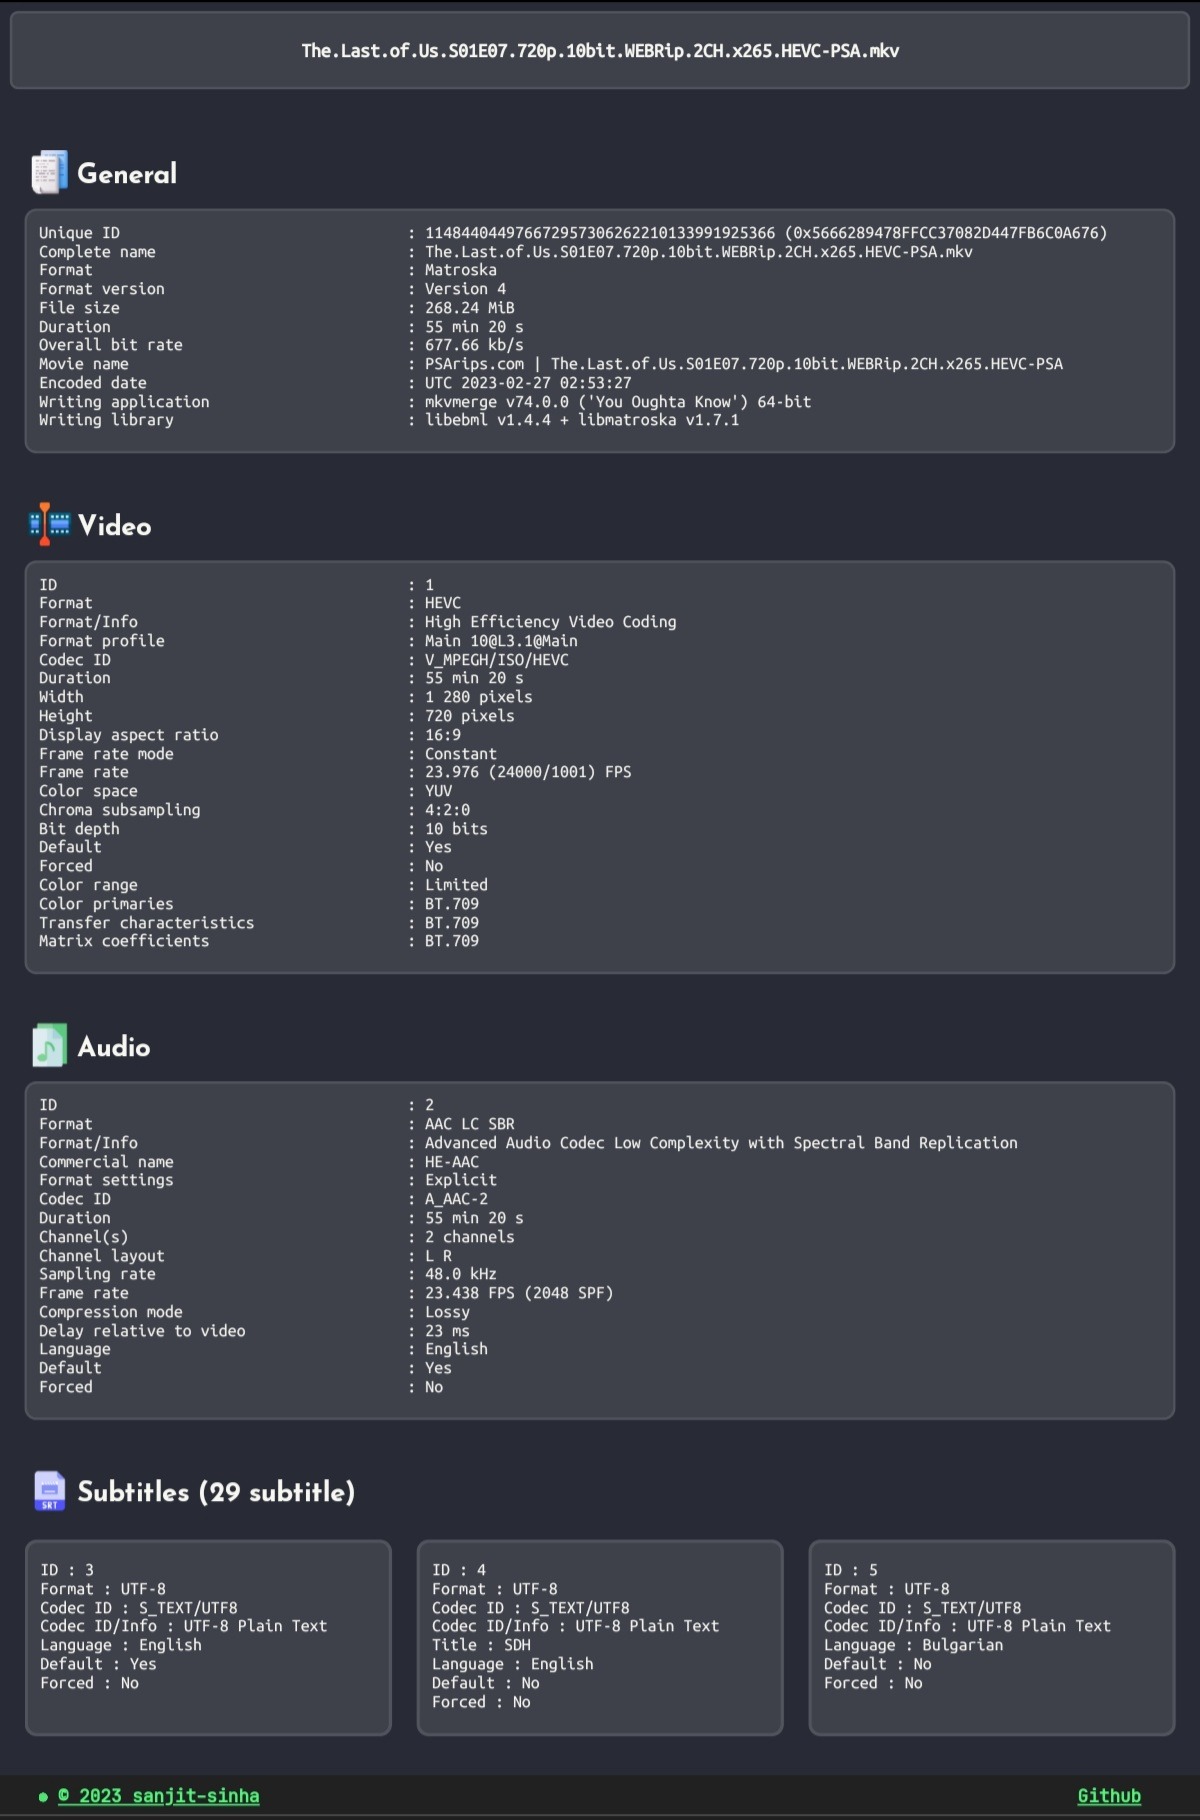
- Generating Mediainfo from Google Drive links, direct download links, and Telegram files, and displaying the information on a custom-designed website.
- Creating screenshots from Google Drive links, direct download links, and Telegram files, and posting them on slow.pics
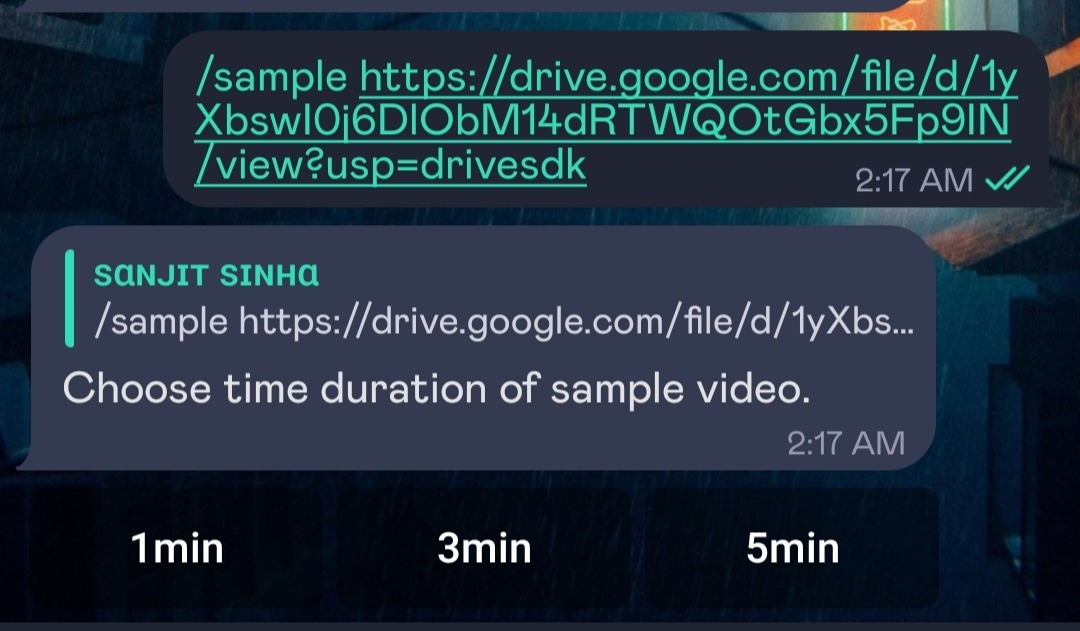
- Generating custom-duration video samples from video files.
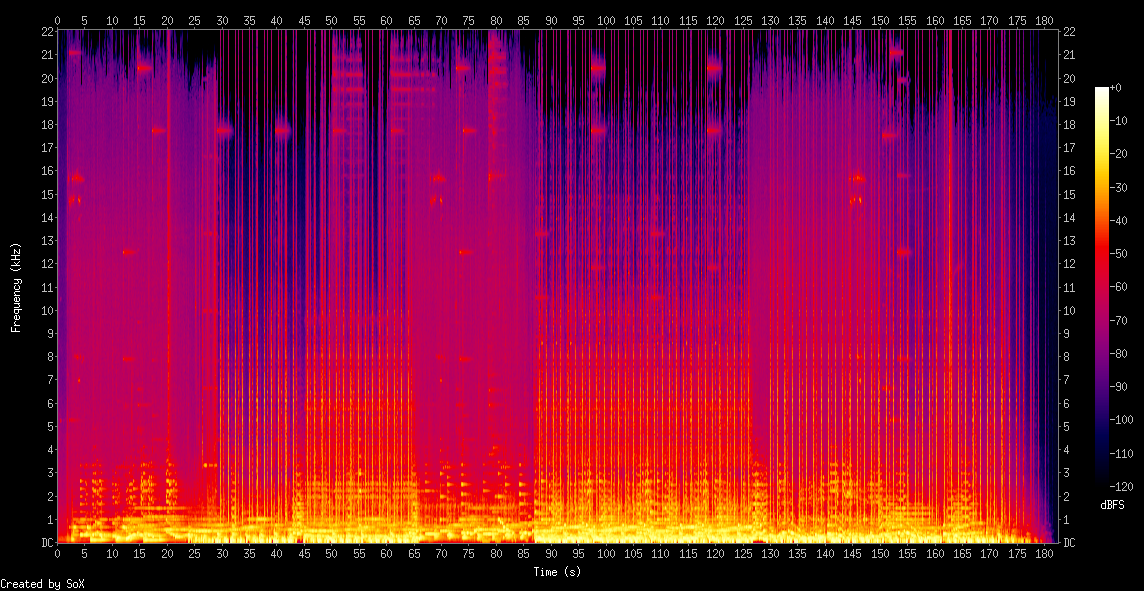
- Creating spectrograms of Telegram audio files and displaying them as images.
- pasting the text in the katb.in website.
Note: This Bot is made on top of this repository -> https://github.com/sanjit-sinha/TelegramBot-Boilerplate
 |
|---|
 |
|---|
 |
 |
|---|
Exmaple Links
( Mediainfo • Screenshot • Audiograph )
/m or /mediainfo- Type link after command or Reply to telegram file to generate Mediainfo./ss or /screenshot- Type link after command or Reply to telegram video file to generate screenshots./sampleor/trim- Type link after command or Reply to telegram video file to generate sample video./spekor/sox- Reply to Telegram file to generate audio spectogram./paste- paste your text in katb.in website.
Additional Flags for screenshot and mediainfo command :-
--count=10 [ Number of screenshots. Default 10, Max 20 ], --fps=10 [ Difference between two consecutive screenshots in seconds. Default 5, Max 15 ]. --time=01:20:10 [ Time from where the screenshots should be taken in HH:MM:SS format ], --hdr [ For HDR Videos.]
--r [ For raw Mediainfo in document format. ]
(Few more commands /start /help /ping /update /logs)
Install and update Dependencies
sudo apt-get update && sudo apt-get upgrade -y
sudo apt-get install -y python3-pip
sudo pip3 install -U pip
sudo apt-get install -y --no-install-recommends mediainfo ffmpeg
sudo apt-get install libsox-fmt-mp3
sudo apt-get install sox
clone the repository and install the requirements
git clone https://github.com/sanjit-sinha/Tg-MediaInfoBot
cd Tg-MediaInfoBot
pip3 install -U -r requirements.txt
Now edit the config vars by typing nano config.env and save it by pressing ctrl+o and ctrl+x.
Getting Google OAuth API credential.json file and token.json (important)
-
NOTES
- You need credentials.json and token.json in root folder for bot to work.
- Old authentication changed, now we can't use bot or replit to generate token.json. You need OS with a local browser. For example
Termux. - You can ONLY open the generated link from
token_generator.pyin local browser.
STEPS
- Visit the Google Cloud Console
- Go to the OAuth Consent tab, fill it, and save.
- Go to the Credentials tab and click Create Credentials -> OAuth Client ID
- Choose Desktop and Create.
- Publish your OAuth consent screen App to prevent token.json from expire
- Use the download button to download your credentials.
- Rename that file into credentials.json and move that file to the root of repo.
- Visit Google API page
- Search for Google Drive Api and enable it in Google Cloud Console
- Finally, run the script from inside of repository
pip3 install google-api-python-client google-auth-httplib2 google-auth-oauthlib
python3 token_generator.py
Now you can start the bot by simply typing bash start or python3 -m TelegramBot
The bot will stop working once you logout from the server. You can run the bot 24*7 in the server by using tmux.
sudo apt install tmux -y
tmux
bash start
Now the bot will run 24*7 even if you logout from the server. Click here to know about tmux and screen advance commands.
Note You can also Deploy Bot using Docker
docker build . -t mediainfobot
docker run mediainfobot

- copyright (C) 2023 by Sanjit sinha
- Licensed under the terms of the The MIT License