We present here multiple (easy to use) python based scripts used for video and image editing. These scripts work in Linux and Windows. MacOS is not supported, but these scripts should also work on macOS because python is a system agnostic language.
We present in the following the different scripts provided by this repository.
To show information about any script, execute <SCRIPT_NAME>.py --help
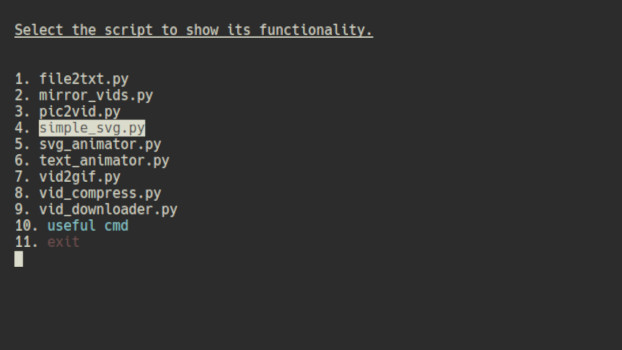
This script shows a list that contains all other scripts, and let you select which one you want to use to display its help. It also allows you to update all the scripts (network needed). So, this is the only command you need to memorize.
To use it, just execute:
cmd_help.py
Creates a smooth transition between two videos. Some examples:


Makes a transition animation between two videos, using the last part of the first video, and the first part of the second video.
Example:
vid_transition.py -i ex_vid1.mp4 ex_vid2.mp4 --animation translation --num_frames 15 --max_brightness 1.5
Let's break down this command: -i ex_vid1.mp4 ex_vid2.mp4 refers to the input videos used for animation.
--num_frames 15 means that the program will take the last 15 frames of the video 'ex_vid1.mp4' and the
first 15 frames of the video 'ex_vid2.mp4' in order to make the seamless animation.
--animation translation means we will use short translation animation.
Finally, --max_brightness 1.5 mean we also want to add brightness animation,
and the value 1.5 (150%) refers to the maximum value of brightness, at the midpoint of the animation.
In other words, the brightness starts at 100% goes to 150% after 15 frames,
then comes back to 100% after another 15 frames.
To show all transition animation, type the following command:
vid_transition.py -a help


Create a text animation video with a transparent background. The font size is calculated automatically from the text_bbox variable. To use a custom font (other then 'text_animator_overpass_font'), provide a path to a new '.ttf' file using '--font'. On Linux, providing the name of the font is sufficient (the script will look for it from the installed fonts in the system). to create a line break use the character "|"
For example:
text_animator.py -i "vibration|animation" --length 3 --antialiasing true -c 255,0,0 --text_bbox 500 400
This command will produce a video with a transparent background of 3 seconds length. In this video, the sentence 'vibration animation' is animated. The color of the text will be red, and it will have the default size of 600x600 pixels. The script will try to fit the text in the text bounding box of 500x400 pixels, and it will calculate the font size automatically.

Downloads video or part of a video using yt-dlp and ffmpeg. It will also add a small text reference to the video source in the corner of the video (this can be disabled). For example:
vid_downloader.py -t 0.00.00 0.00.02 -u https://www.youtube.com/watch?v=PCicKydX5GE
This command will download the part from 0 h 00 m 00s to 0h 00 m 02s of this YouTube video.
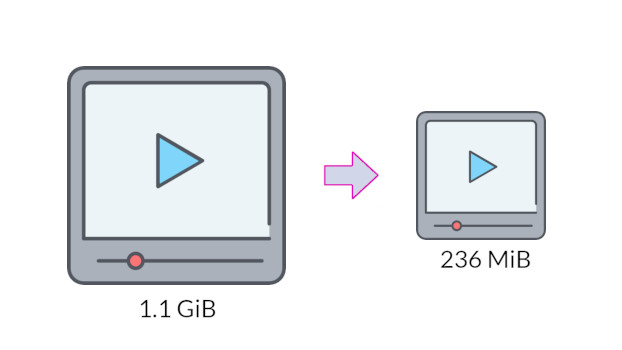
Compresses videos using ffmpeg, also provides multiple options in order to change the resulting videos like dimension change or sound removal.
example:
vid_compress.py --fps 25 --scale 720 --keep yes --rm_audio yes -i birds.mp4
This command will take 'birds.mp4' video as an input and compress it, the resulting video will have 25 frames per second, will be scaled to 720p and its audio will be removed, its compression will be done using the famous H.264 codec. For more information about codecs that can be used:
vid_compress.py --codec help

Search for images in the current directory and convert them to video, all images must have the same dimensions. The number of images shown per second is calculated using the provided duration.
For example:
cd my_pictures; pic2vid.py --duration 4 --extension .jpg --fps 25
This command will go to directory 'my_pictures', and it will merge any '.jpg' images into one video with the duration of 4 seconds, and 25 frames per second. The number of images shown in each second depends on the number of images and the specified duration.

Generate simple shape in the form of SVG file.
For example:
simple_svg.py --color "#00cc99" --size 600 400 --shape ellipse --thickness 15
This command will produce an SVG file with an ellipse drawn in the center, with the color #00cc99, of the size 600x400 and a line thickness of 15.
This one will also produce a command that you can use with svg_animator.py to animate the shape, You just have to past the command using Ctrl+V and hit Enter (you need to have 'xclip' installed)

Create a line animation video from a SVG file, the supported shapes are: path, ellipse, circle and rect. Only the first shape presented in the file is animated.
For example:
svg_animator.py --input ellipse.svg -c 0,204,153 -w 13 -t y --num_frames 150 --fps 30
This command will take the 'ellipse.svg' file as an input. And it will produce a video of 5 seconds (150 number_of_frames / 30 FPS = 5 seconds). The color of the used line is RGB(0,204,153) and a width of 13.
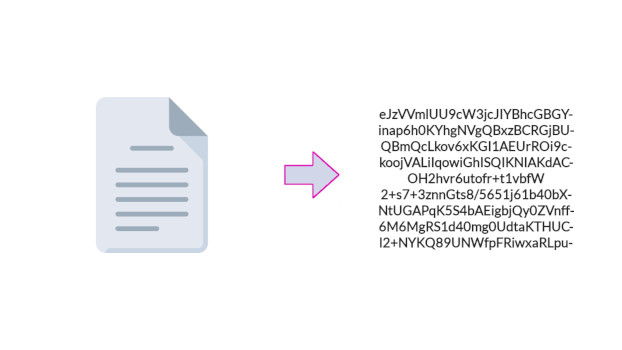
Transforms files to text and vise-versa. Useful to embed images inside code, for example.
For example:
file2txt.py -i flower_icon.png -p y
This will transform 'flower_icon.png' into a text that you can embed in your program.
Converts videos to GIFs. Multiple optimization option are provided.
For example:
vid2gif.py -i birds.mp4 -f 12 -s 300
This command will take the birds.mp3 video and transform it to a GIF with 12 frames per second, and an image width of 300 pixels.
In this section, we present multiple packages that need to be installed before running the scripts, The commands needed to install these will be shown in the next section:
FFmpeg is a command line video editing program. And it is used by almost all scripts provided by this repository.
Git is used to update the scripts if the user wishes to do so.
On Linux, you can use your command line favorite package manager.
In our example, we will use Aptitude (apt-get Ubuntu based).
Here is the list of commands to install FFmpeg and the python packages:
sudo apt install ffmpeg
sudo apt install git

python3 -m pip install --upgrade pip
python3 -m pip install --upgrade Pillow
python3 -m pip install --upgrade svg.path
python3 -m pip install --upgrade yt-dlp
On Windows, the best option is to use a command line package manager. We advise using scoop from https://scoop.sh/ (a good alternative to scoop is Chocolatey).
To install scoop and the other packages, type the following commands in PowerShell. To open a PowerShell open Windows 10 Explorer ALT+F -> S -> R:
Set-ExecutionPolicy RemoteSigned -Scope CurrentUser
irm get.scoop.sh | iex

scoop install ffmpeg
scoop install git

py -m pip install --upgrade pip
py -m pip install --upgrade Pillow
py -m pip install --upgrade svg.path
py -m pip install --upgrade windows-curses
py -m pip install --upgrade yt-dlp
Once the Prerequisites packages are installed, the scripts can be used once you give them execution permission on Linux.
The simplest way to use a script is to put it in the folder you want to use and then execute it. However, we advise against this. We show in the following sections how to make the scripts global, so that they can be used from anywhere in your system.
- Firstly, download the GitHub repo using
git clone:
git clone https://github.com/salaheddinek/video-editing-py-script.git
- Then, make the scripts global by running the using our installation script.
In this example, we choose to install the scripts under the folder
~/Scripts:
python3 video-editing-py-script/make_my_scripts_global.py "~/Scripts"
The previous command copy the scripts to a new folder ("~/Scripts" in this case), then it gives all the scripts execution permission, then it modifies ".bashrc" so that all scripts in this folder can be run from anywhere in your system.
- To test if everything is ok. Open a new terminal. Type the following command, and it should show a list of available scripts:
cmd_help.py
- For Windows users, start by downloading the repository files. To do so, open PowerShell in your download folder by opening Windows Explorer, Then press ALT+F -> S -> R, then run the following command to download the files:
git clone https://github.com/salaheddinek/video-editing-py-script.git
- Then, make the scripts global by running the using our installation script.
In this example, we choose to install the scripts under the folder
C:\Scripts:
py .\video-editing-py-script\\make_my_scripts_global.py "C:\Scripts"
The previous command copy the scripts to a new folder ("C:\Scripts" in this case), then, it generates multiple '.bat' files to run the '.py' files.
- Now we need to add the 'Scripts' folder to the global PATH, so we can call the scripts from anywhere on Windows. For this, we need to use the PowerShell in ADMINISTRATOR mode. To do so, open Windows explorer then hit ALT+F -> S -> A, then execute the following command:
setx path "%PATH%;C:\Scripts"
Warning: after running the previous command,
Windows sometimes uninstalls 'scoop' package manager,
to verify if it is still installed, execute scoop --version.
Install it again if it is missing.
- To verify if everything is ok, open a new PowerShell. Then type 'cmd_' and hit TAB key, you should see 'cmd_help.bat', this is the only command that you need to memorize, as it shows you the rest of scripts. Remember to replace the '.py' with '.bat' to run any script. Enjoy!
Side Note: when using PowerShell, scripts help messages (-h/--help) might miss some characters, use Windows CMD to verify the help message in this case.