Hey there, welcome to NexTemplate – my personal indie project! This collection brings together custom templates and components crafted with Next.JS, shadcn/ui, and TailwindCSS. It's a space where I share pieces of code that might make your web development journey a bit smoother.
-
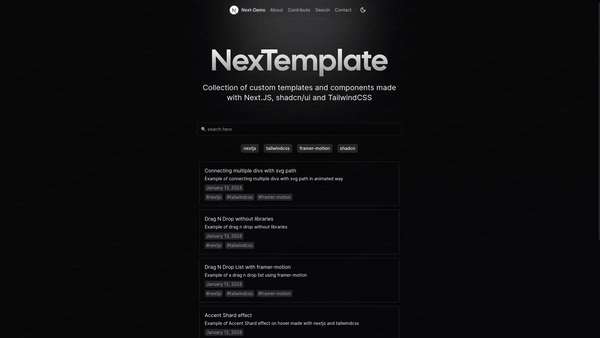
Diverse Collection: NexTemplate offers a bunch of reusable templates and components that I've put together. They're not perfect, but they've been useful for me, and I hope you find them helpful too.
-
Search Functionality: Need something specific? Use the search feature to quickly find the components you're looking for.
-
Live Demos: See the components in action with live demos. The demos include code snippets in TypeScript, CSS, and Tailwind for your convenience.
-
Code Organization: I've tried to organize the components into different files, following some good practices for clarity. It's not perfect, but it gets the job done.
-
Easy Copy-Paste Integration: Feel free to copy and paste the code snippets directly into your project. It's a quick and straightforward way to integrate these components.
-
Fully Open Sourced: NexTemplate is fully open source. Dive into the code, make changes, and use it as you see fit. Just remember, it's not perfect, and I'm always open to improvements.
To get started with NexTemplate, visit the NexTemplate. The project isn't flawless, but it's a work in progress.
Contributions to NexTemplate are welcome and encouraged! If you have suggestions, feature requests, or you found a bug, feel free to open an issue. If you'd like to contribute code, follow these steps:
-
Fork the repository: Click the "Fork" button in the upper right corner of this repository to create your copy.
-
Clone your fork: Clone your forked repository to your local machine using the following command:
git clone https://github.com/rudrodip/nextemplate
-
Create a branch: Create a new branch for your contribution:
git checkout -b feature-or-fix-name
-
Make changes: Make your changes or additions to the codebase. Ensure your code follows the project's coding guidelines.
-
Test your changes: Run the development server locally to test your changes:
npm run dev
# or
yarn dev
# or
pnpm run dev
# or
bun run dev- Commit your changes: Commit your changes with a meaningful commit message:
git add .
git commit -m "Add feature or fix"- Push changes: Push your changes to your forked repository:
git push origin feature-or-fix-name-
Create a Pull Request (PR): Open a Pull Request on GitHub against the dev branch. Provide a clear title and description of your changes. Make sure to target the dev branch, not the main branch.
-
Review and Merge: Maintainers will review your contribution. Once approved, your changes will be merged into the main branch.
If you'd like to contribute a new component to NexTemplate, please follow these guidelines:
-
Component Location: Place the new component in the
src/components/templates/<component_folder>directory. -
Mandatory Files: Each component folder must include the following two files:
component-details.json: Contains metadata about the component.main.tsx: Should export the component as the default export.
-
Component Details Metadata:
- The
component-details.jsonfile must export an object of typeComponentDetails. - Example of
ComponentDetailstype:export type ComponentDetails = { title: string; desc: string; tags: string[]; published: boolean; date: string; // Format: "2024-01-12T17:20:00.000Z" }; - Ensure that the
datestring follows the specified JavaScript format.
- The
-
File Structure: There can be multiple files within the component folder, but subdirectories are not allowed.
To deploy NexTemplate, you can use your preferred hosting platform. Here's a general guide:
- Build your app:
npm run build
# or
yarn build
# or
pnpm run build
# or
bun run build-
Deploy to your platform of choice:
- If using Vercel, connect your GitHub repository, and Vercel will handle the deployment seamlessly.
- For other platforms, upload the contents of the
out/directory generated after the build to your server.
-
Visit your deployed site: Open your browser and visit your deployed site to ensure everything is working as expected.
If you encounter any issues, have questions, or just want to chat, knock me on Discord / Twitter or open an issue on GitHub. Your feedback is valuable, and we appreciate your contribution!
Thank you for being a part of the NexTemplate community!