Matrix display 32x32 pixel based on Maxim 7219 chip controller and Linux platform driver for Raspberry Pi
This project was born with an educational intent, because I have used it to learn how to write an platform driver with DTS for Linux embedded system. In the follow we will see how to use Raspberry Pi 3B to drive a 32x32 led matrix display. We will starting from design of electronic circuit until to develop snake game in Python...
"max7219mat" is composed by: the electronic board, a platform device driver, a minimal library in C language and a Cython wrapper to making callable the C library functions from Python code.
Now I describe first the electronic board and after the device driver for Linux.
The display board is made up of 16 modules types 8x8 matrix led. Each module is managed by a Maxim 7219 chip.
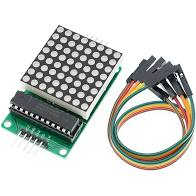
This is a simple module with which I have started my experiments:
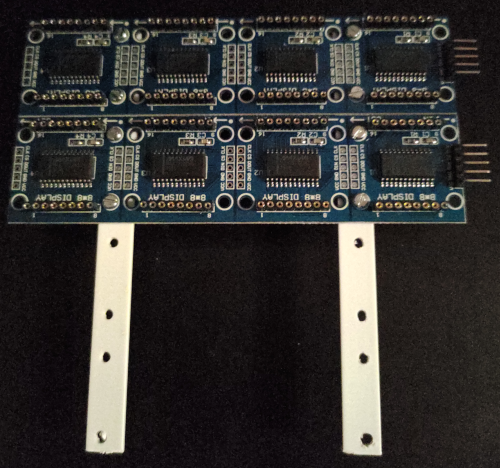
But to build a bigger display I have decided to use a line with four modules like this:
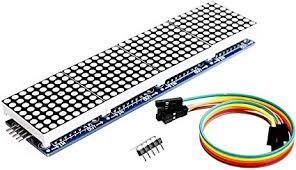
Unfortunately this product is made to work like a simple scrolling text viewer. Technically it works like a big scrolling register where the bits go through from one chip Maxim 7219 to the other adjacent. On Internet you can find thousands projects to do this with Arduino or Raspberry Pi using dedicated libraries.
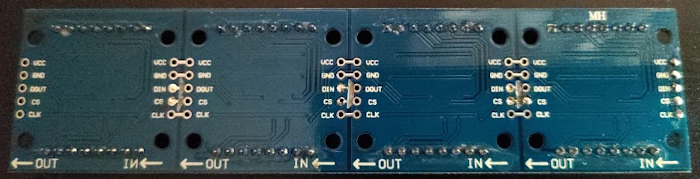
However to build a decent display I decided to use four lines, but to drive every display 8x8 individually I had to hack them. The modification consists in interrupting the connection of two signals: Data I/O and chip selection CS between the various Maxim 7219 chips.
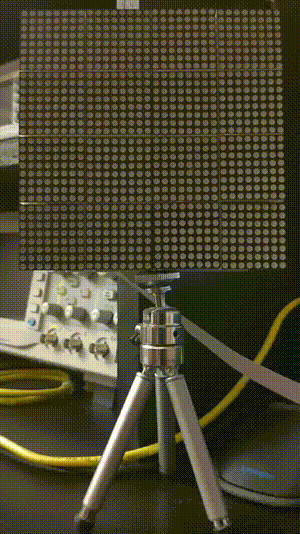
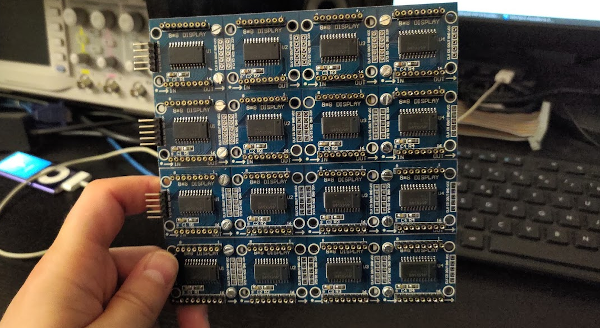
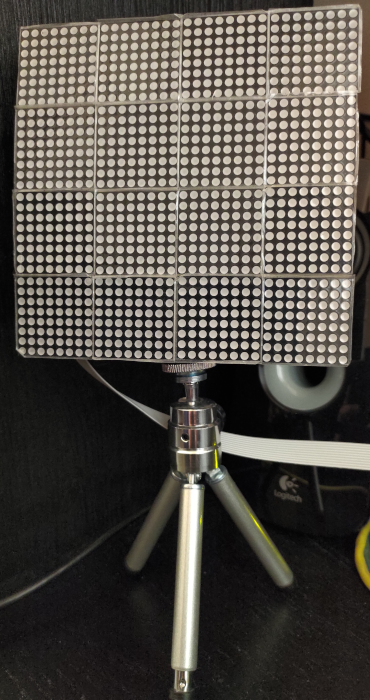
So I assembled everything and connected the cables:
Now to connect the display to the Raspberry Pi I designed an interface with the following two requirements:
- To implement a mechanism to select the correct module 8x8 to send the data
- To interface in safe the level signals of Raspberry Pi at 3.3V with the 5V level of display
I used the MC74HC154N a 4-line to 16-line decoder/demultiplexer to send data at correct module 8x8 . Like the MAXIM7219 also for this chip the supply voltage is 5V because it's from the TTL family. The voltage level conversion is build around at Mosfet 2N7000 and it is also bi-directional, but here is used only from 3.3V to 5V
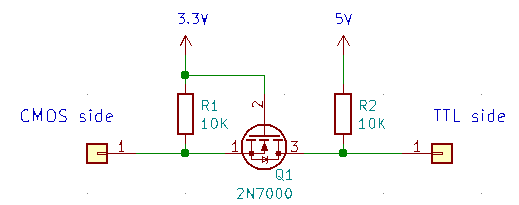
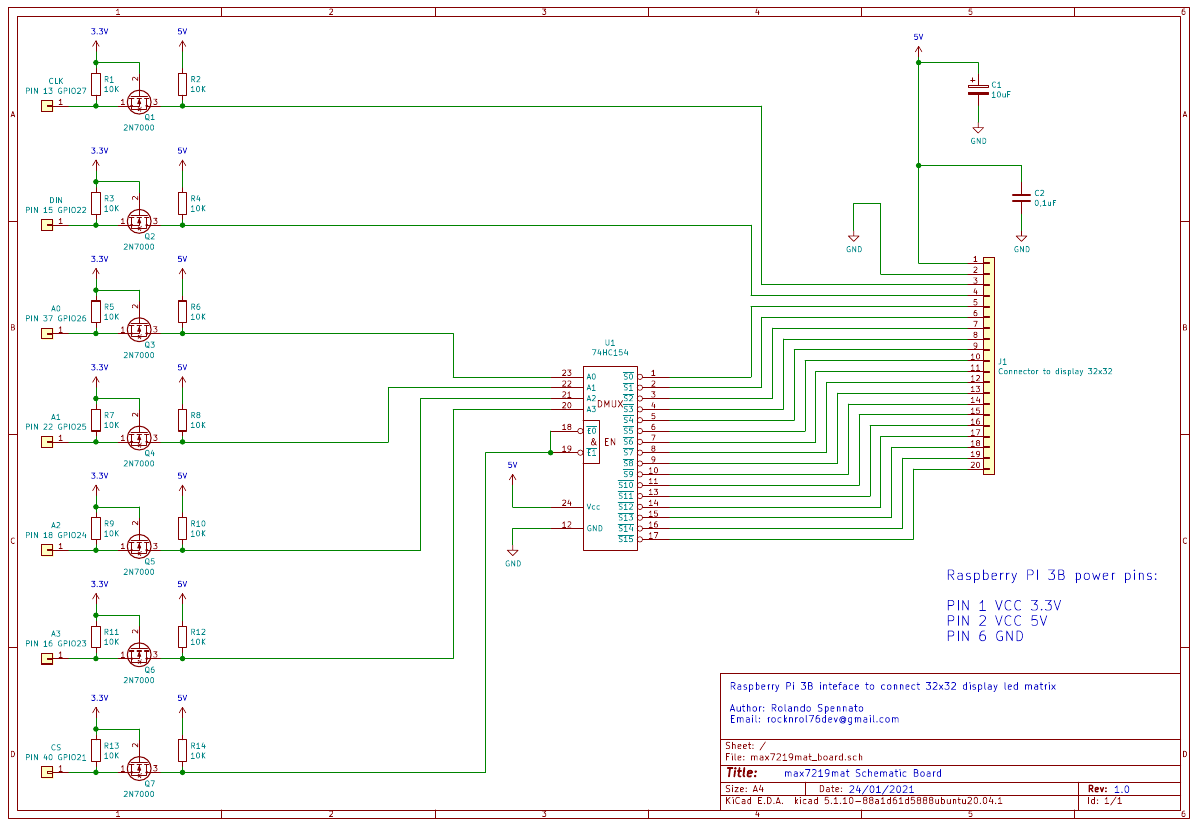
Below is the interface "Raspberry Pi to Display" circuit diagram that you can see better in KiCad file available in this repository
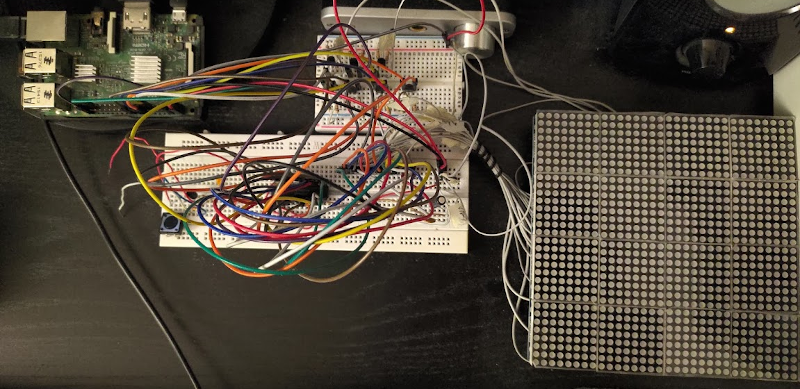
In the pictures below You can see the prototype on breadboards:
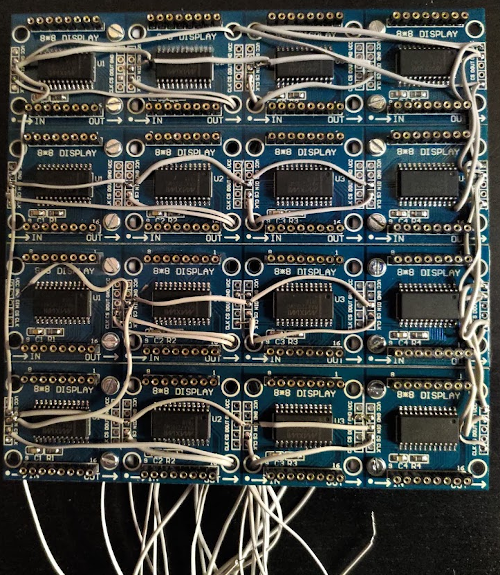
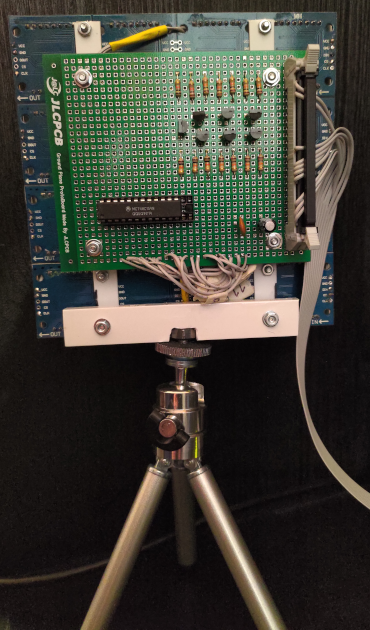
and finally the display is assembled on prototype PCB board. I have left a little free space for future developments.
Our hardware is directly connected at the Raspberry Pi GPI and cannot be recognized by the system. On the other hand the Raspberry Pi has no way to discoverable it. So this hardware is exactly a platform device.
The solution is to use the Device Tree technique. Indeed the primary purpose of Device Tree in Linux is to provide a way to describe to the system a non-discoverable hardware.
In the Device Tree Source (DTS) file we describe hardware and next we compile it to obtain a Device Tree Binary (DTB) file. The DTB is loaded on boot time.
Follow an extract from DTS file:
&gpio {
    ....
    ....
    ....

	max7219mat_pins: max7219mat_pins {
		brcm,pins = <21 22 23 24 25 26 27>; /* GPIO numbers */
		brcm,function = <1>;	/* output */
		brcm,pull = <1 1 1 1 1 1 1>;	/* pull up */
	};
};

&soc {
    ....
    ....
    ....

	max7219mat {
		compatible = "rocknrol,max7219mat";
		label = "max7219mat";
		pinctrl-0 = <&max7219mat_pins>;
	};
};
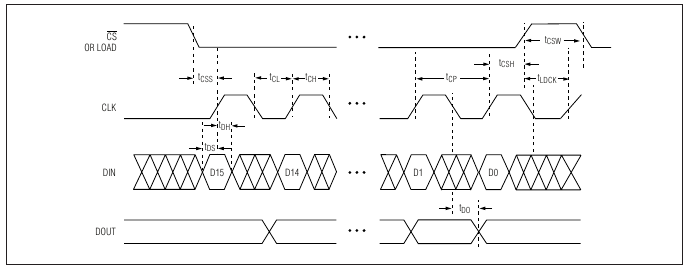
The driver generates all signals needed to the chip MAX7219. This signals are shown in the following Timing Diagram (extraxted from MAXIM MAX7219 Datasheet):
In userland the software can to use the system call "ioctl" to select the module chosen (from 1 to 16) and to use the system call "write" to send data that will be drawn.
The graphics library "libmax7219mat" allows you to manage the display hardware and turning pixels on/off.
Following all functions exposed from library:
-
int initialize_library(void)
- Desc: initialize display hardware
- Param: none
- Ret:
- 0: ok
- -1: error status
-
int selftest_display(void)
- Desc: execute the self-test on display
- Param: none
- Ret:
- 0: ok
- -1: error status
-
int check_display_module(int module, int toggle_on_off)
- Desc: execute the test on a single display module
- Param:
- module: number of module (1 - 16)
- toggle_on_off:
- not 0: module on
- 0: module off
- Ret:
- 0: ok
- -1: error status
-
int set_brightness(int brightness, int module)
- Desc: set brightness on a single display module
- Param:
- brightness: value (1 - 15)
- module: number of module (1 - 16)
- Ret:
- 0: ok
- -1: error status
-
int render_line(int module, int line)
- Desc: draw a single vertical line module
- Param:
- module: number of module (1 - 16)
- line: number of line (0 - 7)
- Ret:
- 0: ok
- -1: error status
-
int render_module(int module)
- Desc: draw the selected module
- Param:
- module: number of module (1 - 16)
- Ret:
- 0: ok
- -1: error status
-
int render_screen(void)
- Desc: draw all modules
- Param: none
- Ret:
- 0: ok
- -1: error status
-
int auto_render_enable(int value)
- Desc: enable auto display render on set pixel
- Param:
- value:
- 1: enable
- 0: disable
- value:
- Ret:
- 0: ok
- -1: error status
-
int screen_clipping_enable(int value)
- Desc: enable clipping on display
- Param:
- value:
- 1: enable
- 0: disable
- value:
- Ret:
- 0: ok
- -1: error status
-
int set_pixel(int x, int y, int value)
- Desc: turn on or turn off a pixel
- Param:
- x: x coordinate
- y: y coordinate
- value:
- 1: pixel on
- 0: pixel off
- Ret:
- 0: ok
- -1: error status
-
int get_pixel(int x, int y)
- Desc: retrieve a pixel status
- Param:
- x: x coordinate
- y: y coordinate
- Ret:
- 1: pixel on
- 0: pixel off
- -1: error status
-
int clear_screen(void)
- Desc: turn off all pixels
- Param: none
- Ret:
- 0: ok
- -1: error status
-
int quit_library(void);
- Desc: deinitialize display hardware
- Param: none
- Ret:
- 0: ok
- -1: error status
Using Cython programming language the C library is been ported on Python.
To use it you must include the module like following:
import pymax7219lib
Following all functions available for Python developers:
-
initializeLibrary()
-
selftestDisplay()
-
checkDisplayModule(module, toggle_on_off)
-
setBrightness(brightness, module)
-
renderLine(module, line)
-
renderModule(module)
-
renderScreen()
-
autoRenderEnable(value)
-
screenClippingEnable(value)
-
setPixel(x, y, value)
-
getPixel(x, y)
-
clearScreen()
-
quitLibrary()
In the folder where the file "pymax7219lib.cpython-37m-arm-linux-gnueabihf.so" is present You can launch python3 and import the module pymax7219lib.
For example You can execute the selftest:
>>> import pymax7219lib
>>> pymax7219lib.initializeLibrary();
>>> pymax7219lib.selftestDisplay();
>>> pymax7219lib.quitLibrary();
To show all function in python shell:
>>> import pymax7219lib
>>> help(pymax7219lib);
The shared dynamic library "pymax7219lib.cpython-37m-arm-linux-gnueabihf.so" can be copied (using root permission) in the folder "/usr/lib/python3/dist-packages/" to permit at python of make it visible in any directory.
Using the "pymax7219lib" library I developed a simple snake game in pure Python as you can see: