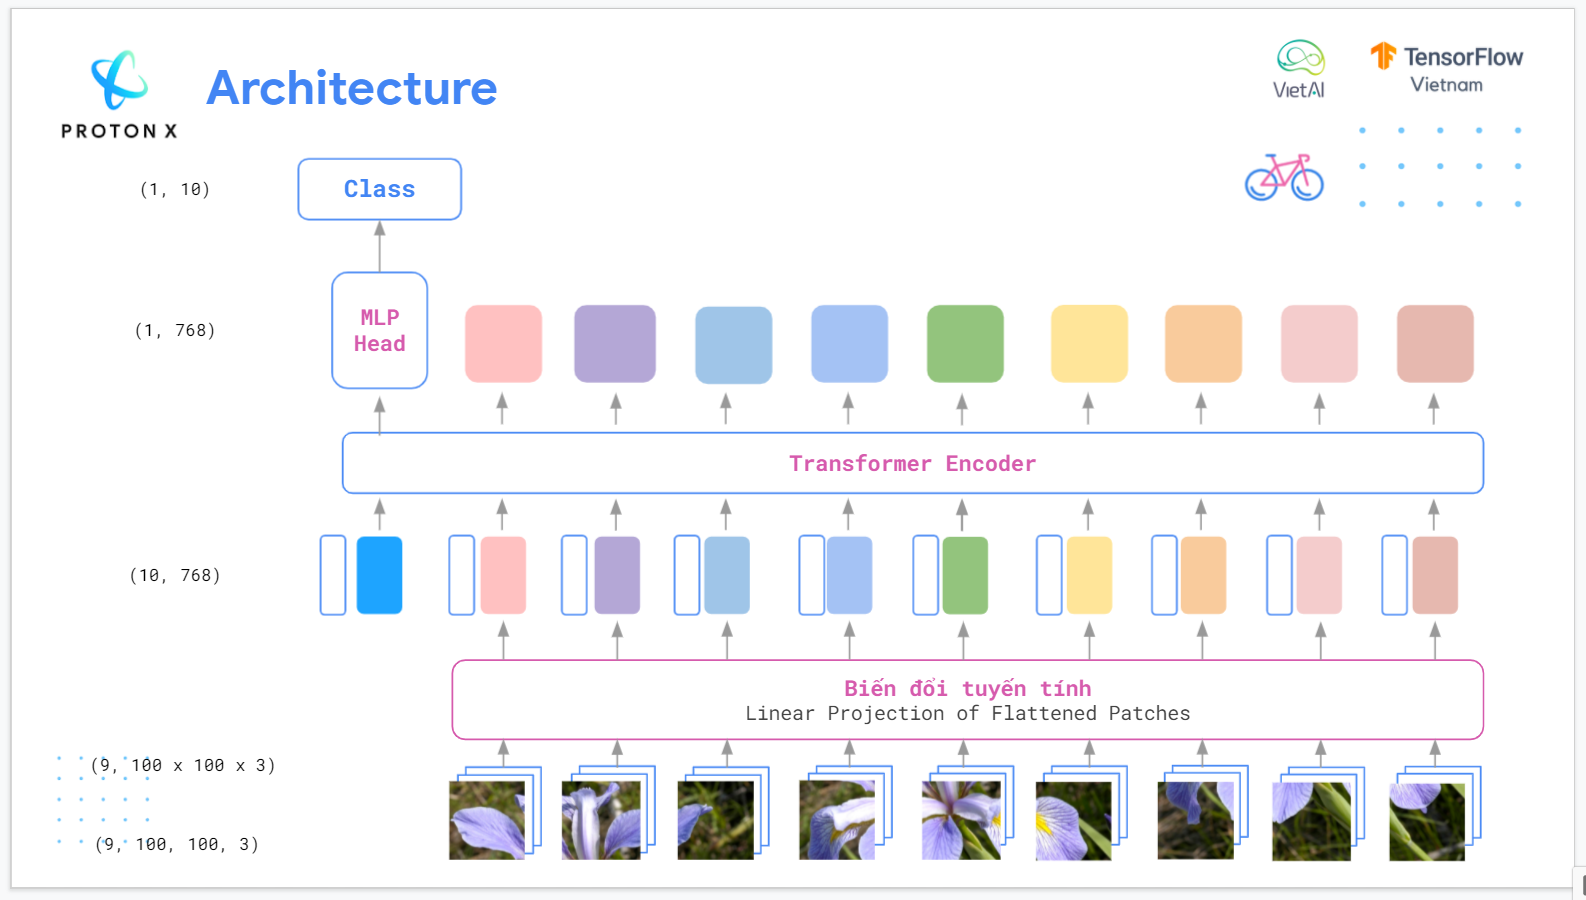
Our implementation of paper: An Image is Worth 16x16 Words: Transformers for Image Recognition at Scale, using tensorflow 2
Thử nghiệm với Colab
Author:
- Github: bangoc123 and tiena2cva
- Email: [email protected]
-
Make sure you have installed Miniconda. If not yet, see the setup document here.
-
Clone this repository:
git clone https://github.com/bangoc123/vit -
cdintovitand install dependencies package:pip install -r requirements.txt
Create 2 folders train and validation in the data folder (which was created already). Then Please copy your images with the corresponding names into these folders.
trainfolder was used for the training processvalidationfolder was used for validating training result after each epoch
This library use image_dataset_from_directory API from Tensorflow 2.0 to load images. Make sure you have some understanding of how it works via its document.
Structure of these folders.
main_directory/
...class_a/
......a_image_1.jpg
......a_image_2.jpg
...class_b/
......b_image_1.jpg
......b_image_2.jpg
We create train.py for training model.
usage: train.py [-h] [--model MODEL] [--num-classes CLASSES]
                [--patch-size PATH_SIZE] [--num-heads NUM_HEADS]
                [--att-size ATT_SIZE] [--num-layer NUM_LAYER]
                [--mlp-size MLP_SIZE] [--lr LR] [--weight-decay WEIGHT_DECAY]
                [--batch-size BATCH_SIZE] [--epochs EPOCHS]
                [--image-size IMAGE_SIZE] [--image-channels IMAGE_CHANNELS]
                [--train-folder TRAIN_FOLDER] [--valid-folder VALID_FOLDER]
                [--model-folder MODEL_FOLDER]

optional arguments:
  -h, --help
    show this help message and exit

  --model MODEL
    Type of ViT model, valid option: custom, base, large, huge

  --num-classes CLASSES
    Number of classes

  --patch-size PATH_SIZE
    Size of image patch

  --num-heads NUM_HEADS
    Number of attention heads

  --att-size ATT_SIZE
    Size of each attention head for value

  --num-layer NUM_LAYER
    Number of attention layer

  --mlp-size MLP_SIZE
    Size of hidden layer in MLP block

  --lr LR
    Learning rate

  --batch-size BATCH_SIZE
    Batch size

  --epochs EPOCHS
    Number of training epoch

  --image-size IMAGE_SIZE
    Size of input image

  --image-channels IMAGE_CHANNELS
    Number channel of input image

  --train-folder TRAIN_FOLDER
    Where training data is located

  --valid-folder VALID_FOLDER
    Where validation data is located

  --model-folder MODEL_FOLDER
    Folder to save trained model
There are some important arguments for the script you should consider when running it:
train-folder: The folder of training images. If you not specify this argument, the script will use the CIFAR-10 dataset for training.valid-folder: The folder of validation imagesnum-classes: The number of your problem classes.batch-size: The batch size of the datasetlr: The learning rate of Adam Optimizermodel-folder: Where the model after training savedmodel: The type of model you want to train. If you want to train withbaseorlargeorhugemodel, you need to specifypatch-size,num-heads,att-sizeandmlp-sizeargument.
Example:
You want to train a model in 10 epochs with CIFAR-10 dataset:
!python train.py --train-folder ${train_folder} --valid-folder ${valid_folder} --num-classes 2 --patch-size 5 --image-size 150 --lr 0.0001 --epochs 200 --num-heads 12 After training successfully, your model will be saved to model-folder defined before
We offer a script for testing a model using a new image via a command line:
python predict.py --test-image ${test_image_path}where test_image_path is the path of your test image.
Example:
python predict.py --test-image ./data/test/cat.2000.jpg