This README describes the process of using a Raspberry Pi microcontroller along with my display_gif.py script to display an animated gif on a 32x32 RGB LED Matrix.
For example, I used my Matrix to display a spooky ghost gif for Halloween. 🎃

@heatheramahan via Twitter
October 20, 2016
Happy Halloween! 👻 Spooky little collab by @jettisonjoe (pixel art) & me (pi hacking).
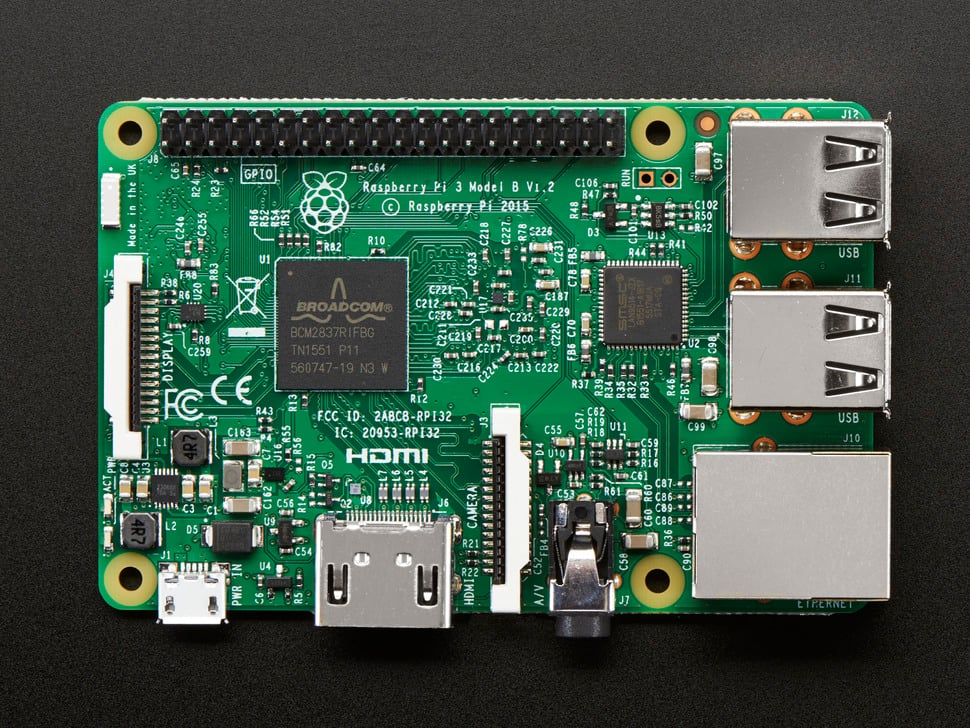
| 32x32 RGB LED Matrix Panel | Raspberry Pi1 | Adafruit RGB Matrix HAT + RTC for Raspberry Pi - Mini Kit |
|---|---|---|
 |
 |
 |
| Displays graphics on a grid of 1024 dazzling RGB LEDs! | The brains of the operation. Raspberry Pi Model Zero/A+/B+/Pi 2/3/ or Pi 4 are all compatible. | Plugs into your Raspberry Pi and allows you to control the RBG LED Matrix panel. (Soldering required!) |
| MicroSD Memory Card | (Optional) Mini USB WiFi Module2 | 5V 4A power supply |
|---|---|---|
 |
 |
 |
| Storage for Raspberry Pi OS and your projects. | Connects your Raspberry Pi to the internet via wifi. | Powers the RGB LED Matrix. |
| USB MicroSD Card Reader/Writer | USB A to Micro-B cable3 | USB keyboard, HDMI display & cable | Soldering Supplies |
|---|---|---|---|
 |
 |
 |
|
| Required for installing Rasberry Pi OS. | Powers the Raspberry Pi using your regular computer’s USB port or a USB wall charger. | You’ll need these items to interface with your Raspberry Pi the first time you log in. Later, you can set up SSH to access your Raspberry Pi remotely. | Soldering iron, solder, and wire cutters are required to assemble the Adafruit RGB Matrix HAT. |
| Raspberry PI OS | Aseprite | Nano | (Optional) Your preferred code editor |
|---|---|---|---|
 |
 |
||
| The official OS for Raspberry Pi microcontrollers. | Animated sprite editor & pixel art tool. (Or some other program for creating 32x32 animated gif.) | Command line text editor that comes pre-installed on Raspberry Pi OS. | A code editor that supports remote editing via SSH. For example: VS Code or Sublime Text. |
-
Install Raspberry Pi OS.
- Insert your MicroSD Memory Card into your USB MicroSD Card Reader/Writer and attach it to your regular computer.
- Recommended: Use the official Raspberry Pi Imager to install Raspberry Pi OS Lite.
-
Connect accessories and power up.
- Insert the prepared MicroSD card into your Raspberry Pi.
- Connect your keyboard and HDMI display to your Raspberry Pi.
- If needed, attach your Mini USB WiFi Module. Or, if you're using a wired connection, attach your ethernet cable.
- Apply power using your USB A to Micro-B cable and a USB power source.
-
Log in to your Raspberry Pi.
The default credentials are
pi(user name) andraspberry(password). - Connect your Raspberry Pi to Wifi.
(Ignore this step if you're using a wired network connection.)
The crucial steps are summarized below. Please reference the Raspberry Pi documentation for more details and troubleshooting.
- Configure the wireless country in the Localization options using the
raspi-configcommand line tool. - Edit the
wpa-supplicant.conffile to include your wireless network ID and password. - Reconfigure the interface with
wpa_cli -i wlan0 reconfigure.
- Configure the wireless country in the Localization options using the
-
(Optional) Set Up SSH for Remote Connection.
With an SSH connection, you can log in to your Raspberry Pi remotely (from your regular computer). You’ll no longer need the HDMI display and USB keyboard to access your Raspberry Pi.
The crucial steps are summarized below. Please reference the Raspberry Pi documentation for more details and troubleshooting.
-
On your Raspberry Pi:
- Enable SSH using the
raspi-configcommand line tool. - Run the
hostname -Icommand and note your Raspberry Pi's IP address.
- Enable SSH using the
-
On your regular computer:
- Connect to your Raspberry Pi via SSH using the terminal command:
ssh pi@<IP>replacing
<IP>with your Raspberry Pi's IP address.
- Connect to your Raspberry Pi via SSH using the terminal command:
-
-
(Optional) Set Up Remote Code Editing with your preferred code editor, for example Visual Studio Code or Sublime Text.
The Visual Studio Code Remote - SSH extension works great. If you want to SSH to your Raspberry Pi using password authentication, you'll need to enable the Show Login Terminal setting.
Alternatively, you can ignore this step and use Nano to write and edit code via the command line.

💡Tip: You can gracefully power off your Raspberry Pi via the command line with the command sudo shutdown -h now.
Follow Adafruit's Assembly instructions describing how to solder the (included) components of the Adafruit RGB Matrix HAT:
- 2x20 pin socket header
- 2 pin terminal block
- 2x8 pin IDC header
You'll need soldering supplies (soldering iron, solder, wire cutters) for this step. If you’re new to soldering, see also Adafruit’s Guide to Excellent Soldering.
Don’t be intimidated! This project was my first time soldering. I was able to do it and you can do it too.

@heatheramahan via Twitter
October 3, 2016
Solder? I hardly know her! #myfirst #soldering
-
Follow the first five steps of Adafruit’s Driving Matrices instructions.
The first five steps explain how to connect the HAT to the Rasberry Pi and Matrix using the included cables and wires, and then apply power:
- The 2x20 pin socket header on the HAT attaches to the GPIO header on the Raspberry Pi.
- The red and black cables supply power from the HAT to the Matrix. The end with a 4-pin MOLEX connector attaches to the Matrix. The other end attaches to the terminal block on the HAT.
- The 2x8 ribbon cable provides the data connection between Matrix and the HAT.
- The 5V 4A power supply (sold separately) connects to the HAT and supplies power to the Matrix (via the red and black cables).
-
Before continuing to Adafruit's Step 6, you need to install some additional modules on your Raspberry Pi.
-
Install
python3-distutils. Specifically,distutils.coreis a required dependency for thergbmatrixlibrary, but it is not included in the default Python installation on Raspberry Pi OS.sudo apt install python3-distutils -
Install
PIL(Python Image Library)4. Required dependency forrgbmatrixlibrary anddisplay_gifscript.sudo apt install python3-pil -
Install
python3-dev5. Required dependency for building thergbmatrixPython library from C++ source code.sudo apt-get install python3-dev
-
-
Complete Step 6 of Adafruit's instructions. Adafruit's installer script downloads, builds, and installs a version of the
rgbmatrixPython library6.The
curlcommand downloads the installer scriptrgb-matrix.shand thebashcommand runs it.curl https://raw.githubusercontent.com/adafruit/Raspberry-Pi-Installer-Scripts/master/rgb-matrix.sh > rgb-matrix.sh sudo bash rgb-matrix.sh
After the installation is complete, try out the demos included in the library to test that the Matrix is working.
You're finally ready to display an animated gif on your Matrix! (If you'd like to make your own pixel art gif, I recommend using Aseprite.)
-
Copy your gif to your Raspberry Pi.
-
If your animated gif is on your regular computer, you can use the
scpcommand to copy it onto your Raspberry Pi.Run this command on your regular computer
scp <source> pi@<pi_ip>:<destination>replacing the following parts as described:
<source>is the path to the file you want to copy<pi_ip>is your Raspberry Pi’s IP address<destination>the path to this project directory on your Raspberry Pi
-
If your animated gif is hosted on the internet, you can use the
curlcommand to download it to your Raspberry Pi.Run this command on your Raspberry Pi
curl <url> > <destination>replacing the following parts as described:
<url>is the url to your gif<destination>is where you want to download your gif on your Rasberry Pi.
-
-
On your Raspberry Pi, download my Python
display_gif.pyscript (MIT license) and a sample gif with thecurlcommand:curl https://raw.githubusercontent.com/poemusica/rpi-matrix-gif/master/display_gif.py > display_gif.py curl https://raw.githubusercontent.com/poemusica/rpi-matrix-gif/master/myGIF.gif > myGIF.gif
-
In your project directory on your Raspberry Pi (the destination directory for (1) and (2) above), run the Python script:
sudo python3 display_gif.pyBy default, the script displays the sample gif (
myGIF.gif) created by @jettisonjoe.
To display your own gif, run the script with an additional command line argument:
sudo python3 display_gif.py <your_gif>replacing
<your_gif>with the name of your gif.

💡Tip: If you want to stop the script, use the Ctrl+c key combination.
🗒️Notes on limitations:
- For best results, use a square gif as it will be resized to fit the 32x32 LED matrix.
- Currently the
rgbamatrixlibrary only supports RGB mode, which means gifs with transparency must be converted from RGBA to RGB (no transparency).
If you want the display_gif.py script to run automatically whenever you start up the Raspberry Pi, I recommend running your script as a service using systemd.
Footnotes
-
Originally I used a Raspberry Pi Model B+ (and Raspbian OS) for this project back in 2016. In 2022, I revisited the project using a Raspberry Pi 3 - Model B (and Raspberry Pi OS). ↩
-
If you are using a Raspberry Pi that includes built-in wifi (ex: Raspberry Pi 3), you do need to purchase a wifi module. Alternatively, you can use an Ethernet cable for a wired network connection. Originally, I used the Miniature WiFi (802.11b/g/n) Module but this product is now discontinued. The product linked in the table is a recommended alternative. ↩
-
Alternatively, you can use a USB C to Micro B Cable, depending on your preference / available USB ports. ↩
-
The Adafruit installation script is supposed to install
pilloworPILbut at the time of writing, it didn't seem to be working. ↩ -
The Adafruit installation script is supposed to install
python3-devbut at the time of writing, it didn't seem to be working. ↩ -
See also the documentation and source code for the
rgbmatrixPython library (GNU General Public License Version 2.0) created by Henner Zeller. An earlier (2016) version of this project used Adafruit's now deprecated fork of Zeller'srgbamatrixlibrary. ↩