Karate Robot Windows Install Guide
This is a guide for setting up Karate Robot with Visual Studio Code on a Windows machine.
Download it from https://code.visualstudio.com/.
Follow the instructions here to install the official Karate extension for VS Code and make sure you can run a simple API test.
The good thing about the official Karate extension for VS Code is that it includes the Karate runtime. You will need to manually add karate-robot.jar to the runtime as we will see in the section below.
Look for the latest release on GitHub and scroll down to find the "Assets". Look for the file with the name: karate-robot-<version>.jar. Download it to the root of your project folder, and rename the file to karate-robot.jar.
If you want to use specific versions of Karate instead of the one "bundled" with the Visual Studio Code extension, refer: Using Specific Versions of Karate.
Your project should look something like this:

Click on the extensions icon on the left, and then click on the "gear" icon for the Karate extension, and choose "Extension Settings" as shown below:

Find the setting for "Classpath Prefix" and change it to .,karate-robot.jar (just add a comma and then karate-robot.jar)

Now you are ready to run Karate Robot tests.
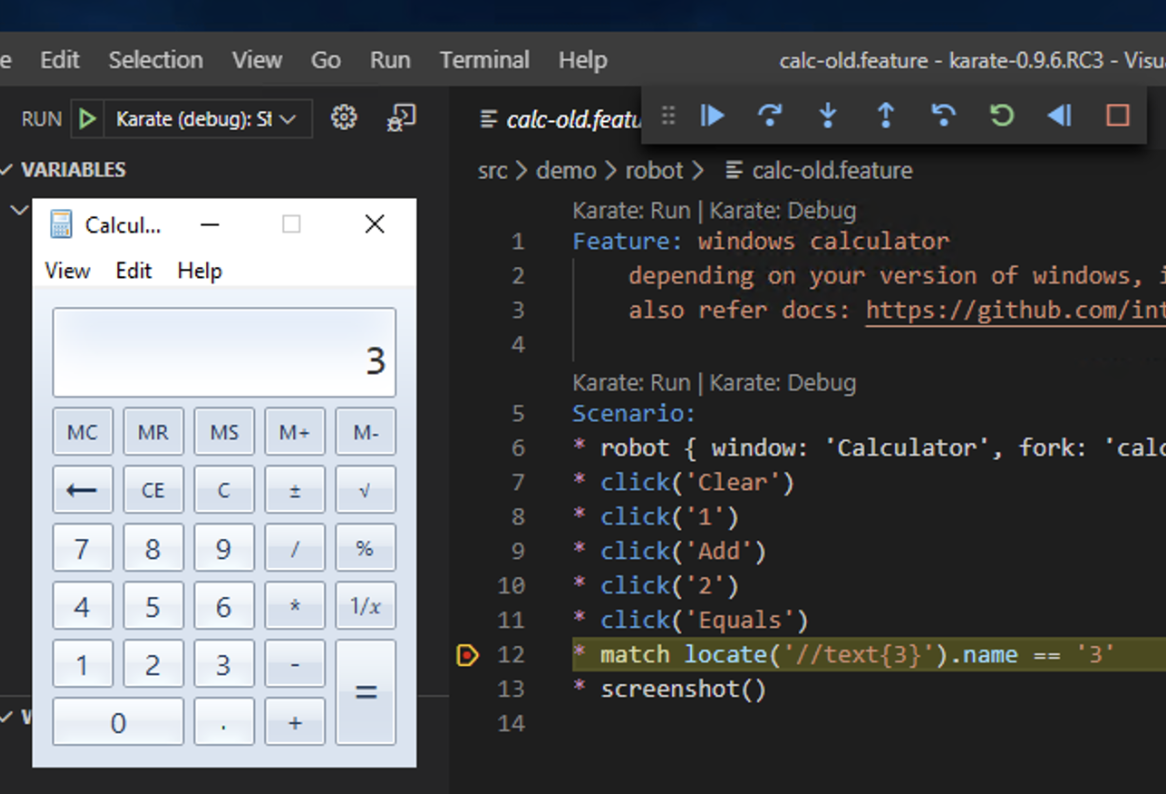
Create a new feature file called calc.feature with the following contents:
Feature: windows calculator
Scenario:
* robot { window: 'Calculator', fork: 'calc', highlight: true, highlightDuration: 500 }
* click('Clear')
* click('1')
* click('Add')
* click('2')
* click('Equals')
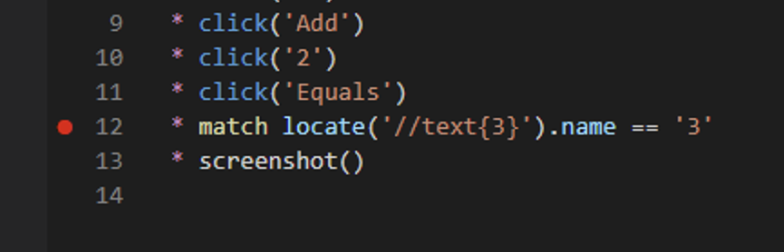
* match locate('//text{3}').name == '3'
* screenshot()Click on the Run >> "CodeLens" to run the test. You should see something like this, and the Windows calculator application should appear and be tested.

Click on the link in the log to see the HTML report and it should contain a screenshot of the last step.

Depending on the version of Windows that you are on, the calculator behaves differently, so use this version of the calc.feature if needed:
Feature: windows calculator

Scenario:
* robot { window: 'Calculator', fork: 'calc', highlight: true, highlightDuration: 500 }
* click('Clear')
* click('One')
* click('Plus')
* click('Two')
* click('Equals')
* match locate('#CalculatorResults').name == 'Display is 3'
* screenshot()
* click('Close Calculator')This is a must for writing and maintaining tests and one of the best things about the IDE support. This requires you to purchase a paid subscription.
Now try "Karate Debug" again, but this time before you do anything, set a break-point, see the red-dot on line 12 below.
And as we expect, Karate will stop at the break-point like seen below.
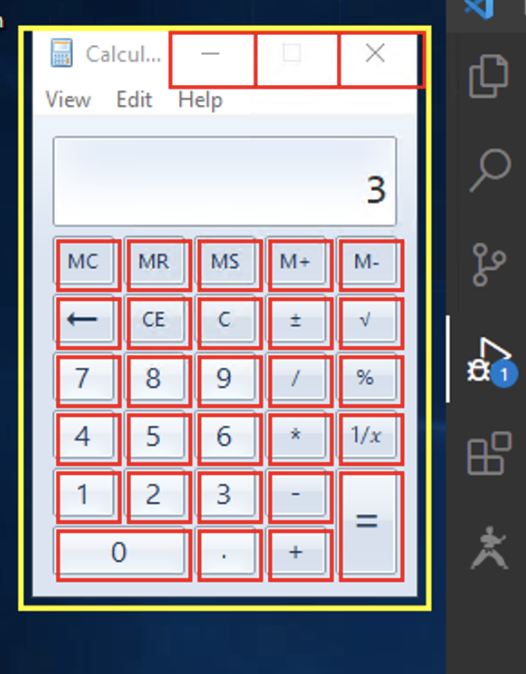
Now you can do some interesting things. Find the "Debug Console" tab in the bottom pane (click on the "..." icon if needed) and type highlightAll('//button')
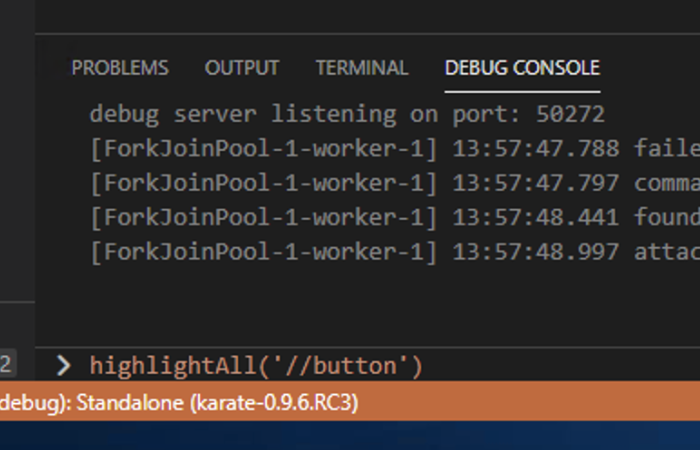
Hit ENTER and you should see this. You can try other commands such as highlight('6'). Any Karate step should work. You can see how this is extremely useful for building or troubleshooting tests.
Note that you can even step back and edit & hot-reload steps. Also see this video.
This is needed when using Karate-Robot for desktop automation and when you use the Karate extension in debug mode. Most of the time, Karate-Robot expects a particular application-window to be "in focus" and visible, and on top of all other windows. But when you use the debug actions such as [step-forward], [continue] etc. after hitting a break-point - the Visual Studio Code window would be the one having "focus" instead.
So there needs to be a way to tell Karate to "flip" focus back to the AUT (Application Under Test). This can be easily done - as Karate has a way to execute any arbitrary script before resuming execution when in debug mode. And typically, the most effective way is to trigger an ALT+TAB input sequence.
The Visual Studio Code Launch Configuration (.vscode/launch.json) for the Karate Debug Server takes an optional debugPreStep parameter. You can create a launch configuration by clicking on the "Run and Debug" icon and selecting the option to create a launch.json file as shown below:

Select "Karate" as the debugger and you will get a launch.json file created. You will need to add the debugPreStep entry.
For example, this is the configuration that can switch focus to the previously most recently focused window:
        {
            "type": "karate",
            "name": "default",
            "request": "launch",
            "feature": "${file}",
            "debugPreStep": "input(Key.ALT + Key.TAB)"
        }
Note that the step-prefix (e.g. *, Given, When then etc. can be omitted). Only a single step can be configured, but the good thing is that you can call any valid feature if you have a need to run a sequence of pre-step operations:
"debugPreStep": "call read('some.feature')"
The "Inspect.exe" tool can be used to figure out how to select UI elements. One way to acquire this is to install the Windows SDK (selecting "Windows SDK for Desktop C++ x86" should be sufficient).
It seems that there may be better options such as Accessibility Insights for Windows so you could try that - or any other similar tool instead.
Besides image-driven navigation, Karate Robot has experimental support for OCR (Optical Character Recognition) that can be useful in case there is no other way you could find to "select" an element or control, possibly because it is a UI framework that Windows has limited support for.
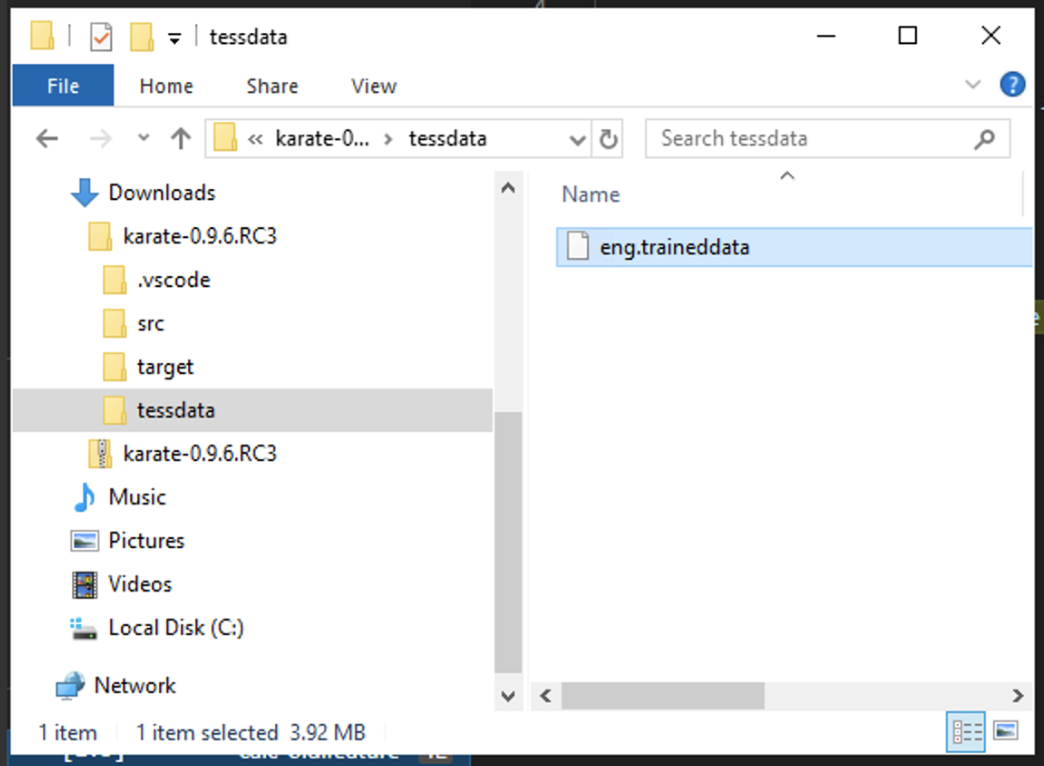
For the OCR support to work, you need to separately download some data files. You can read the documentation for details, but for now we will just use the defaults for "English" and just add a single data-file in a pre-defined (default) directory.
-
Download
eng.traineddatafrom the tessdata_fast data-set. -
Place this in a
tessdatafolder in the root of your Karate project folder. This is how it should look.
Now you can enter this command in the Debug Console (when a debug / breakpoint session is in progress) and hit ENTER.
robot.active.debugExtract()
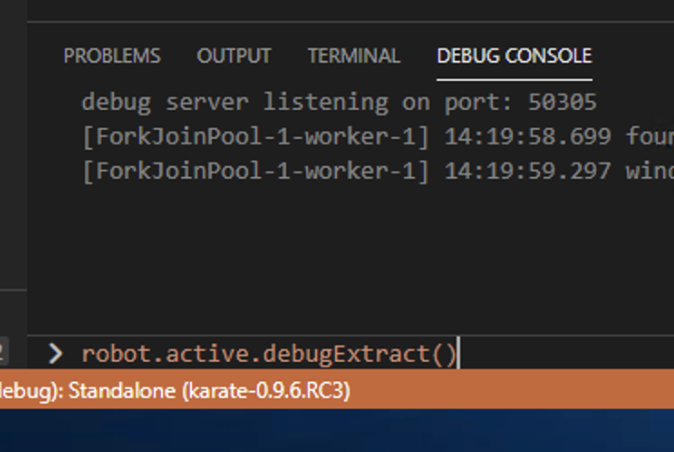
You should see Karate attempt to OCR-scan the "active" window for text:
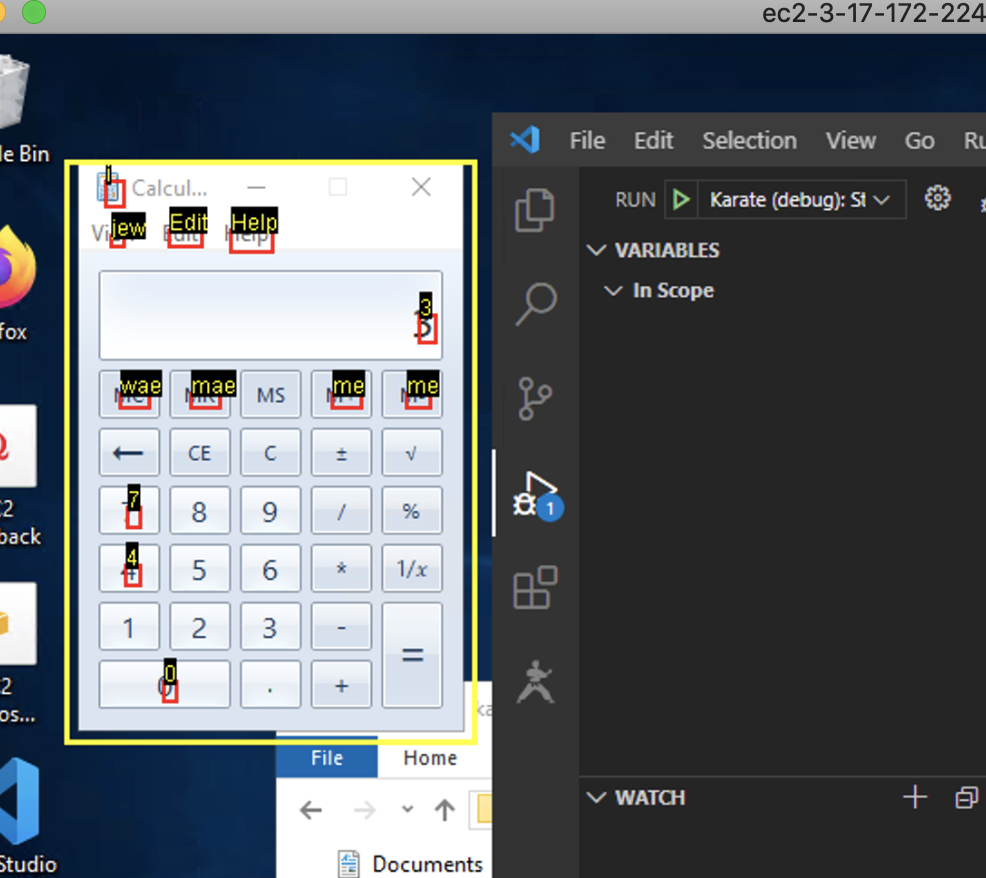
For convenience an additional Window will appear with details so that you can study it at leisure.
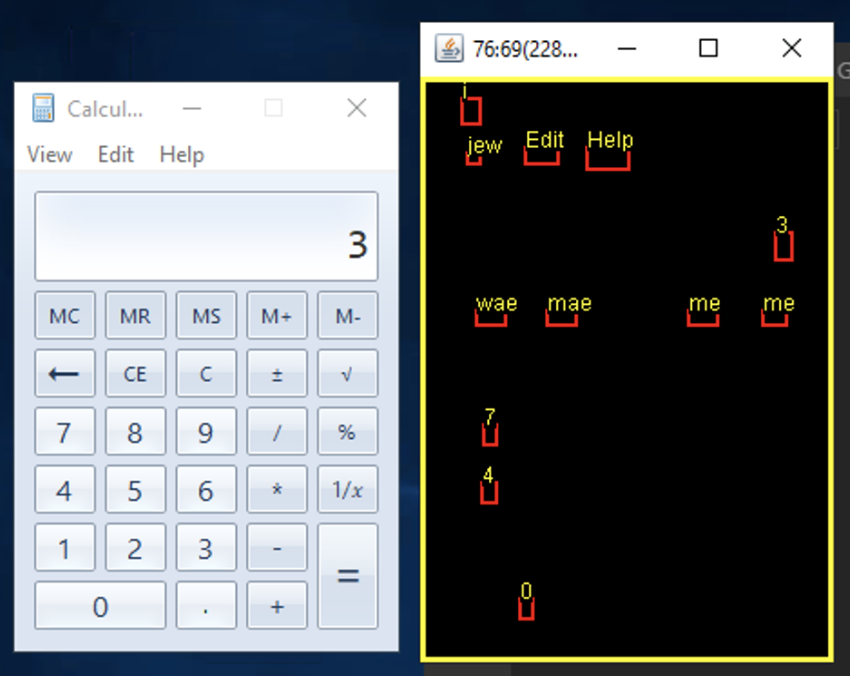
There may be some more work needed to make the OCR capabilities more accurate and robust, please do contribute if you can !
To run tests on the command-line, you have to install a Java runtime and the karate binaries manually, so follow these instructions.
For convenience, the Karate VS Code extension, bundles and embeds the latest version of Karate. Teams maintaining large test-suites using advanced features may want to "lock-down" the version of Karate used, which is important when collaborating within a team and running tests in Continuous Integration.
To use a specific version of Karate (and Karate Robot) with Visual Studio code, follow the instructions here.
Note that when using an RC release, the latest documentation would be in the develop branch: