Home
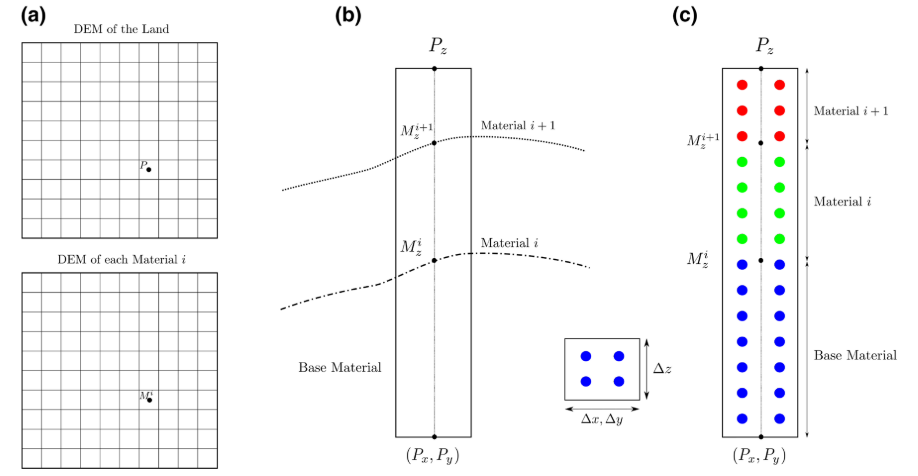
The basic idea is summarized in the figure below. Initially we have a DEM (digital elevation model) data of the land that we want to model, and a DEM data for each material inside the model domain:
With this information we can build our MPM model.
From each DEM point of the land, we will put particles from bottom up to top, in an imaginary box, called stratigraphic box. This box is centered in each DEM point. Its bottom is the lower limit of our model and its top is the Z coordinate of the land.
For homogeneous models, the DEM points of the land are only needed and the entire model is created by a number of stratigraphic boxes equal to the number of the DEM data of the land.
For heterogeneous models we need the DEM data for each material in order to set the correct material to the particles in the stratigraphic boxes during the model construction.
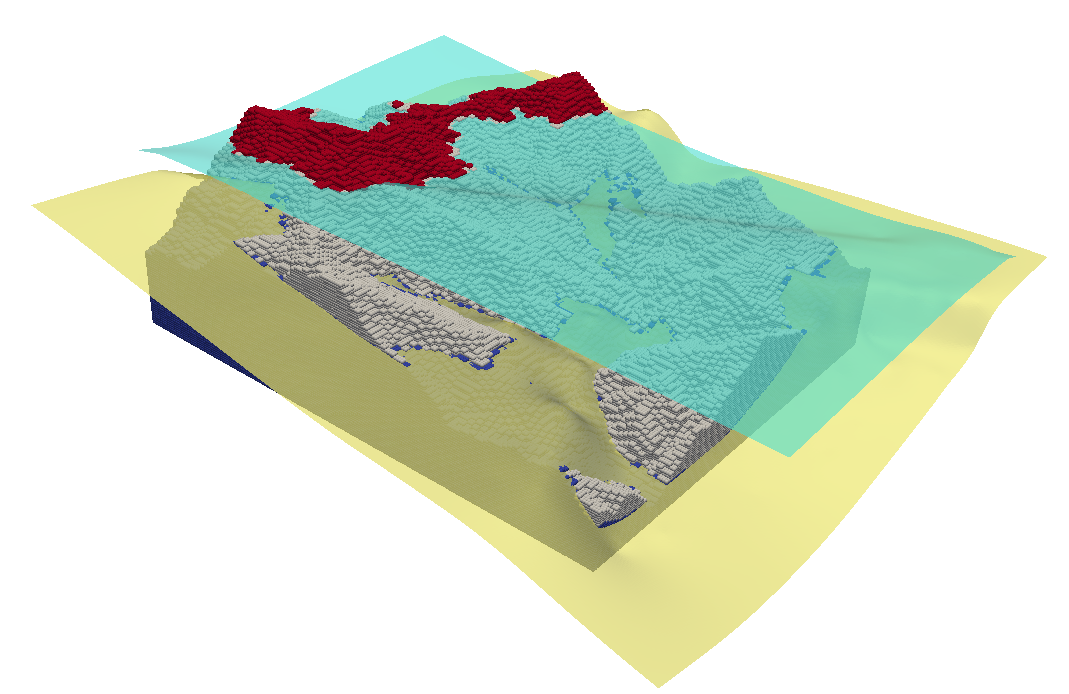
For this example we have the DEM data of the land and two DEM data corresponding to two materials that define the heterogeneities inside the model. The limits of each material are called 'horizons'.
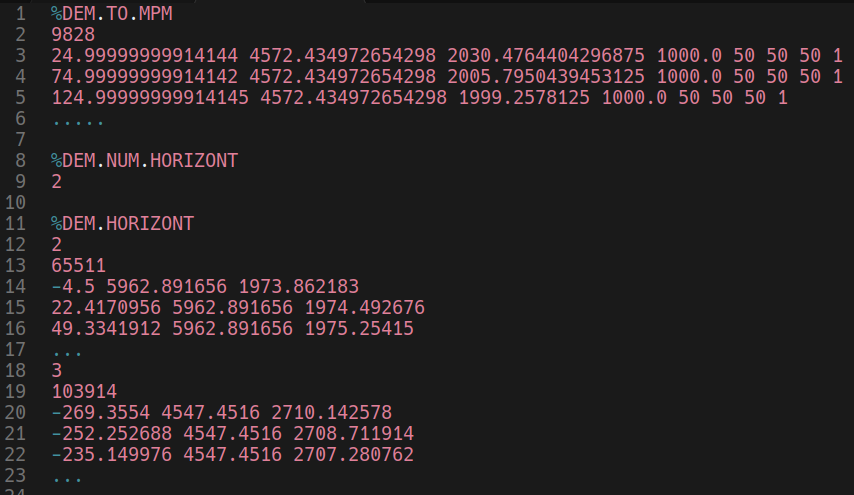
With this data we must prepare the input file for the generator in order to build the model. In figure below we see an extract of the input file:
-
In line 1 the keyword
%DEM.TO.MPMinforms to the generator we are creating the model from DEM data. -
In line 2 is placed the number of stratigraphic boxes (number of DEM of the land). For this case 9828 boxes are used.
-
From line 3 all boxes information are placed, following the sequence:
pos_x pos_y pos_z zbase dx dy dz matid. Wherepos_xis the x coordinate of the DEM land data,zbaseis its z coordinate,dx,dyanddzare the box dimension (Eulerian grid dimension), andmatidis the material identification. -
In line 8 the keyword
%DEM.NUM.HORIZONTis placed to inform the number of horizons (additional materials) to be inserted. -
In line 9 the number 2 is placed because we have two horizons.
-
In line 11 the keyword
%DEM.HORIZONTis placed to define the horizon data. -
In line 12 is informed the id of the horizon to be inserted, 2 in this case.
-
In line 13 is informed that 65511 DEM points will be inserted.
-
From line 14 the coordinates of the points are inserted in the sequence:
x_coordinate y_coordinate z_coordinate. -
In line 18 is informed that the horizon with id 3 will be defined in next.
-
In line 19 is informed that 103914 DEM points will be inserted.
-
From line 20 the coordinates of the points are inserted in the sequence:
x_coordinate y_coordinate z_coordinate.
The file can be executed by doing: ./mpm-generator daguangbao.dat.
After the task is complete the generator creates two relevant files for us:
-
'particles.vtu': containing the particles in a format compatible with ParaView. -
'mpm.part': containing a list of particles with the format:id x y z vol lp matid, whereidis an identification;x,yandzare the coordinates;volis the particle volume;lpis the particle domain andmatidis the material of the particle.
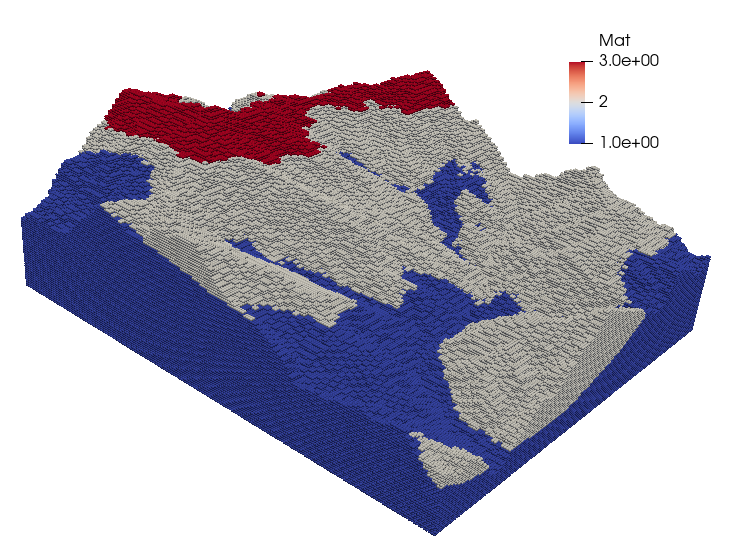
The file 'particle.vtu' allow us to verify the model in ParaView:
And only for better understanding I plotted the DEM data of each materials (horizons) in the figure below using two surfaces: