by Breno Queiroz and Dikson Ferreira


This printer was designed to draw polynomial functions from a string. When connecting to the wifi network created by ESP32, it is possible to make the printer go home, move the axes, draw points on the paper, or send the polynomial function string to draw the graphic.
- (2) Nema17 stepper motors
- (1) Nema8 stepper motor
- (3) Stepper Motor Driver
- (2) GT2 Pulley 20T
- (1) Esp32 DOIT
- (2) Mechanical Endstop
- (2) Clipboards
- (1) GT2 Belt 6mm 3 meters
- (1) PLA filament 0.25kg
- (1) Stabilo Pen (can be another one of the same size)
- (6) LM8UU bearing
- (8) F623ZZ flange
All 3d modeled parts are available in the 3Dmodels folder. First, open the 2Dprinter_v0.SLDASM file using SolidWorks. After that, generate the STL file of each assembly part. Printed parts must have at least 50% of infill to ensure a sturdy structure.


A Nema8 stepper motor was used to move the pen up and down.


The image on the left shows motor X, this motor moves the bed to the left and right. There are 4 LM8UU bearing on the bottom of the bed as shown in the image on the right. An endstop button was used to set the minimum X.


The image above shows the motor Y, this motor moves the pen up and down. There is also an endstop button on the Y axis to detect the minimum Y.
TODO
Before going on, you must have Atom installed on your computer with the PlatformIO package installed on it.
After turn on the printer, the ESP32 will try to connect to an WIFI network. Because of this, you need to change the code in src/PlatformIO/src/main.cpp before using the 2D Penter to set your WIFI network. First, Open the folder PlatformIO with Atom. After that, go to the line 9 and change BrenoCQ to your wifi name. Also, go to the line 10 and change penter2d to your WIFI password.
Now the 2D Penter will automatically connect to the WIFI and show its address on the Serial Monitor! For example: 192.168.43.204.
The only thing you need to do now is type this address on your browser and the website will appear.

The first command is go home, to do this just click on the house.
Just below this there are arrow where you can move the axes. You can set the distance that will be traveled by selecting 0.1mm, 1mm, or 10mm. If you click on the middle of the arrows the printer will make a point on the paper.
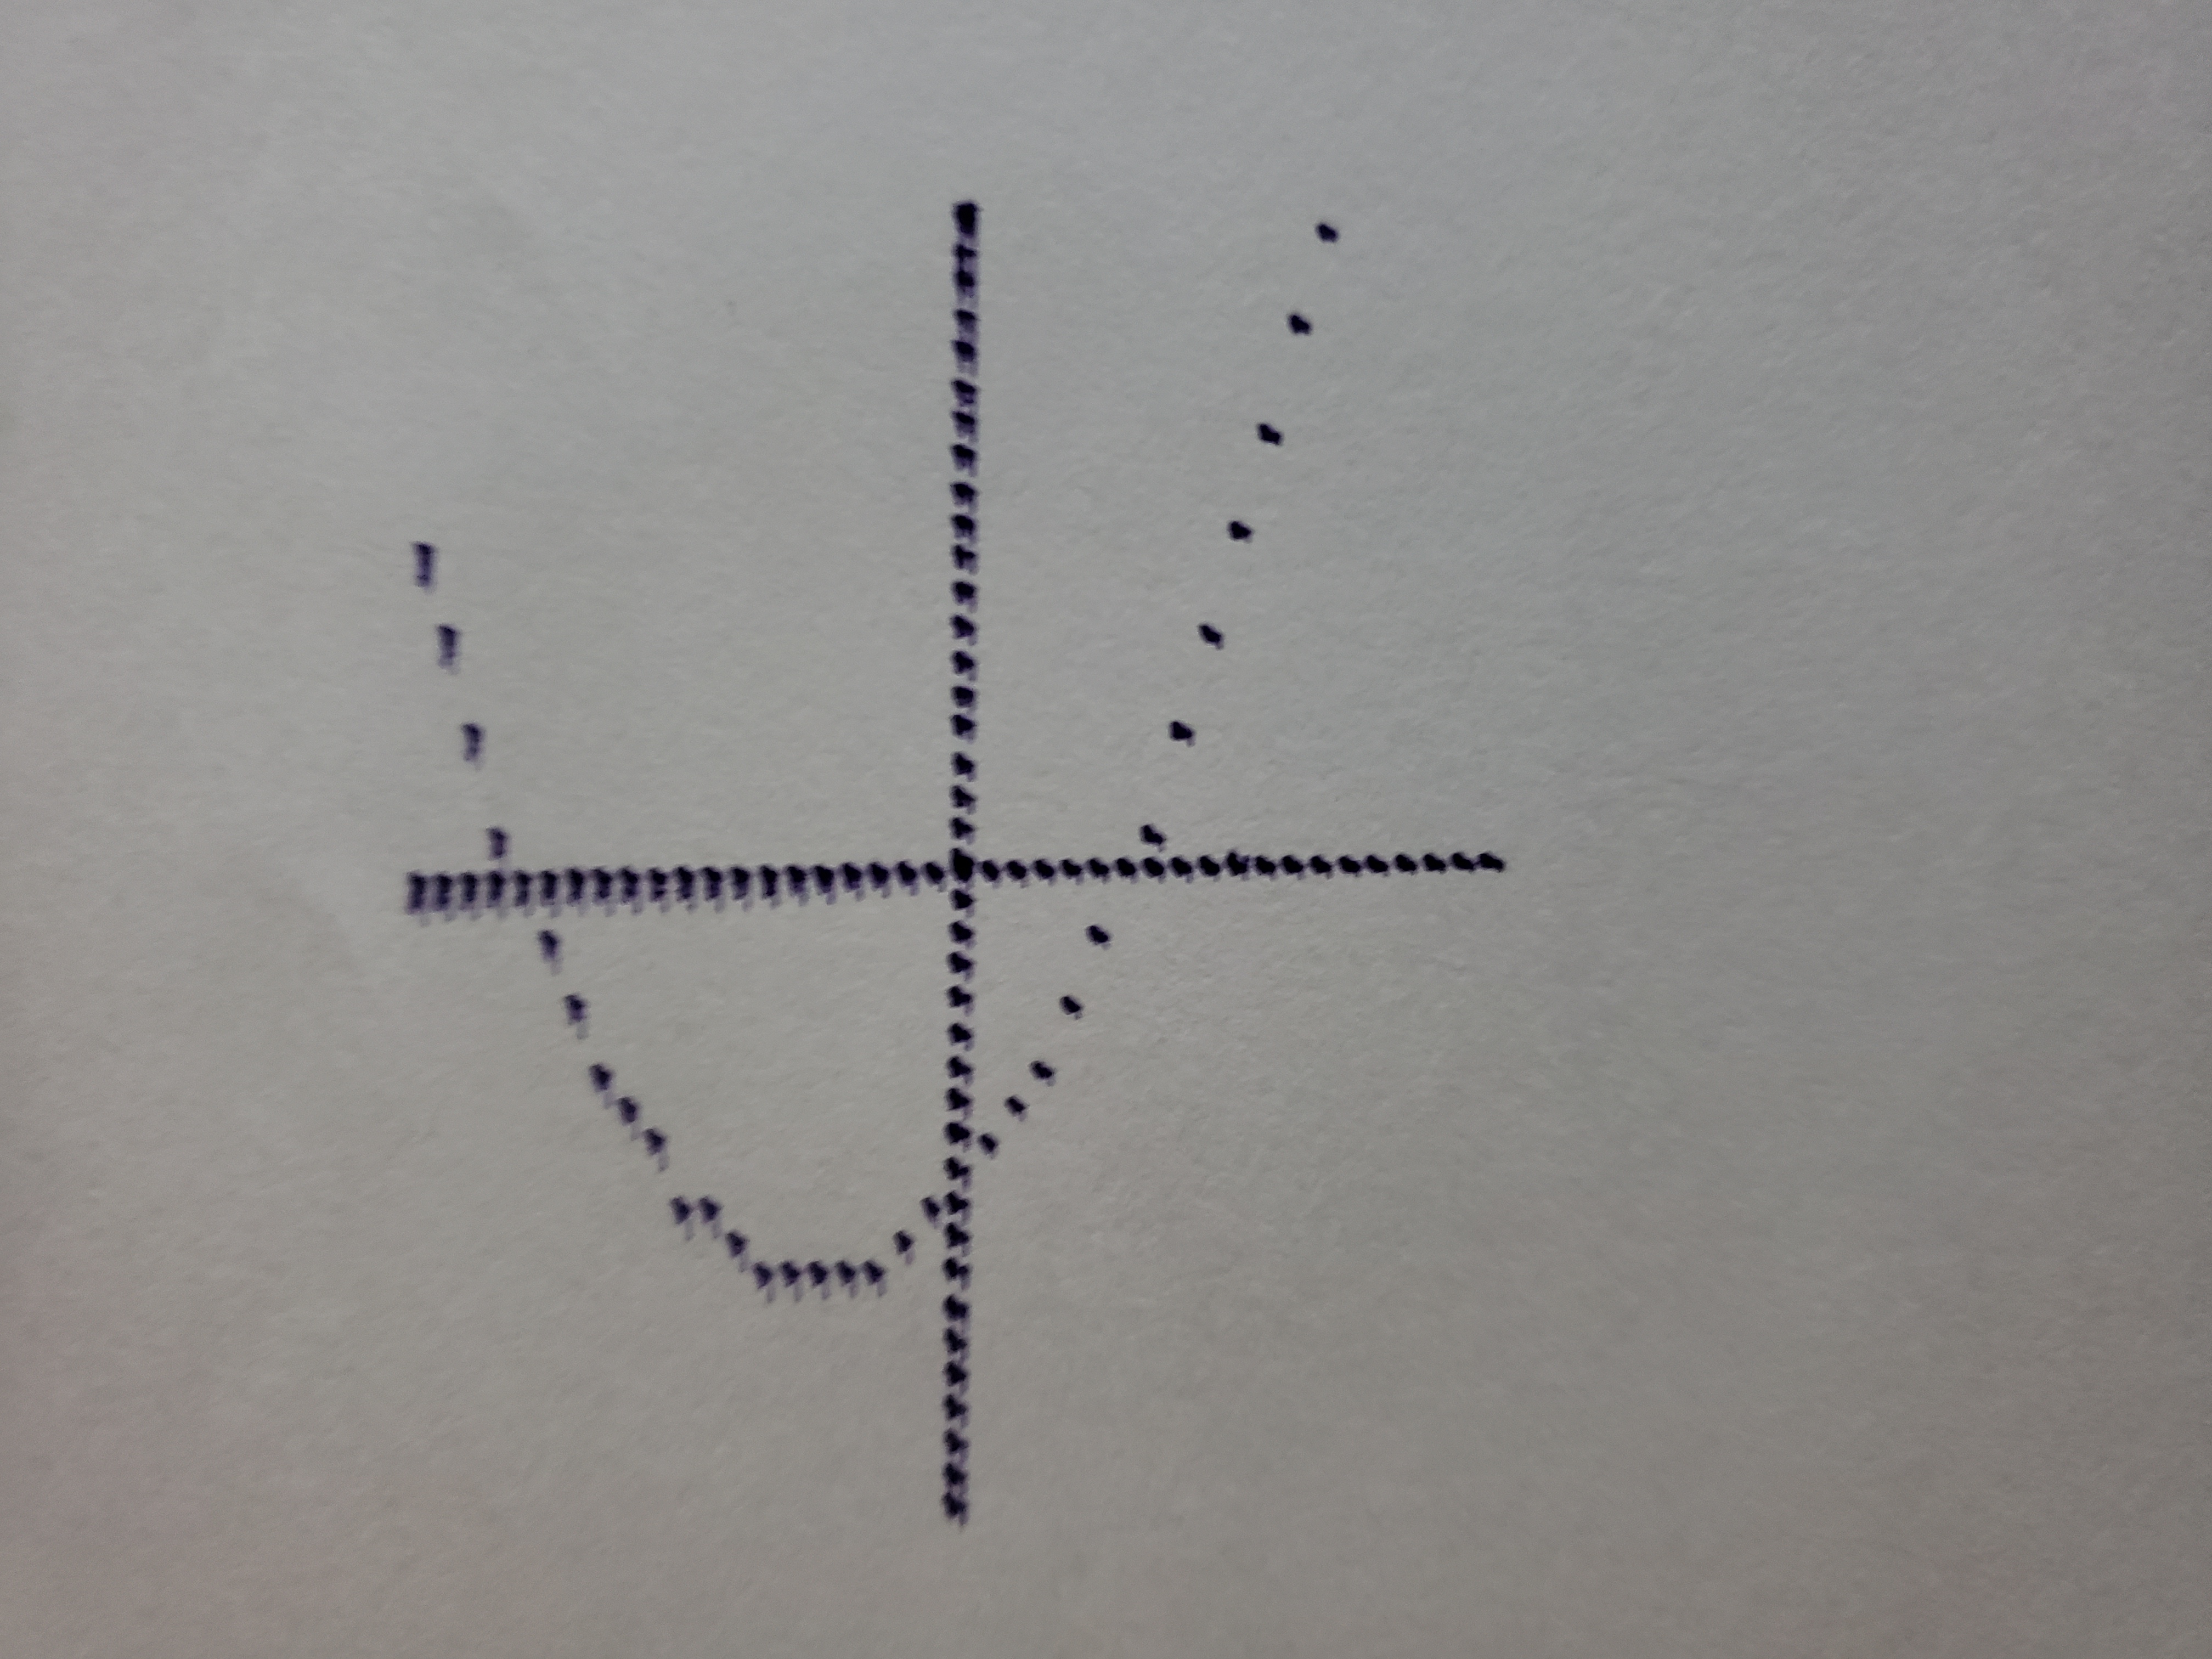
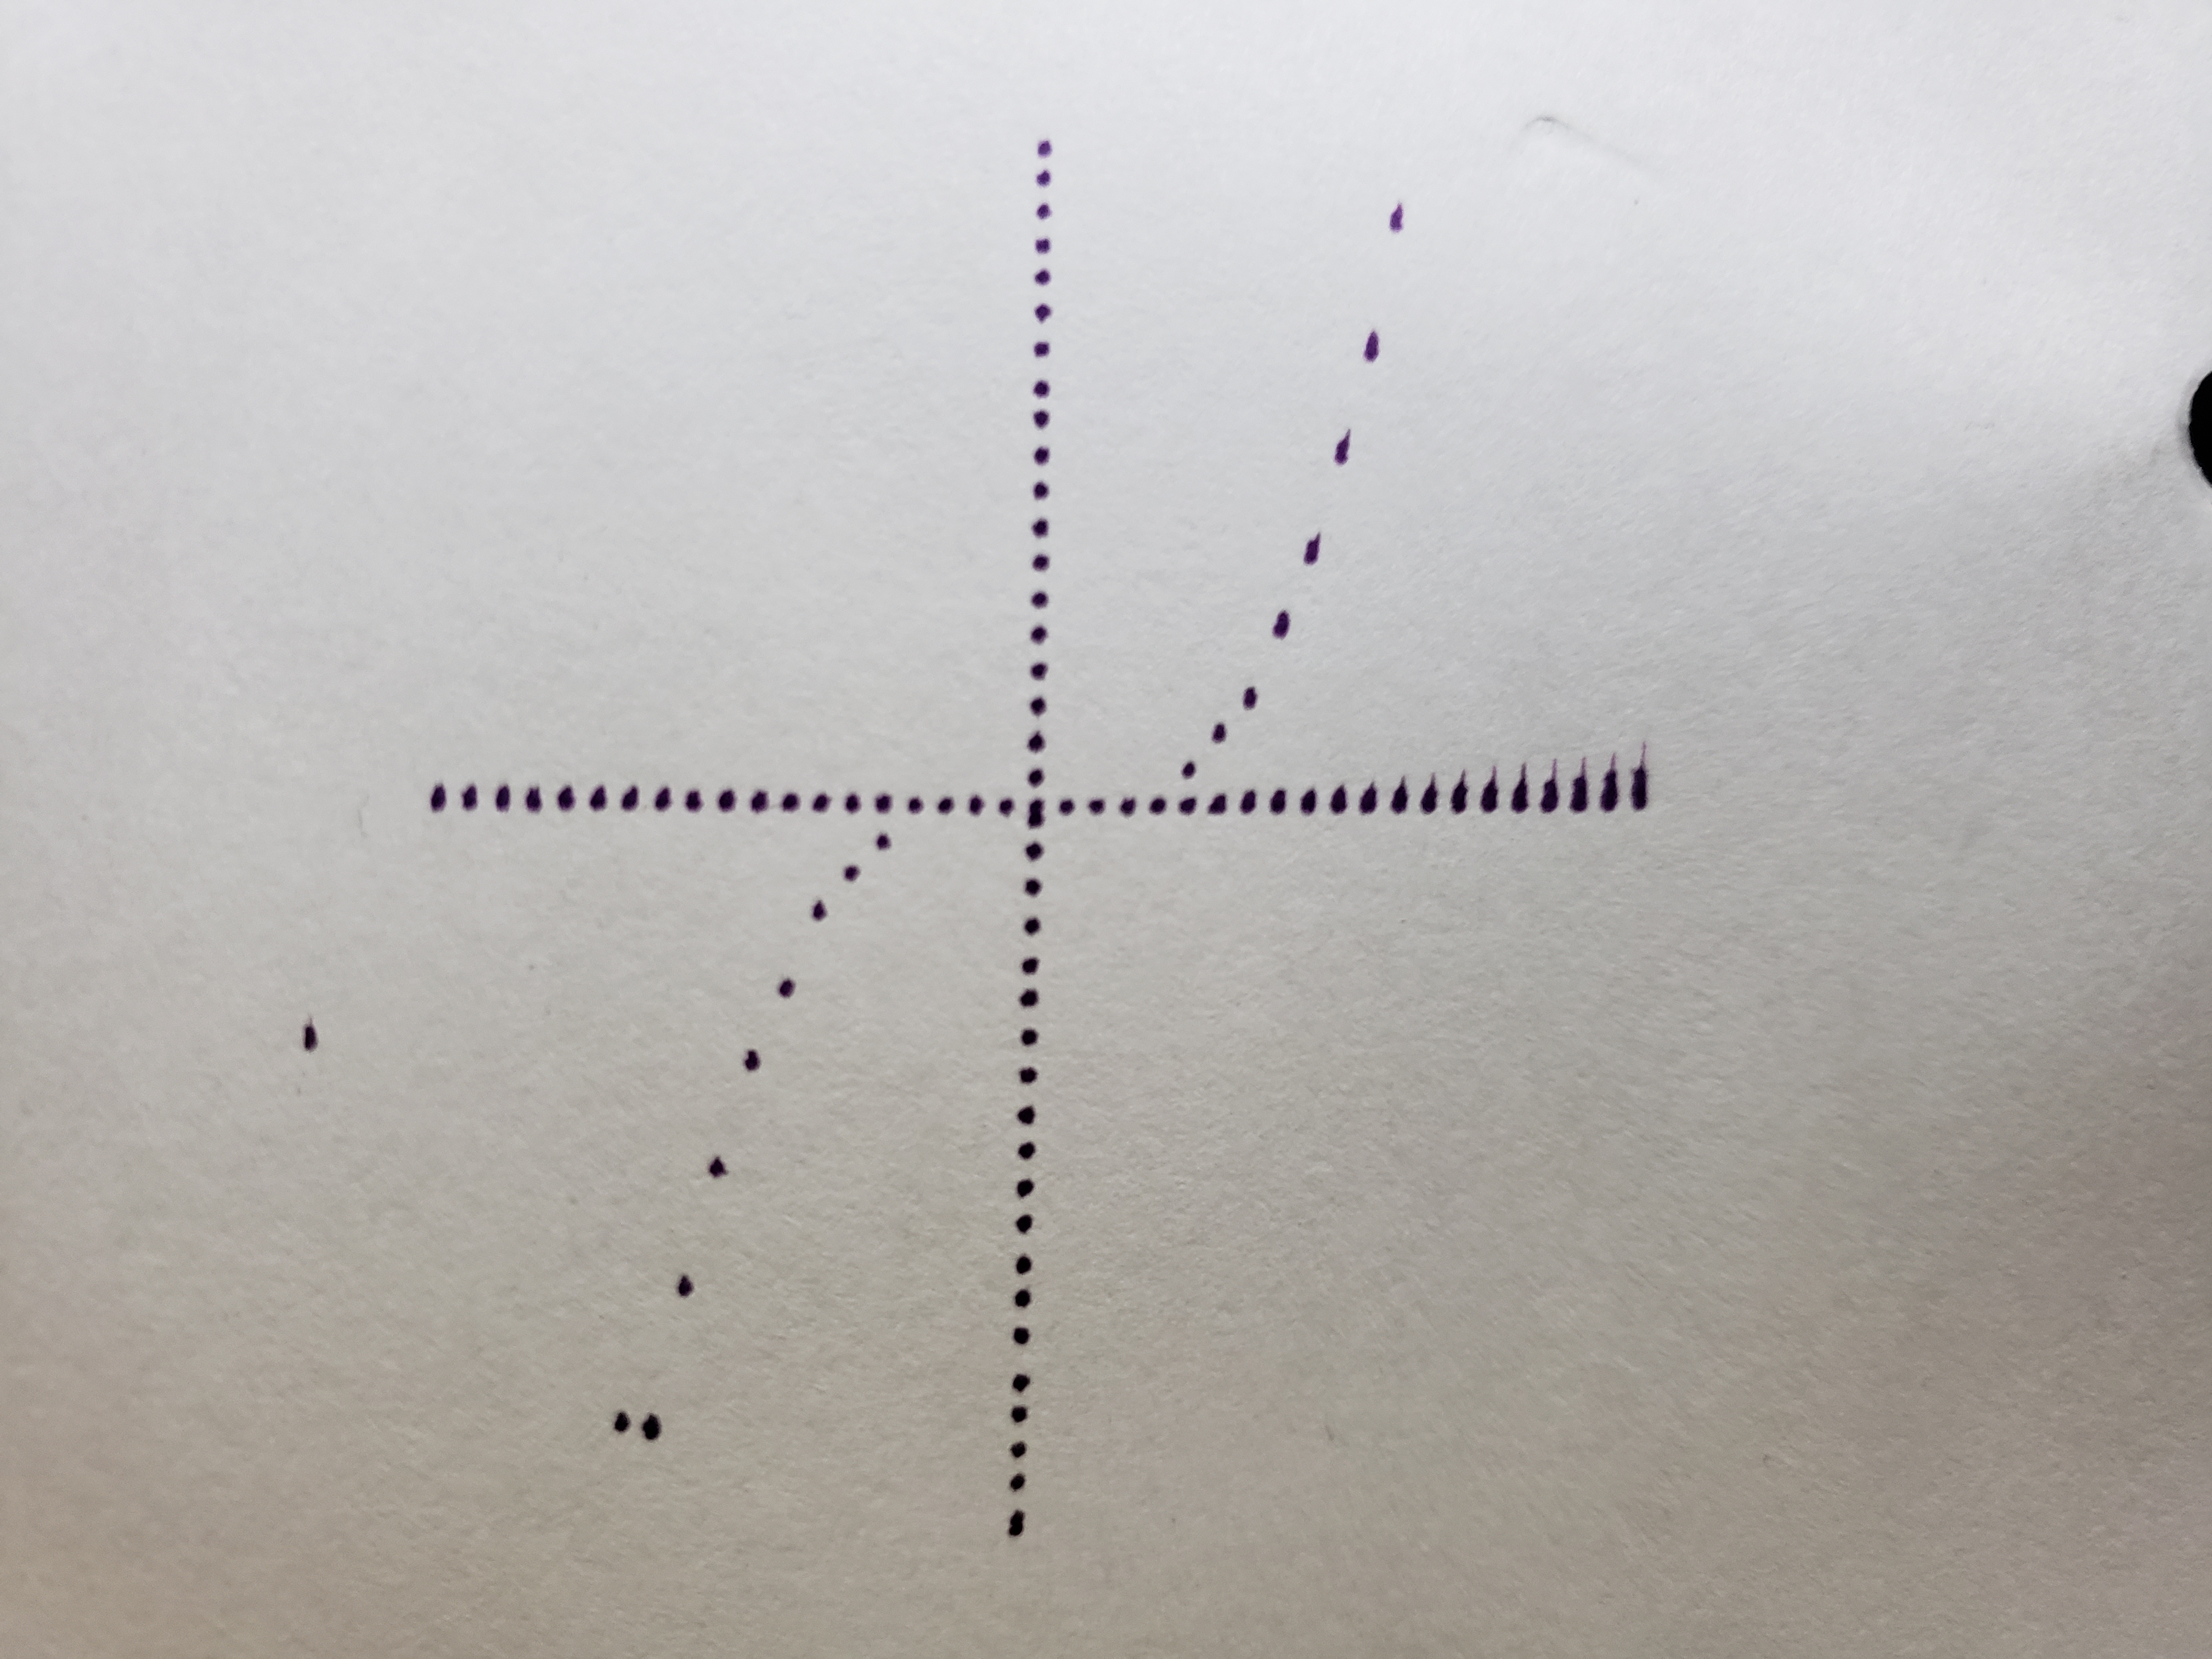
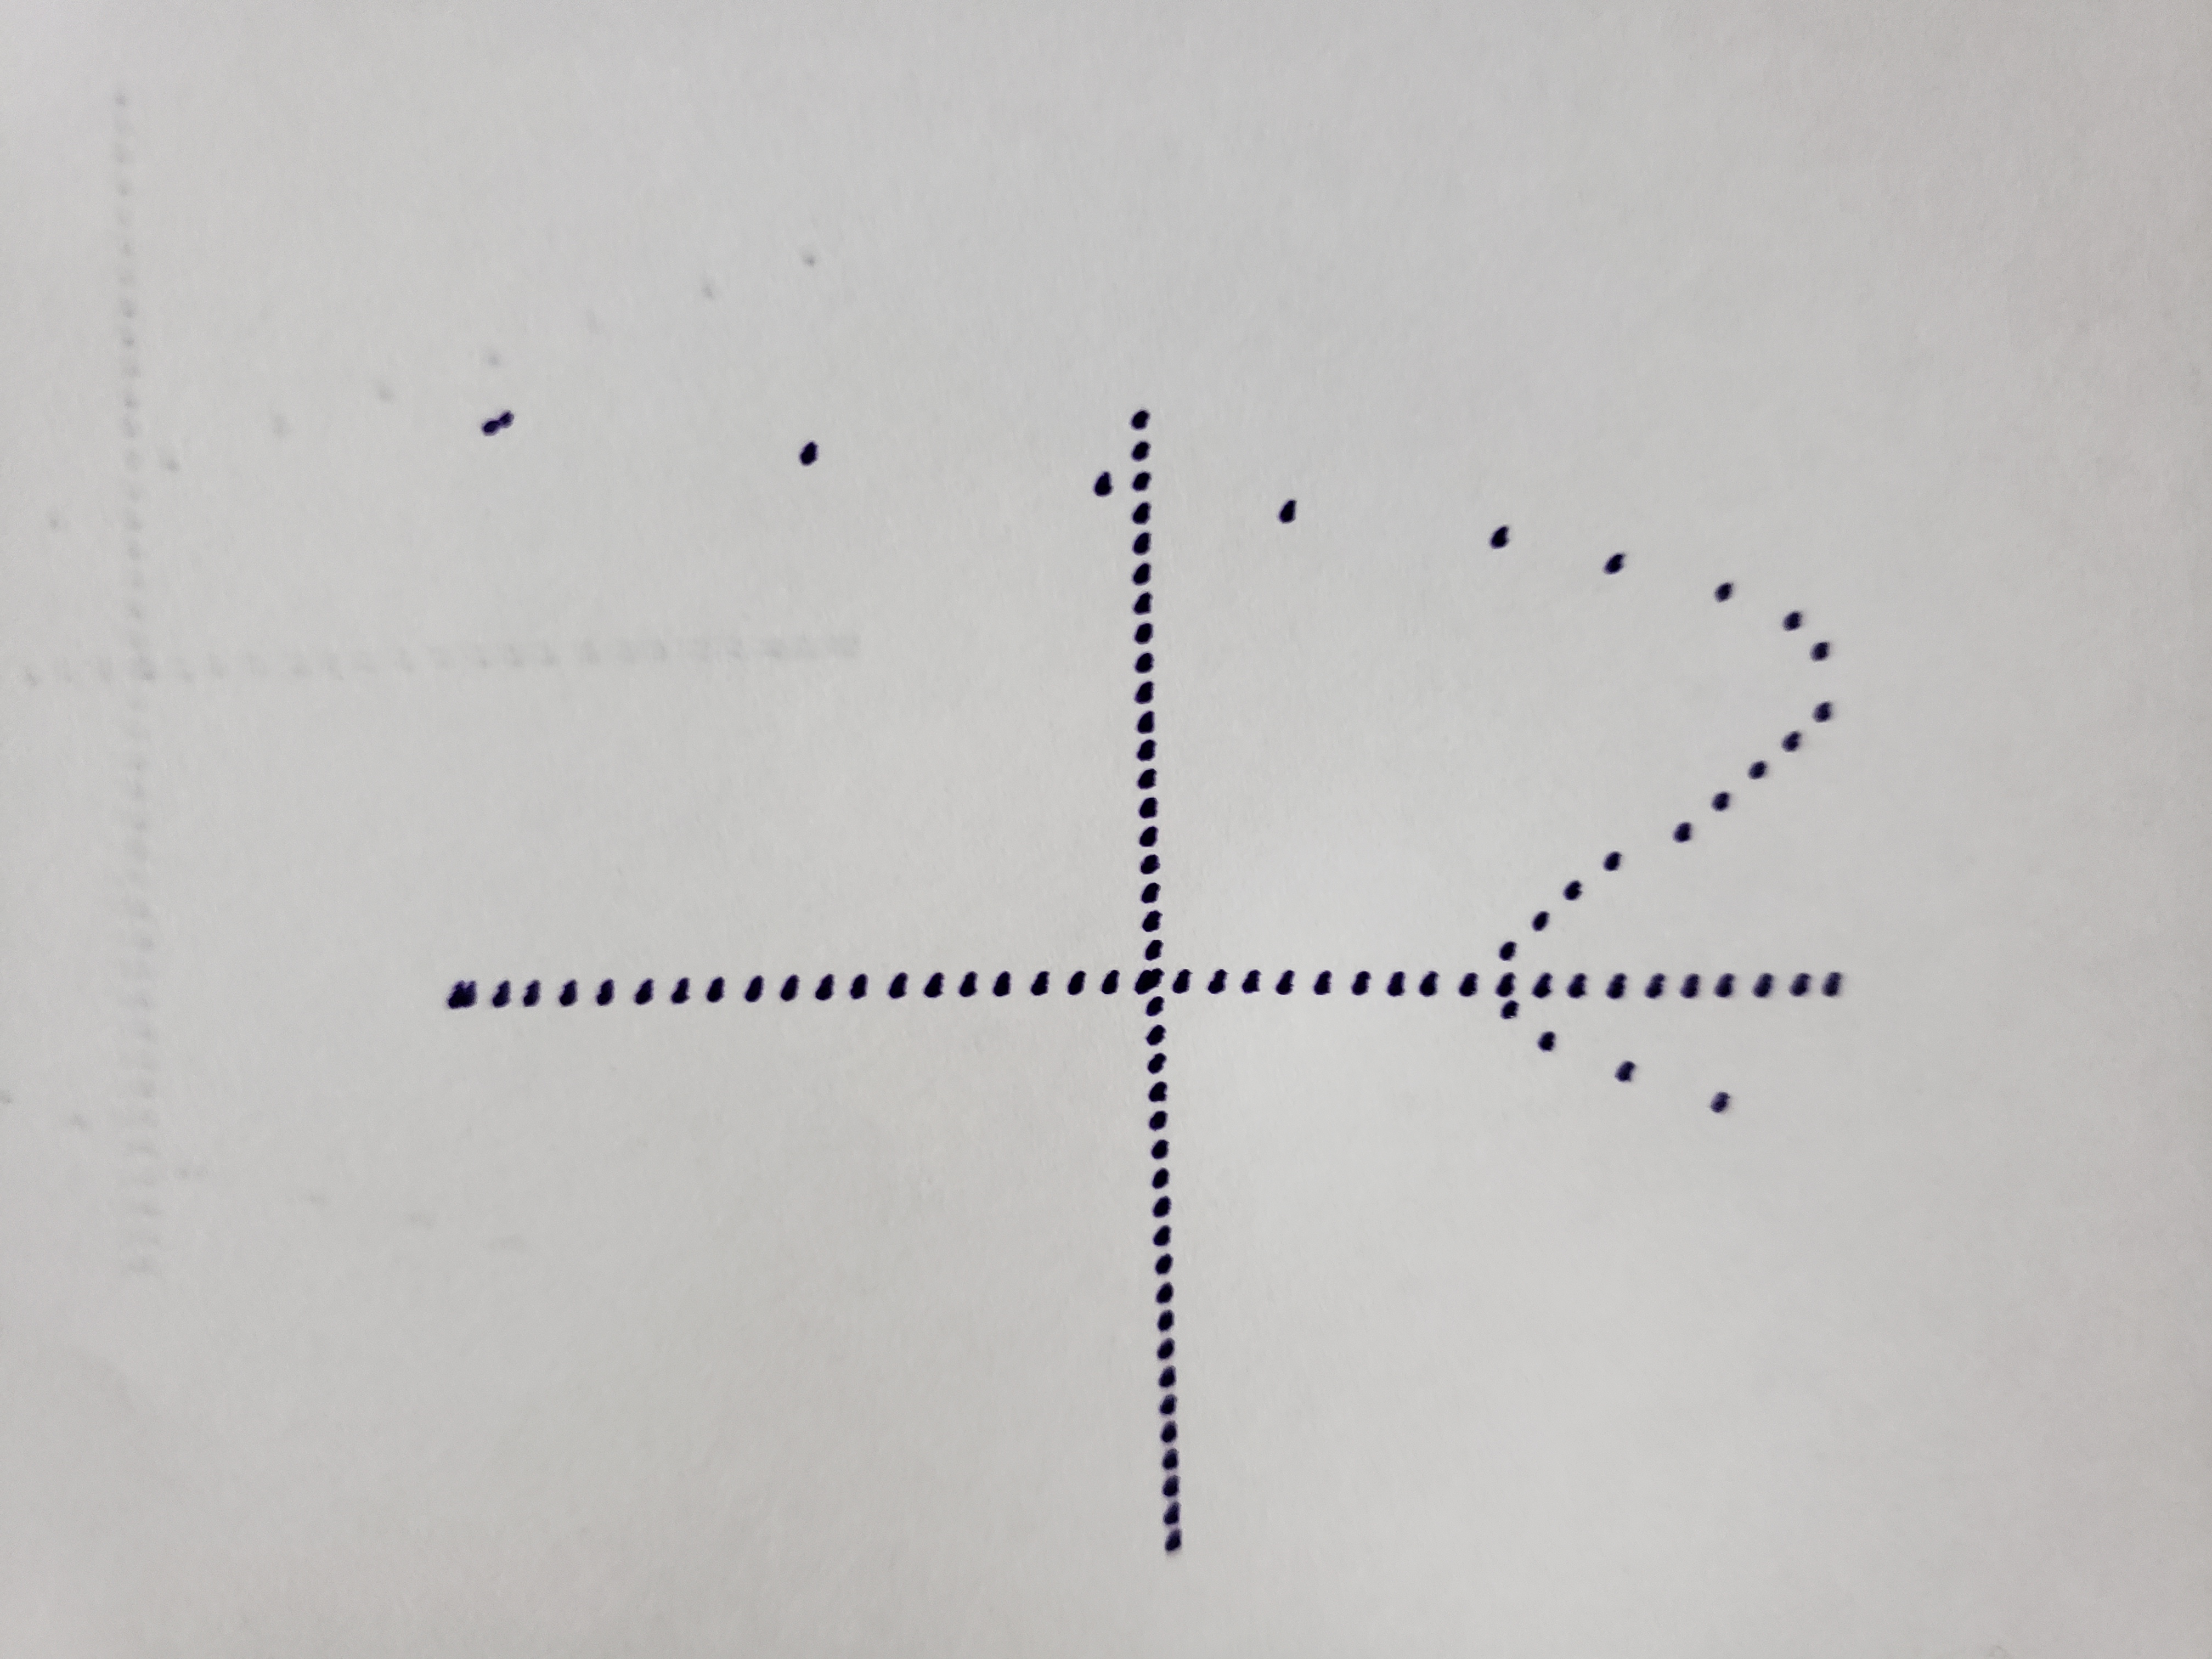
The last command is to draw a polynomial functions. After clicking PLOT! the printer will move home and begin drawing the function at the range (-2,2) on the X and Y axes.
Click here to see the Youtube video.
- Drawing the PCB wires in a copper plate to create circuits