JIRA client with UI menus
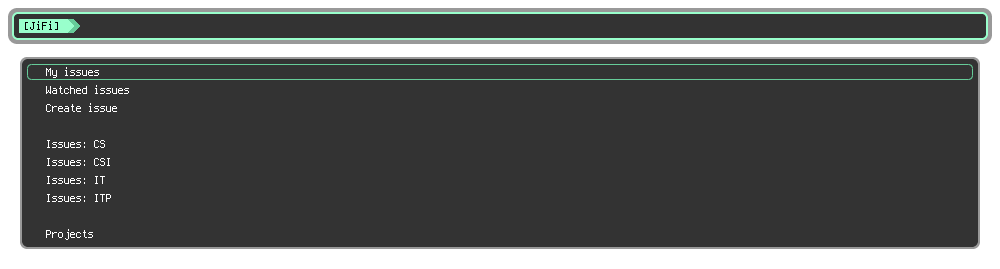

- Listing issues in a project
- Listing projects
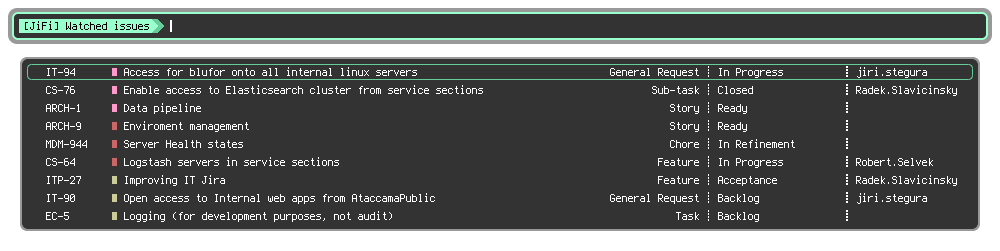
- Viewing issues
- Transitioning issues
- Editing issues
- Assigning issues
- Creating issues (WIP)
jira-uiintegration (WIP)- Commenting issues (TODO)
- Linking issues (TODO)
- Epics (TODO)
- Repositories integration (TODO)
- Clone this repo
- Run
makefrom inside the cloned repo. It checks for the prerequisities before install and won't proceed without them
There's a few steps you need to do before you use it. So here we go
It's located in ~/.jira.d/config.yml.head and should contain the following minimal config
endpoint: https://jira.domain.com
user: <username in JIRA>
login: <loginname in JIRA>
NOTE: User and login are not the same thing.
It's located in ~/.config/rofi/jifi.sh and should contain this minimal config
PROJECTS=(CS CSI IT ITP) # Your favorite projects (it's a Bash array)
TERMAPP=st               # Your X terminal app
You can also supply additional arguments to ROFI in the same file:
ROFI_ARGS="-width 1600" # Rofi width in pixels. For more see: man rofi
Just run jira login to be able to talk to you JIRA instance
Running jira cache will create cache files so that some of the data that doesn't usually change much don't take time doing API calls.
Just run jifi and it should work. It's a good idea to bind it to a keyboard shortcut so it's always at hand for you.