This repository houses the Katana for NinjaOne browser extension.
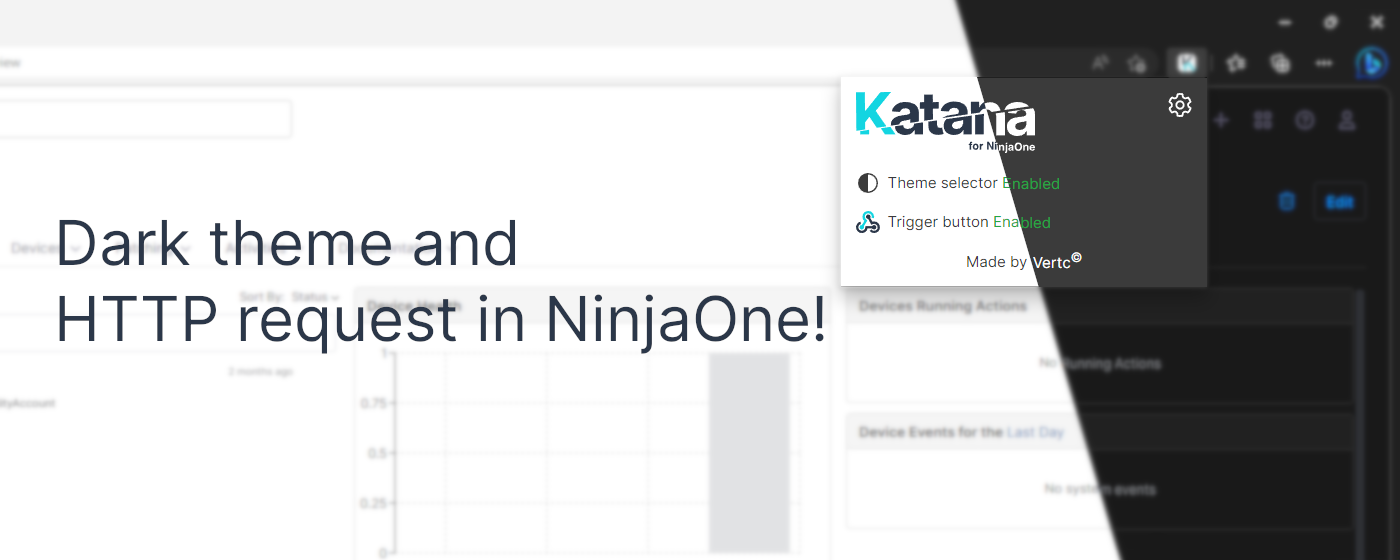
The Katana extension adds dark theme support to NinjaOne aswell as adding a button to devices that sends the current device to a selected endpoint. From there you can integrate it into any program you want. In the Guides section we'll show you how to run an action in Microsoft Power Automate for example.
The extension is available in the Microsoft Edge Add-on store, Google Chrome webstore and in the Firefox add-on store.
To test the latest verions before it's released to the stores you will need to install the extension manually using a zip of the bin folder.
After downloading the bin folder, you'll need to move the respective Firefox of Chromium manifest file into the bin folder.
Follow the link for your browser for an article on how to sideload a extension:
Microsoft edge
Google Chrome
Firefox
Below are some guides to help you get started with the extension.
Katana for NinjaOne has an option to import settings. This will make it easier to roll out the extension to multiple users. The settings are stored in a .json file with the content formatted as shown below:
{
  "buttonText": "Button",
  "debug": false,
  "theme": 2,
  "themeModule": true,
  "triggerModule": true,
  "warningText": "Sent request for",
  "webhookUrl": "https://example.com/api/webhook/123abcABC"
}
The theme option is as follows:
0: Light theme
1: Dark theme
2: Follow browser
When working in the Microsoft ecosystem, you'll have access to Power Automate. This is a application where you can make "flows" to automate workflows. We'll be using this functionality and this extension together with Dataverse for NinjaOne to send an email to a shared mailbox in this example, but the posibilities are endless.
- A Power Automate Premium license for the
Request - When an HTTP request is receivedtrigger and NinjaOne custom connector. - Setup Dataverse for NinjaOne in your Microsoft environment.
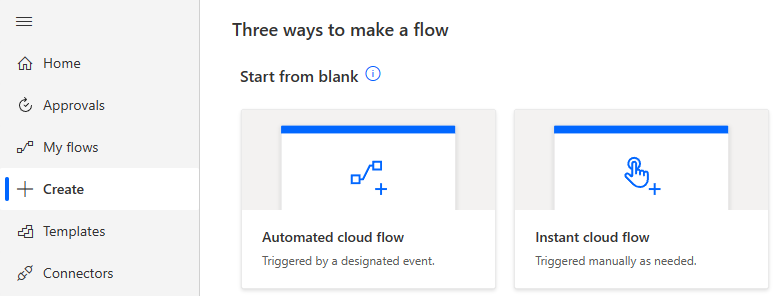
- Navigate to Power Automate andclick on
create. - Click on
Instant cloud flow, give you flow a name and select theRequest - When an HTTP request is receivedtrigger. - Click on
Create.
- Add the following JSON schema to the trigger:
{
    "type": "object",
    "properties": {
        "id": {
            "type": "integer"
        },
        "debug": {
            "type": "boolean"
        }
    }
}
- Add a
NinjaOne - List devices (detailed)step with as df:id=@{triggerBody()?['id']}.
- Add a
Office 365 Outlook - Send an email (V2)step and add the wanted info to the step.
Note that adding any data from the previousNinjaOne - List devices (detailed)step will automatically wrap the step in aApply to eachstep for theBody.

- Save the flow. This will then show you the
HTTP POST URLfield in theRequest - When an HTTP request is receivedtrigger.
Set this URL as the Webhook URL field in the extension.
Now, whenever you click on the Trigger button in NinjaOne, you will receive an email with that devices' details. This in itself is obviously not the most useful functionality, but by changing the flow you can make the button do anything, for example:
- Print labels for devices
- Store device details in a 3rd party Inventory management system
- Create a device specific ticket in a 3rd party ticketing system