3. First Steps
First of all, this part is obvious but you must have the Arduino IDE installed, if you don't have it you can do it from here.
After you have the Arduino IDE, you will have to install our boards, don't worry it is nothing to write home about, here is a quick guide on how to install them:
Install SAMD support
You must install the boards SAMD of Arduino (version 1.6.11 o later)
In the menú bar select Tools --> Board --> Boards Manager --> Arduino SAMD Boards 32 bit M0.
In the search bar write "SAMD", then you can see the boards, do click on install and wait to finish to install.

Install "Electronic Cats" support
To add board support for our products, start Arduino and open the Preferences window (File > Preferences). Now copy and paste the following URL into the 'Additional Boards Manager URLs' input field:
https://electroniccats.github.io/Arduino_Boards_Index/package_electroniccats_index.json
-
If there is already an URL from another manufacturer in that field, click the button at the right end of the field. This will open an editing window allowing you to paste the above URL onto a new line.
-
Press the "OK" button.
-
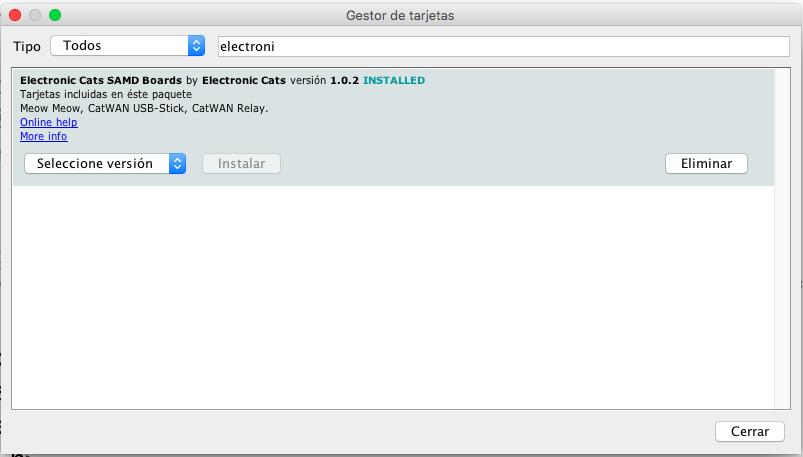
Open the "boards manager" that is in Tools --> Board --> Boards Manager.
-
Now write "Electronic Cats" (without quotes) in the search bar.
-
Click on install, just wait to finish to install and only close the Boards Manager window.
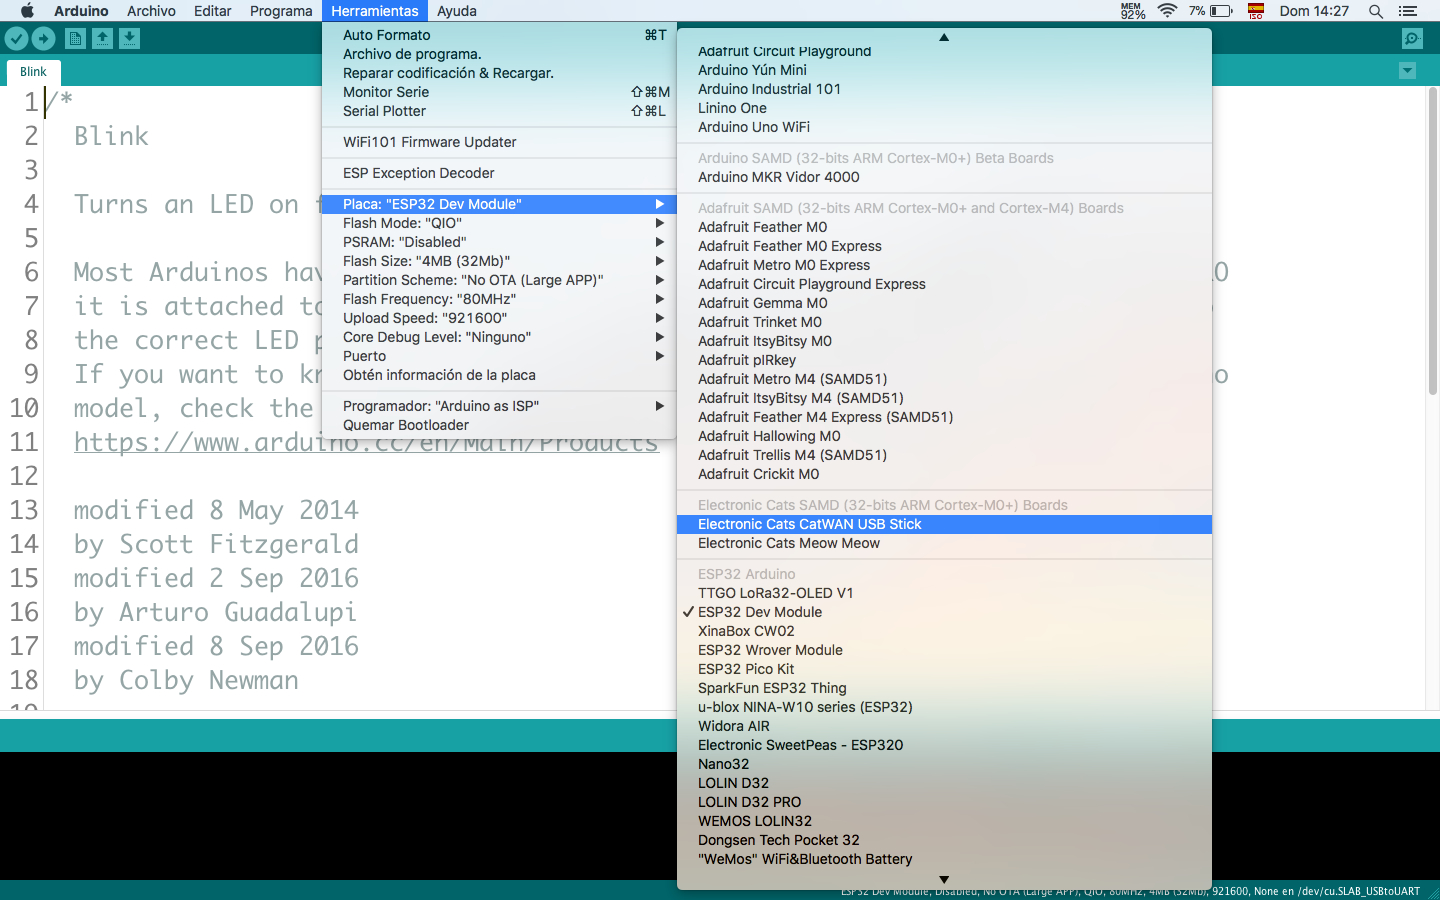
- In tools --> Boards, scroll to down in the board´s list you can see the Electronic Cat´s boards.
Now, the NFC module has a switch to select the interface to use, you must make sure that you are in the correct one.
Before starting you must configure your NFC module for work in SPI communication, for this you must put the switches SEL0 and SEL1 as follows in the picture SEL0=0 SEL1=1
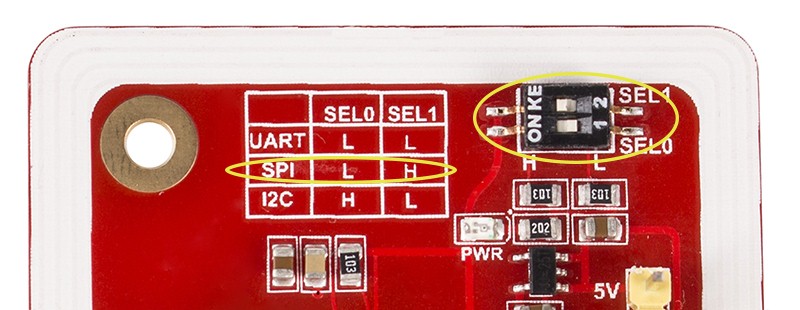
if you don't do this, you won't be able to communicate with the module
The NFC V3 module has pins that protrude from the bottom

These pins are those that are connected to the NFC-CopyCat development board the pins are connected to the female header that the board has

At the end of the day it should be connected in this way:

Great!! What follows is to program your NFC-Copy-Cat, first, you will connect the NFC-Copy-Cat to your PC.

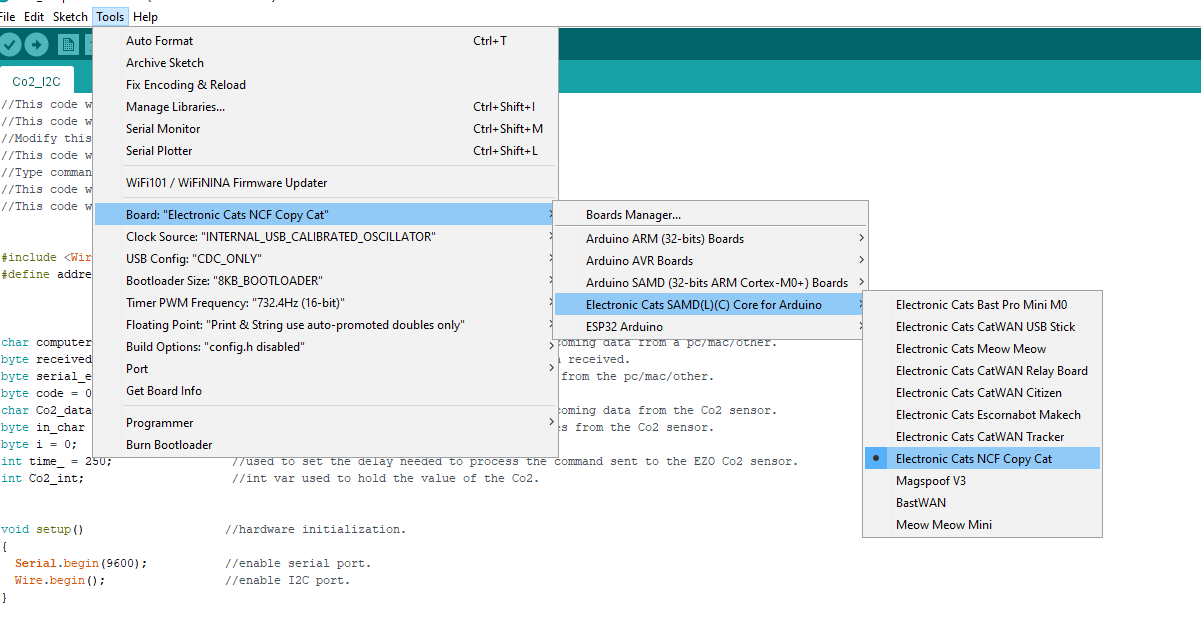
Now you will select the board that one of the previous steps you have just installed. On the Arduino IDE In Tools -> Board -> Electronic Cats SamD (L) (C) -> Electronic Cats NFC Copy Cat
After that, you select the port to which your NFC-Copy-Cat was connected from Tools -> Port.
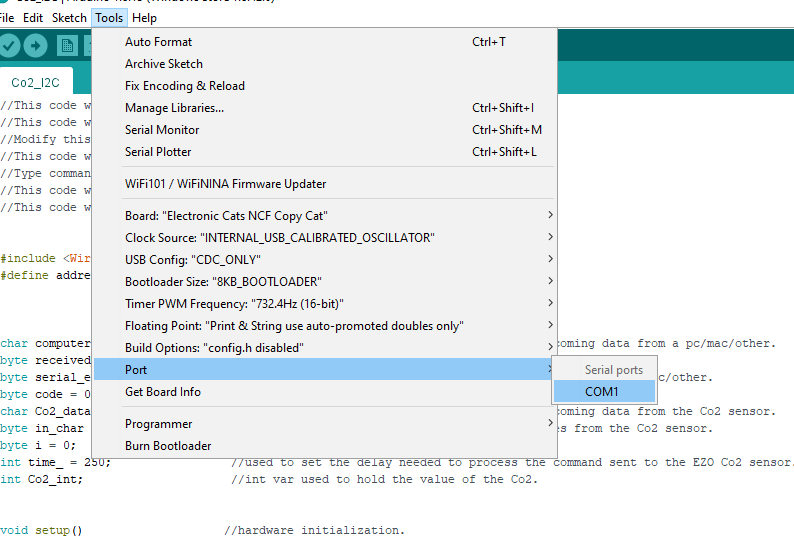
And Ready!!! You can start programming your NFC-Copy-Cat.
You don't know what to program ??? Well in the next section I leave you some examples :D !!!