The Polling App is a full-featured polling platform designed for individuals and organizations to create and participate in polls. It offers an interactive and user-friendly interface for users to express their opinions through votes, view poll results in real-time, and engage with a community of like-minded participants.
Try adding your own Polls!
http://employee-polling-app.s3-website.us-east-2.amazonaws.com/

User Authentication: Secure login and registration system to manage user sessions.
Create Polls: Users can create polls with multiple choices.
Vote on Polls: Authenticated users can vote on different polls and see immediate updates.
View Results: Results are displayed as percentages alongside the total votes.
Leaderboard: A leaderboard showing users ranked by their activity, such as polls created and participated in.
Before setting up the project, ensure you have the following installed on your system:
- Node.js: Version 20.x or later, available at Node.js official website.
- Yarn or npm: Package managers to install dependencies and run the project.
- Docker
To install the Polling App, follow these steps:
1.Clone the repository: git clone [email protected]:tristenwallace/employee_polling_app.git
2.Navigate to the project directory: cd employee_polling_app
3.Install Root Dependencies: npm install
4.Install frontend dependencies: npm run install-client
5.Install backend dependencies: npm run install-server
1.Add .env file to root:
NODE_ENV=development
JWT_SECRET=your_jwt_secret
REACT_APP_API_URL=http://localhost:5000
2.Navigate to server environment: cd server/environment
3.Copy .env.template file to create .env.development and .env.test files. PORT should be different for each, I typically change test PORT to 5433.
Before running the application, you need to set up the databases for both development and testing environments. This project uses PostgreSQL as the database system.
1.Ensure Docker is installed and running on your system. You can download it from the official Docker website.
2.Navigate to the server directory of the project where the docker-compose.yml file is located.
3.Permissions: This setup includes an initialization script for PostgreSQL. Run the following from the server folder to ensure the script is executable:
chmod +x ./postgres-init/init-user-db.sh
- This grants the necessary permissions to execute the database initialization script when the PostgreSQL container starts.
4.Run the following command to start the PostgreSQL containers in detached mode:
docker-compose up --build -d
1.If port is already being used, you can check with sudo lsof -i :5432. If that service is needed on that port you can change the ports in the .env files. Other wise you can kill the service with sudo kill -9 <pid>.
After setting up the database with Docker, you can run migrations to set up your database schema:
1.Navigate to the server directory.
2.Run migrations to set up your database tables: npm run migrate:all
- Migrations rely on the server being compiled first.
npm run migrate:allwill also run the build script and createserver/distfolder.
3.Run migrations for the test database: NODE_ENV=test npm run migrate:all
These commands will apply all the migrations defined in your project, setting up the database schema as required for the application to function.
The root package is configured to start the frontend and backend concurrently. To start the application in the development environment on your local machine, navigate to the root directory and run npm run start.
You can then access the frontend at http://localhost:3000 and the backend on http://localhost:5000.
For more detailed information on setting up, running, and testing the application, refer to the following guides in our documentation:
All necessary dependencies and their setup instructions are detailed in our dependencies guide. This includes software installations and environment setups.
For more information about the API endpoints, see the API Documentation.
Below is a high-level overview of the Polling App's architecture:
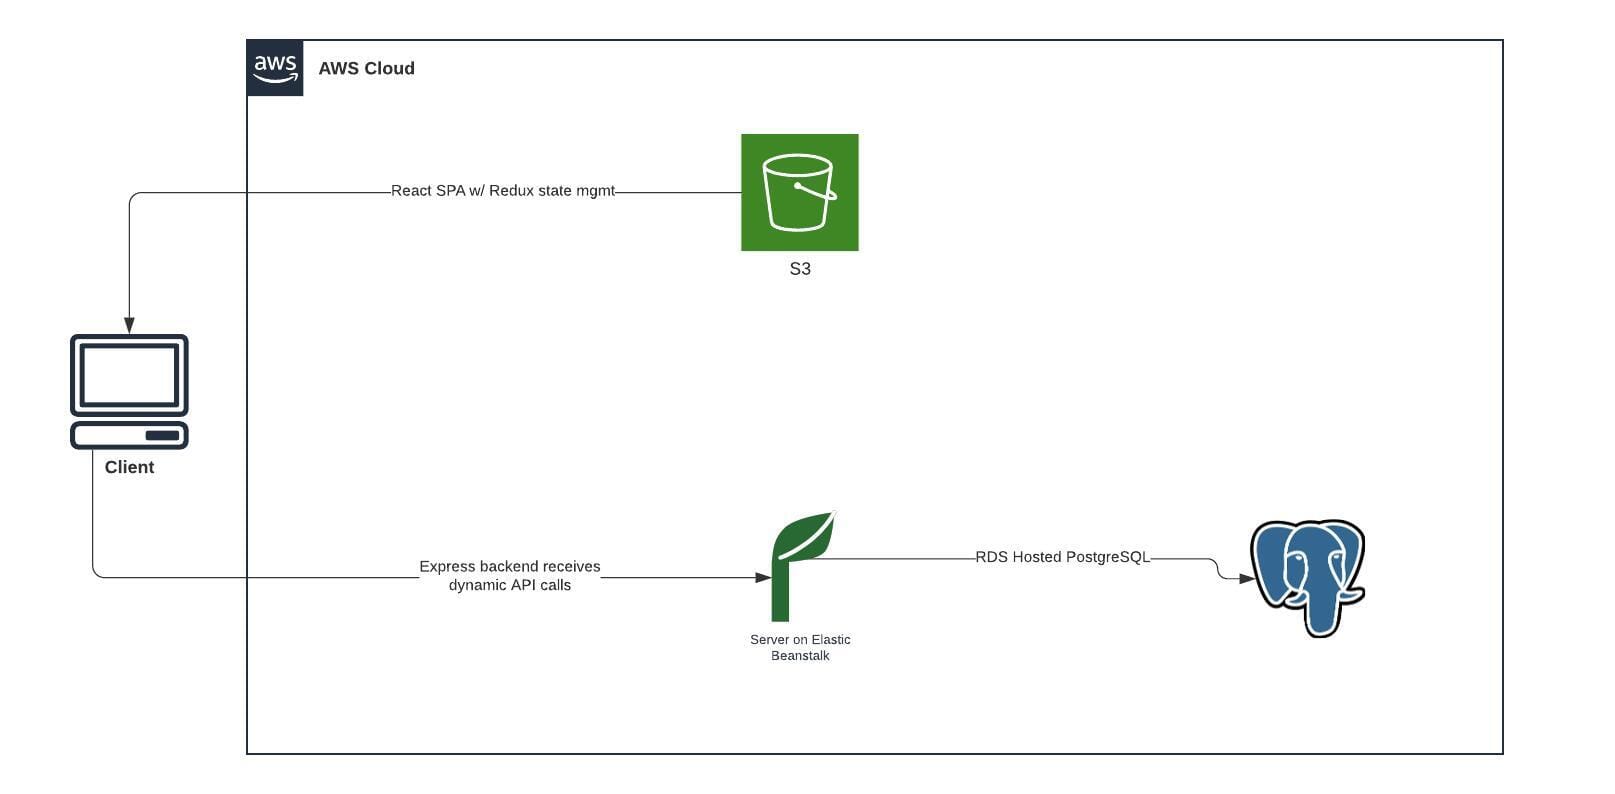
For a detailed explanation of our infrastructure setup, view our Infrastructure Guide.
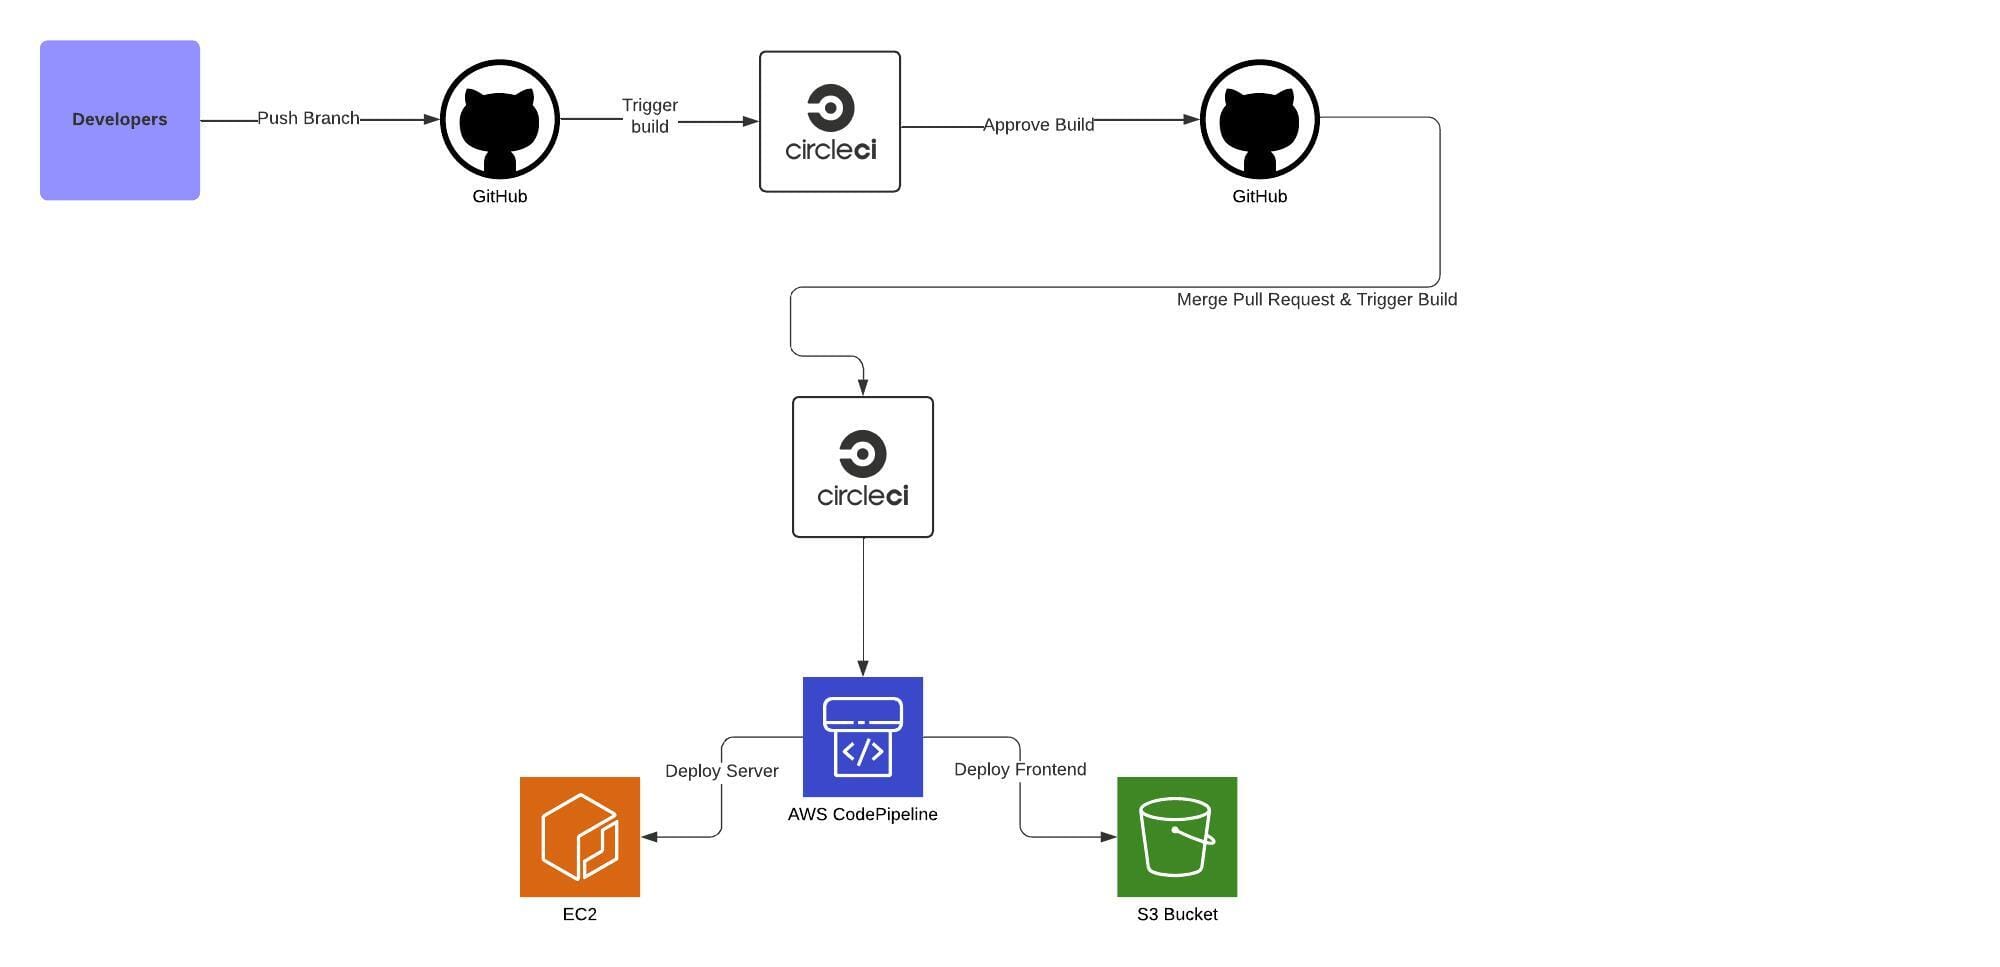
Overview of our CircleCi pipeline process
Refer to Testing Documentation for details on planned testing using Jest & Playwright.
This project is licensed under the MIT License - see the LICENSE file for details.