This article introduces a semi-automatic annotation solution combining Label-Studio and SAM (Segment Anything) with two methods: Point2Label and Bbox2Label. With Point2Label, users only need to click a point within the object's area to obtain the object's mask and bounding box annotations. With Bbox2Label, users simply annotate the object's bounding box to generate the object's mask. Community users can learn from these methods to improve the efficiency of data annotation.
- SAM (Segment Anything) is a segmentation model launched by Meta AI, designed to segment everything.
- Label Studio is an excellent annotation software, covering dataset annotation functions in areas such as image classification, object detection, and segmentation.
This article will use images from the Cat Dataset for semi-automated annotation.
Create a virtual environment:
conda create -n rtmdet-sam python=3.9 -y
conda activate rtmdet-sam
PS: If you are unable to use the git command in a Conda environment, you can install git by following the commands below.
conda install gitClone OpenMMLab PlayGround
git clone https://github.com/open-mmlab/playgroundIf you encounter network errors, try to complete the git clone via ssh, like the following command:
git clone [email protected]:open-mmlab/playground.gitInstall PyTorch
# Linux and Windows CUDA 11.3
pip install torch==1.10.1+cu113 torchvision==0.11.2+cu113 torchaudio==0.10.1 -f https://download.pytorch.org/whl/cu113/torch_stable.html


# Linux and Windows CPU only
pip install torch==1.10.1+cpu torchvision==0.11.2+cpu torchaudio==0.10.1 -f https://download.pytorch.org/whl/cpu/torch_stable.html

# OSX
pip install torch==1.10.1 torchvision==0.11.2 torchaudio==0.10.1
Install SAM and download the pre-trained model:
cd path/to/playground/label_anything
# Before proceeding to the next step in Windows, you need to complete the following command line.
# conda install pycocotools -c conda-forge
pip install opencv-python pycocotools matplotlib onnxruntime onnx
pip install git+https://github.com/facebookresearch/segment-anything.git
pip install segment-anything-hq
wget https://dl.fbaipublicfiles.com/segment_anything/sam_vit_b_01ec64.pth

# If you're on a windows machine you can use the following in place of wget
# curl -L -O https://dl.fbaipublicfiles.com/segment_anything/sam_vit_b_01ec64.pth

# For better segmentation results, use the sam_vit_h_4b8939.pth weights
# wget https://dl.fbaipublicfiles.com/segment_anything/sam_vit_l_0b3195.pth
# wget https://dl.fbaipublicfiles.com/segment_anything/sam_vit_h_4b8939.pth

# download HQ-SAM pretrained model
wget https://huggingface.co/lkeab/hq-sam/resolve/main/sam_hq_vit_b.pth
#wget https://huggingface.co/lkeab/hq-sam/resolve/main/sam_hq_vit_h.pth
#wget https://huggingface.co/lkeab/hq-sam/resolve/main/sam_hq_vit_l.pth

# download mobile_sam pretrained model
wget https://raw.githubusercontent.com/ChaoningZhang/MobileSAM/master/weights/mobile_sam.pt
# or manually download mobile_sam.pt in https://github.com/ChaoningZhang/MobileSAM/blob/master/weights/, and put it into path/to/playground/label_anything
PS: If you are using a having trouble with the wget/curl commands, please manually download the target file (copy the URL to a browser or download tool). The same applies to the following instructions. For example: https://dl.fbaipublicfiles.com/segment_anything/sam_vit_b_01ec64.pth
Install Label-Studio and label-studio-ml-backend
Currently, label_anything supports three inference models: SAM, HQ-SAM, and mobile_sam. Users can choose according to their own needs, but note that the model and the downloaded weights in the previous step need to correspond. HQ-SAM has higher segmentation quality than SAM. Mobile_sam has faster inference speed and lower memory usage than SAM, and the segmentation effect only slightly decreases. It is recommended to use mobile_sam for CPU inference.
# sudo apt install libpq-dev python3-dev # Note: If using Label Studio 1.7.2 version, you need to install libpq-dev and python3-dev dependencies.

# Installing label-studio may take some time. If you cannot find the version, please use the official source.
pip install label-studio==1.7.3
pip install label-studio-ml==1.0.9⚠label_anything requires the SAM backend to be enabled and then the web service to be started before the model can be loaded. (a total of two steps are required to start)
1.Start the SAM backend inference service:
cd path/to/playground/label_anything

# inference on sam
label-studio-ml start sam --port 8003 --with \
  model_name=mobile_sam \
  sam_config=vit_b \
  sam_checkpoint_file=./sam_vit_b_01ec64.pth \
  out_mask=True \
  out_bbox=True \
  device=cuda:0
# device=cuda:0 is for using GPU inference. If you want to use CPU inference, replace cuda:0 with cpu.
# out_poly=True returns the annotation of the bounding polygon.

# inference on HQ-SAM
label-studio-ml start sam --port 8003 --with \
  sam_config=vit_b \
  sam_checkpoint_file=./sam_hq_vit_b.pth \
  out_mask=True \
  out_bbox=True \
  device=cuda:0 \
  model_name=sam_hq
# device=cuda:0 is for using GPU inference. If you want to use CPU inference, replace cuda:0 with cpu.
# out_poly=True returns the annotation of the bounding polygon.

# inference on mobile_sam
label-studio-ml start sam --port 8003 --with \
  model_name=mobile_sam  \
  sam_config=vit_t \
  sam_checkpoint_file=./mobile_sam.pt \
  out_mask=True \
  out_bbox=True \
  device=cpu
# device=cuda:0 is for using GPU inference. If you want to use CPU inference, replace cuda:0 with cpu.
# out_poly=True returns the annotation of the bounding polygon.
- HQ-SAM Segmentation Results Display

- Comparison between SAM and mobile_sam
1.memory compare:
SAM:

mobile-SAM:

2.speed test:
| device | model_name | inference time |
|---|---|---|
| AMD 7700x | mobile_sam | 0.45s |
| RTX 4090 | mobile_sam | 0.14s |
| AMD 7700x | sam-vit-b | 3.02s |
| RTX 4090 | sam-vit-b | 0.32s |
PS: In Windows environment, entering the following in Anaconda Powershell Prompt is equivalent to the input above:
cd path/to/playground/label_anything

$env:sam_config = "vit_b"
$env:sam_checkpoint_file = ".\sam_vit_b_01ec64.pth"
$env:out_mask = "True"
$env:out_bbox = "True"
$env:device = "cuda:0"
# device=cuda:0 is for using GPU inference. If you want to use CPU inference, replace cuda:0 with cpu.
# out_poly=True returns the annotation of the bounding polygon.

label-studio-ml start sam --port 8003 --with `
sam_config=$env:sam_config `
sam_checkpoint_file=$env:sam_checkpoint_file `
out_mask=$env:out_mask `
out_bbox=$env:out_bbox `
device=$env:device

# mobile_sam on windows have not been tested, if you are interesteed in it, please modify the shell script like upper script.
At this point, the SAM backend inference service has started.
⚠The above terminal window needs to be kept open.
Next, please follow the steps below to configure the use of the back-end reasoning service in the Label-Studio Web system.
2.Now start the Label-Studio web service:
Please create a new terminal window to access the label_anything project path.
cd path/to/playground/label_anything⚠(Please skip this step if you do not use SAM with vit-h) The inference backend used is SAM's vit-h, which requires the following environment variables to be set due to the long loading time of the model, which causes the connection to the backend to time out.
The specific can be set according to the name of the downloaded SAM's weights, such as sam_vit_h_4b8939.pth for vit-h and sam_vit_b_01ec64.pth for vit-b.
# Linux requires the following commands
export ML_TIMEOUT_SETUP=40
# Windows requires the following commands
set ML_TIMEOUT_SETUP=40
Start Label-Studio web service:
label-studio start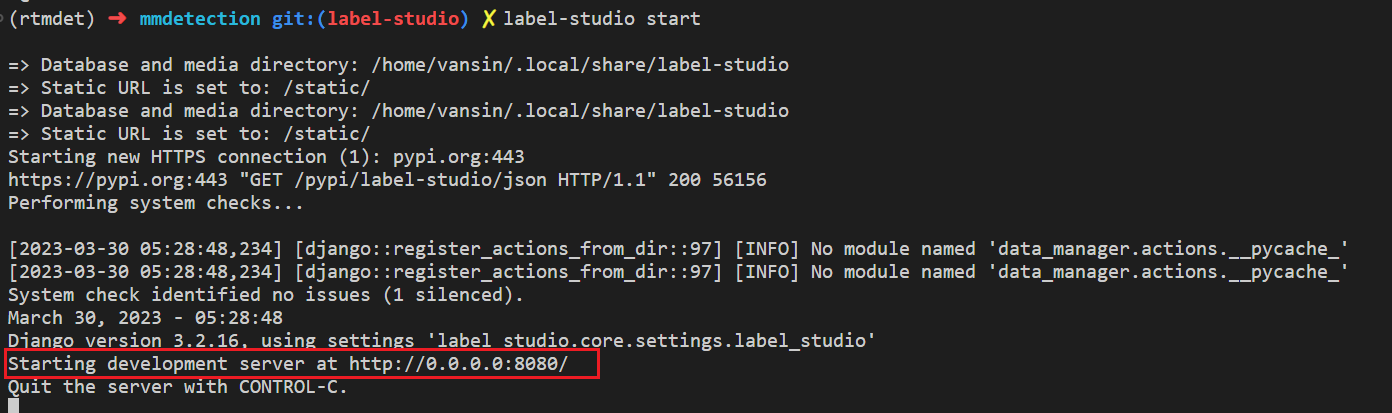
Open your browser and visit http://localhost:8080/ to see the Label-Studio interface.

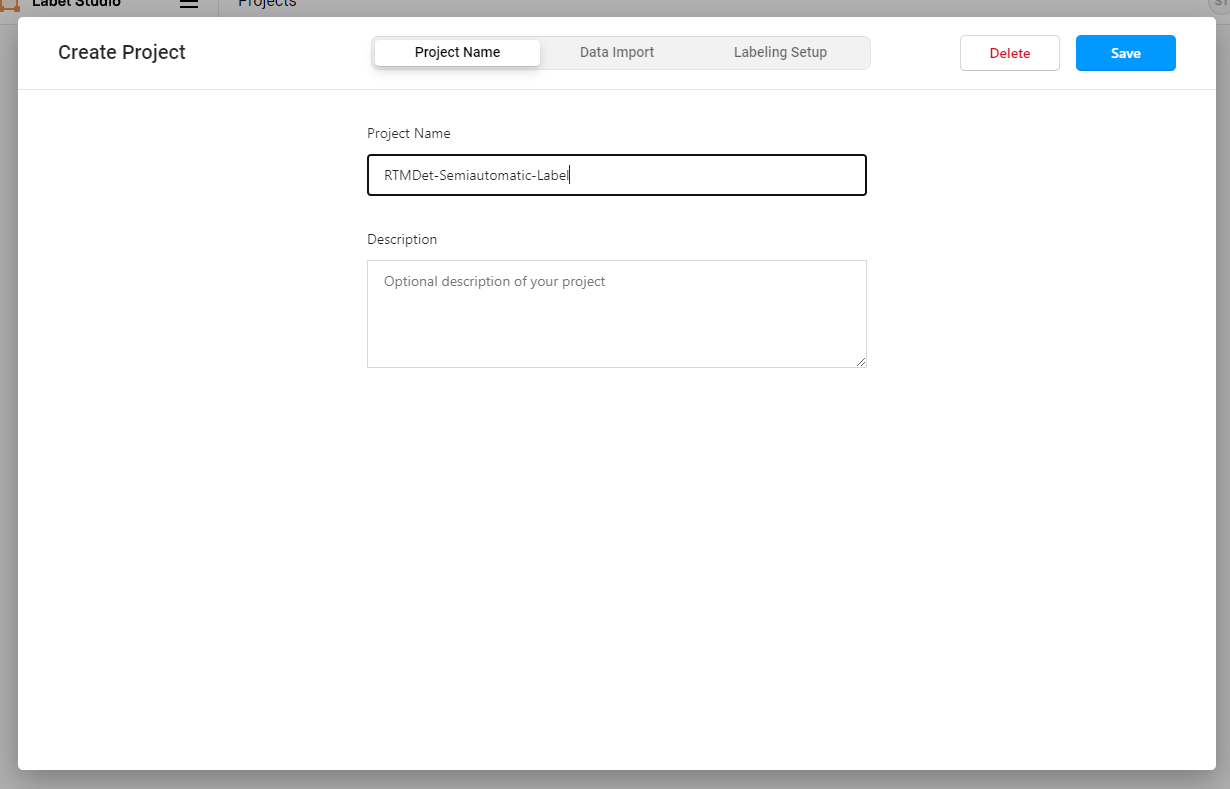
We will register a user and then create an OpenMMLabPlayGround project. PS: Label-Studio's username and password are stored locally. If you encounter a situation where the browser remembers the password but you are unable to log in, please register again.
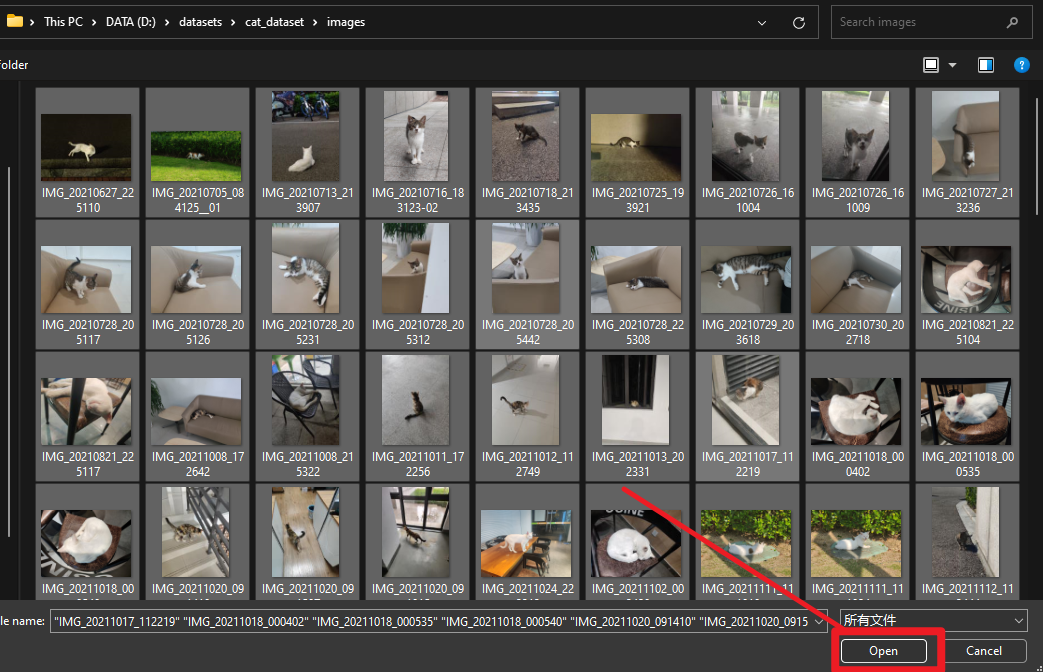
1.Upload
We will download the example Meow Meow images using the method below, click on Data Import to import the cat images that need to be annotated, and then click Save to create the project.
cd path/to/playground/label_anything
mkdir data && cd data

wget https://download.openmmlab.com/mmyolo/data/cat_dataset.zip && unzip cat_dataset.zip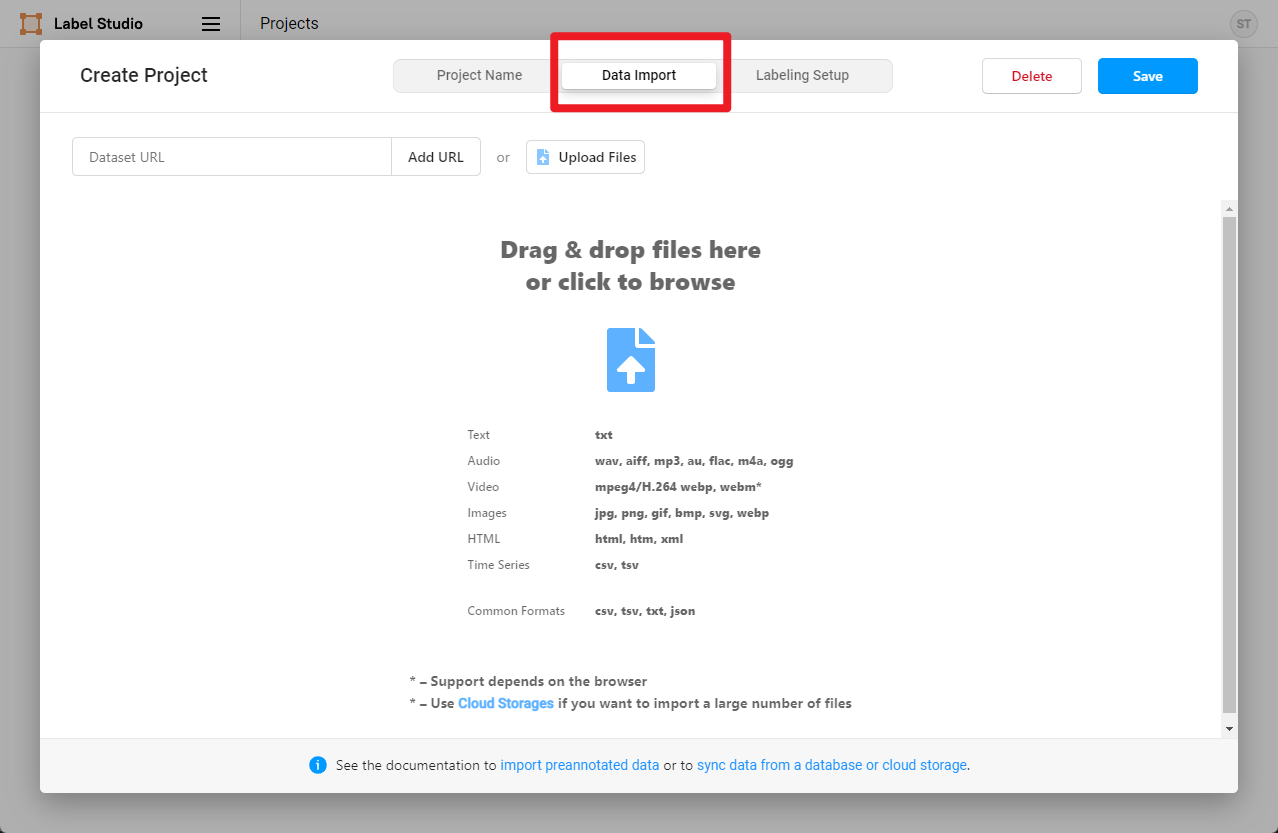
2.Use images stored on the server:
realized through 'Cloud Storages'
① Set environment variables before launch the SAM backend:
export LOCAL_FILES_DOCUMENT_ROOT=path/to/playground/label_anything
② Set environment variables before launch the label studio backend to allow label studio to use local files:
export LABEL_STUDIO_LOCAL_FILES_SERVING_ENABLED=true

export LABEL_STUDIO_LOCAL_FILES_DOCUMENT_ROOT=path/to/playground/label_anything
③ After launching SAM and label studio backend,Create Project first,click on 'Add Source Storage' in Cloud Storage .

Choose 'Local files', write 'Absolute local path'

Click on 'Sync Storage'. Then it can synchronize with the data on the server and use the data on the server for annotation, export and other operations.

Configure Label-Studio keypoint, Mask, and other annotations in Settings/Labeling Interface.
<View>
  <Image name="image" value="$image" zoom="true"/>
  <KeyPointLabels name="KeyPointLabels" toName="image">
    <Label value="cat" smart="true" background="#e51515" showInline="true"/>
    <Label value="person" smart="true" background="#412cdd" showInline="true"/>
  </KeyPointLabels>
  <RectangleLabels name="RectangleLabels" toName="image">
  	<Label value="cat" background="#FF0000"/>
  	<Label value="person" background="#0d14d3"/>
  </RectangleLabels>
  <PolygonLabels name="PolygonLabels" toName="image">
  	<Label value="cat" background="#FF0000"/>
  	<Label value="person" background="#0d14d3"/>
  </PolygonLabels>
  <BrushLabels name="BrushLabels" toName="image">
  	<Label value="cat" background="#FF0000"/>
  	<Label value="person" background="#0d14d3"/>
  </BrushLabels>
</View>
In the above XML, we have configured the annotations, where KeyPointLabels are for keypoint annotations, BrushLabels are for Mask annotations, PolygonLabels are for bounding polygon annotations, and RectangleLabels are for rectangle annotations.
This example uses two categories, cat and person. If community users want to add more categories, they need to add the corresponding categories in KeyPointLabels, BrushLabels, PolygonLabels, and RectangleLabels respectively.
Next, copy and add the above XML to Label-Studio, and then click Save.

After that, go to Settings and click Add Model to add the OpenMMLabPlayGround backend inference service. Set the URL http://localhost:8003 for the SAM backend inference service, enable Use for interactive preannotations, and click Validate and Save.
⚠If you are unable to execute successfully at this step, probably due to the long model loading time, which causes the connection to the backend to time out, please re-execute export ML_TIMEOUT_SETUP=40 (linux) or set ML_TIMEOUT_SETUP=40 (windows) and restart the label-studio start SAM backend reasoning service.

If you see "Connected" as shown below, it means that the backend inference service has been successfully added.

Click on Label to start annotating.

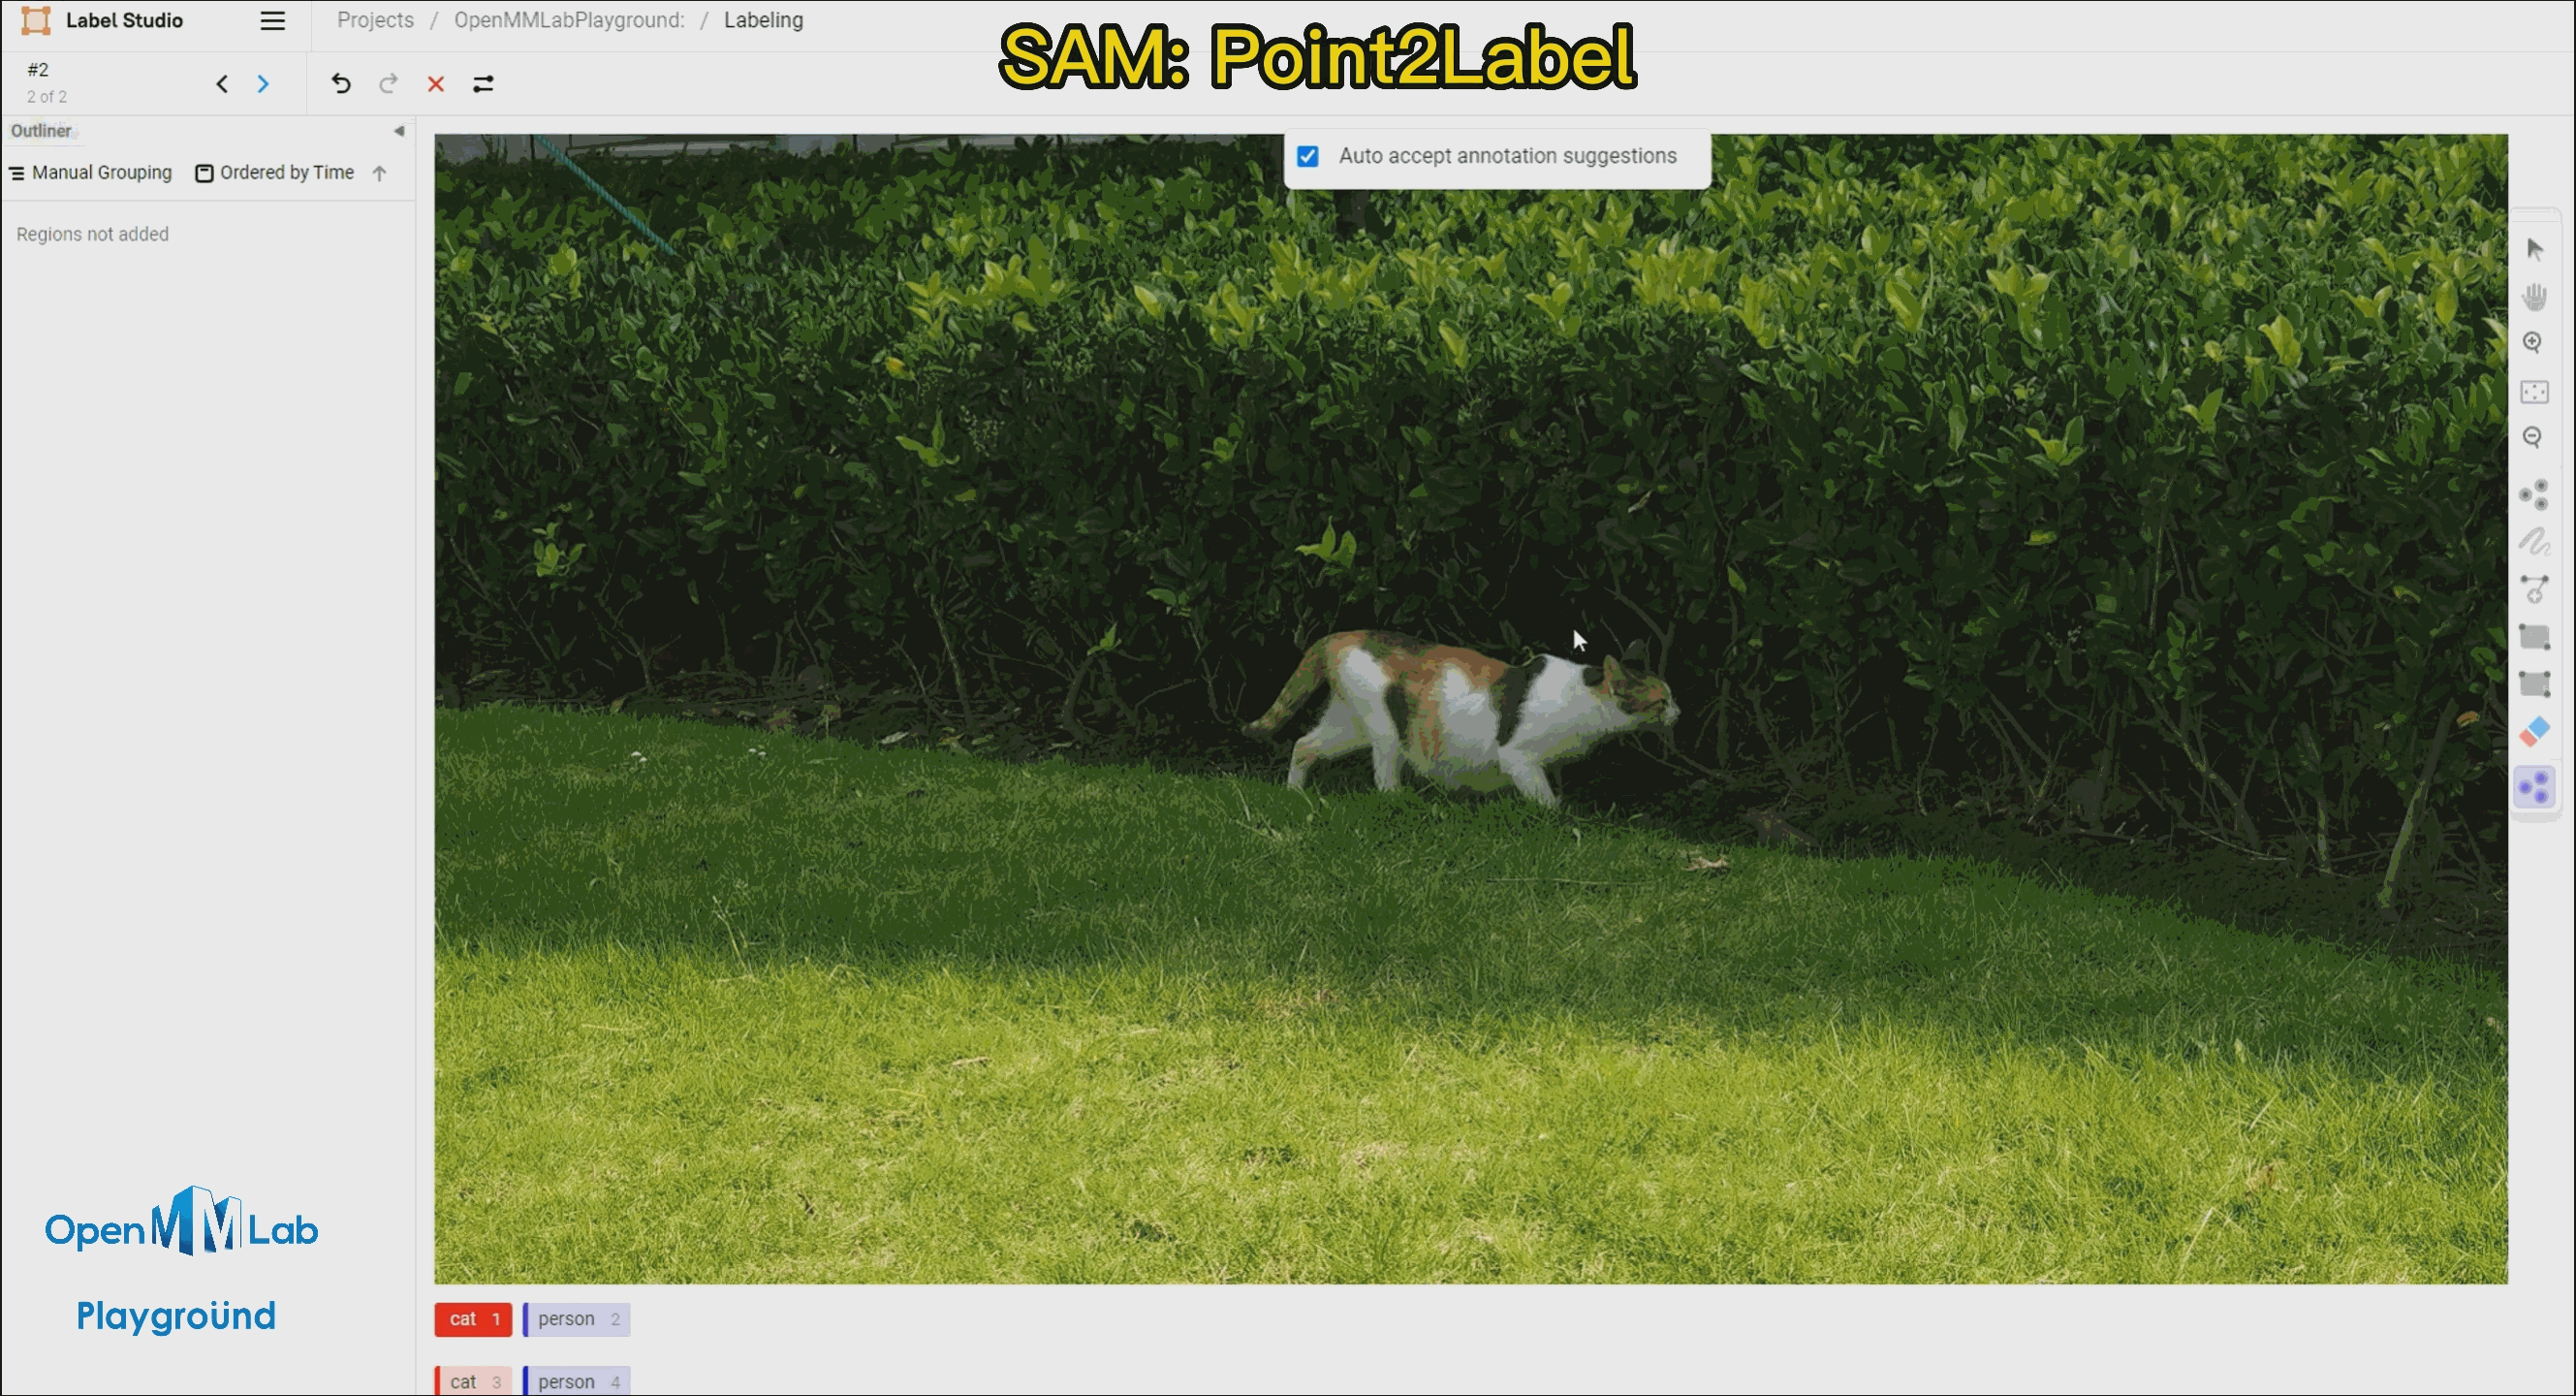
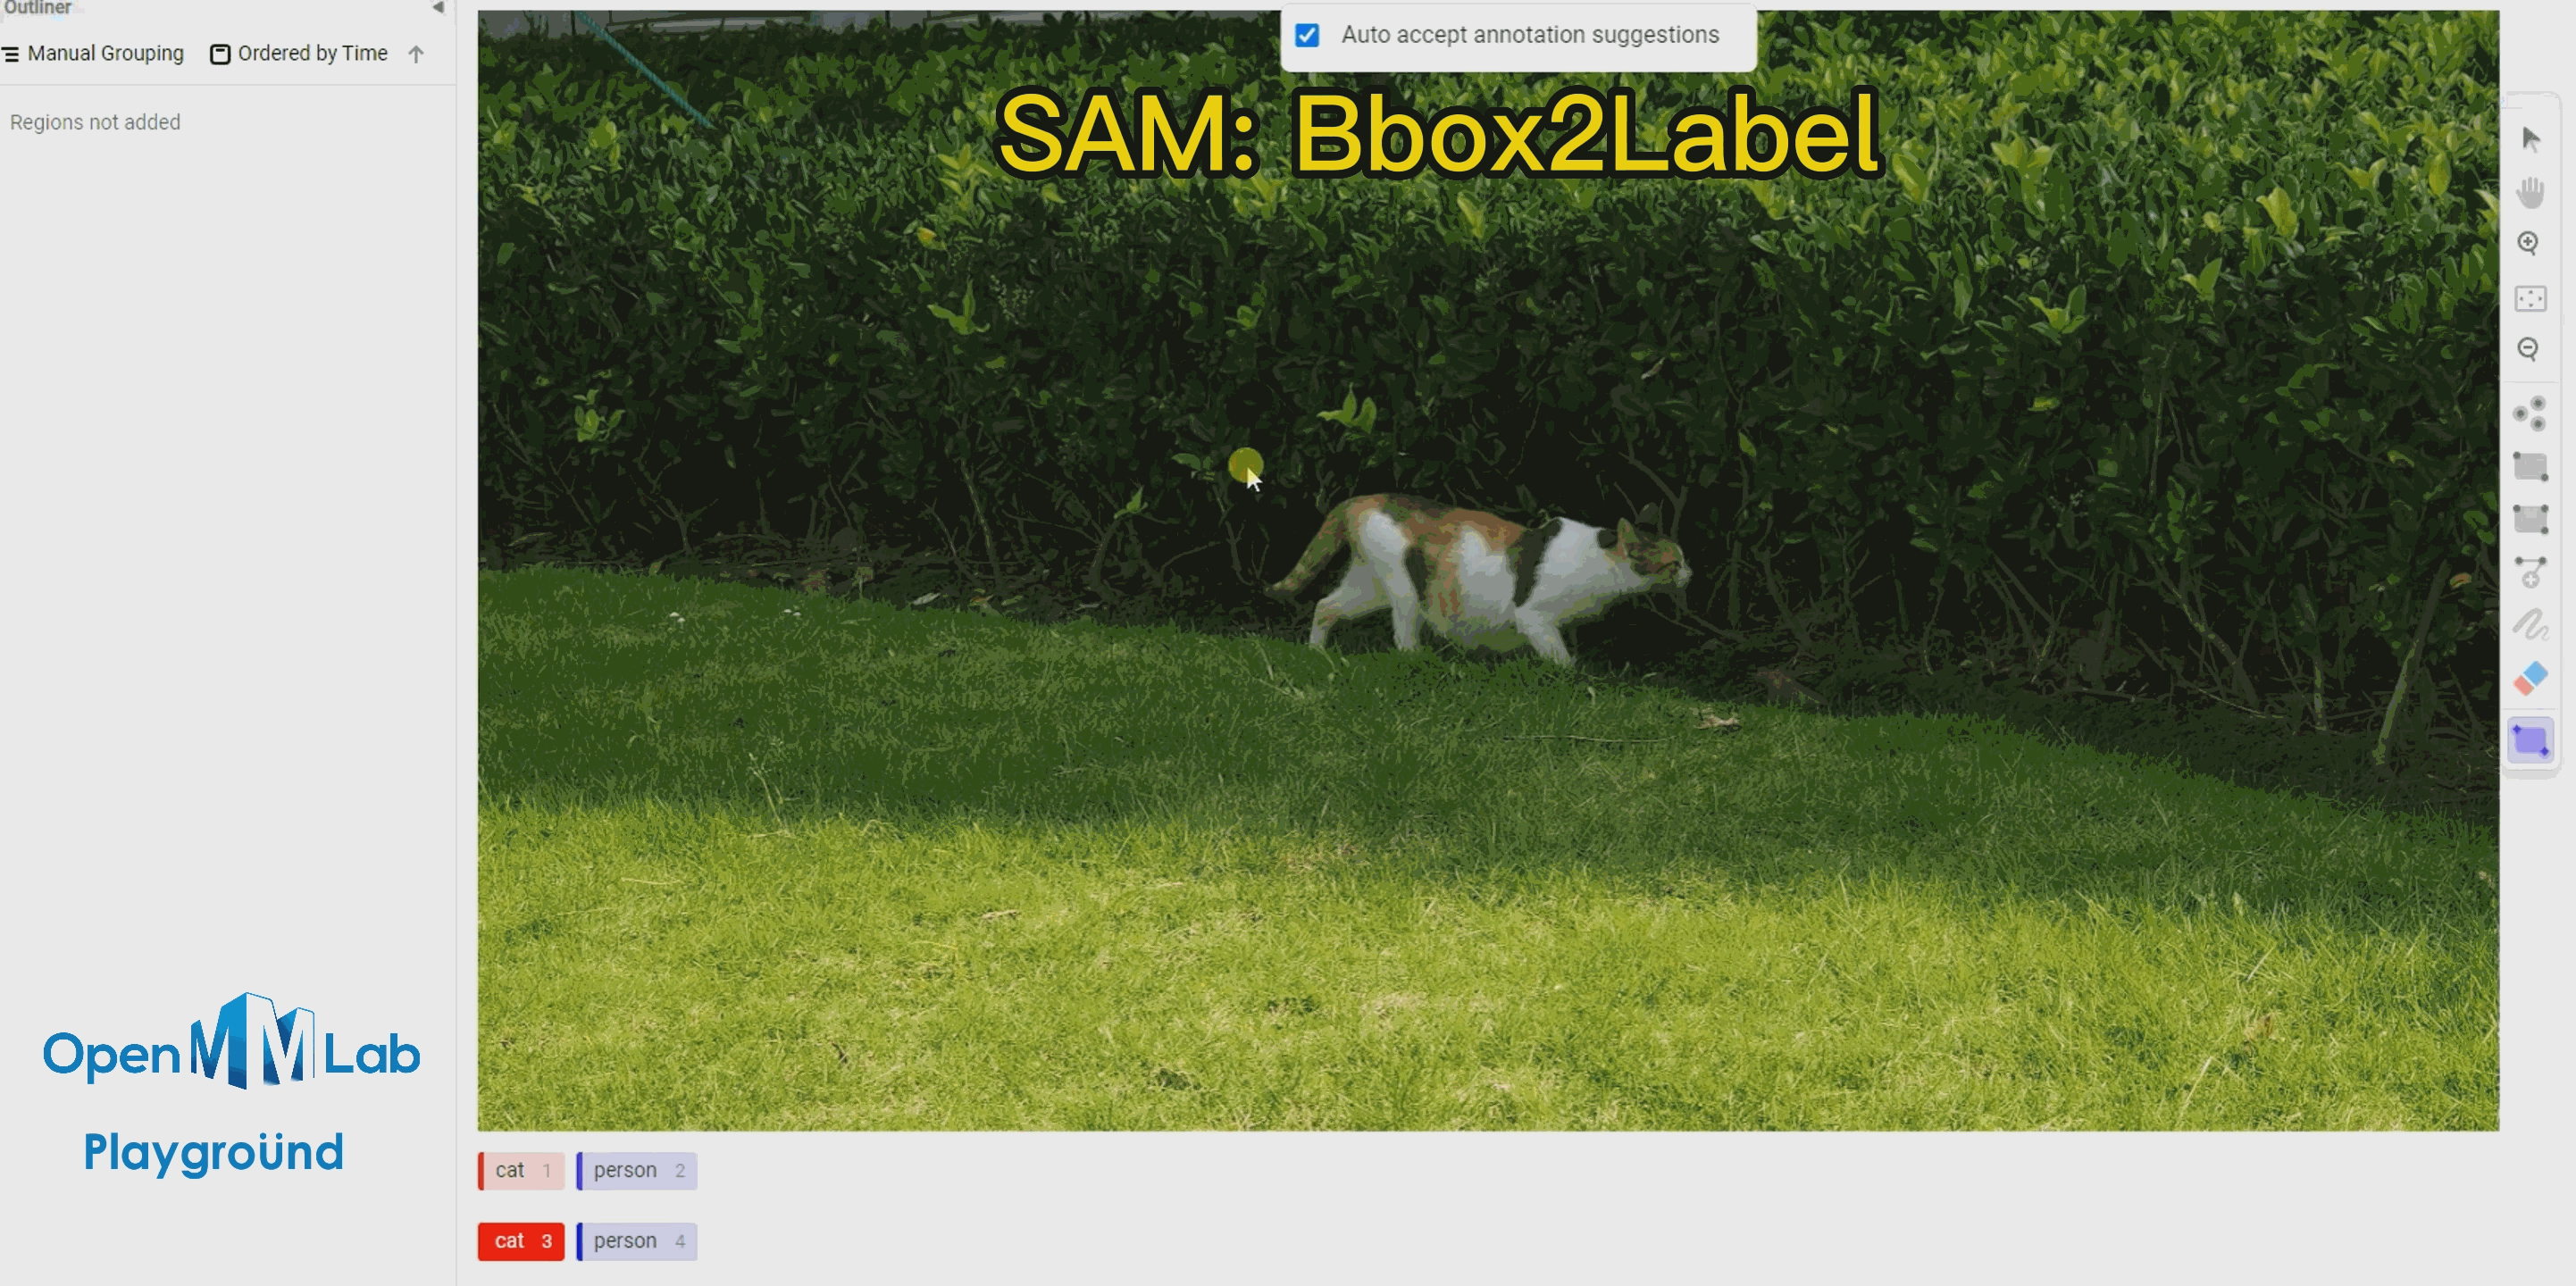
To use this feature, enable the Auto-Annotation toggle and it is recommended to check the Auto accept annotation suggestions option. Then click the Smart tool on the right side, switch to Point mode, and select the object label you want to annotate from the options below, in this case, choose "cat." If using Bbox2Label, please switch the Smart tool to Rectangle mode instead.

Point2Label: As can be seen from the following gif animation, by simply clicking a point on the object, the SAM algorithm is able to segment and detect the entire object.

Bbox2Label: As can be seen from the following gif animation, by simply annotating a bounding box, the SAM algorithm is able to segment and detect the entire object.
After submitting all the images, click on export to export the annotated dataset in COCO format, which will generate a compressed file of the annotated dataset. Note: only the bounding box annotations are exported here. If you want to export the instance segmentation annotations, you need to set out_poly=True when starting the SAM backend service.

You can use VS Code to open the extracted folder and see the annotated dataset, which includes the images and the annotated JSON files.
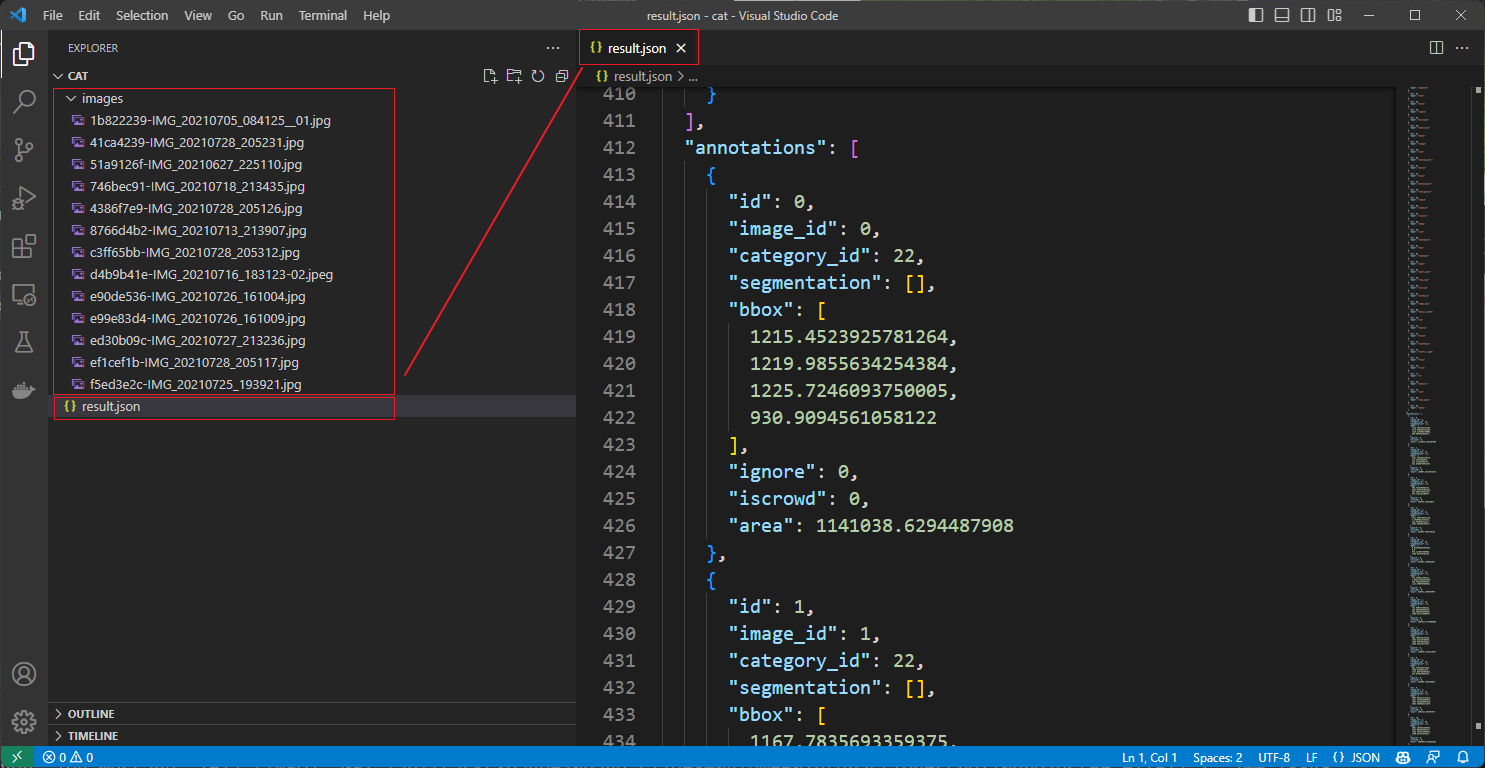
Since the coco exported by label studio does not support rle instance labeling, it only supports polygon instances.
The polygon instance format is not easy to control the number of points, too much is not easy to fine tune (unlike mask which can be fine tuned with an eraser) and too little area is not accurate.
Here we provide a conversion script to convert the json format of label-studio output to COCO format.
⚠Only items that have been annotated with all images are supported.
cd path/to/playground/label_anything
python tools/convert_to_rle_mask_coco.py --json_file_path path/to/LS_json --out_dir path/to/output/file
--json_file_path Enter the output json from Label studio
--out_dir Output path
After generation the script outputs a list in the terminal that corresponds to the category ids and can be used to copy and fill the config for training.
Under the output path, there are two folders: annotations and images, annotations is the coco format json, and images is the sorted dataset.
Your dataset
├── annotations
│   ├── ann.json
├── images
This section describes how to visualize the generated dataset using browse_dataset.py in mmdetection.
First get mmdetection in the playground directory.
cd path/to/playground/
# build from source
conda activate rtmdet-sam
# Windows users need to install pycocotools using conda
# conda install pycocotools -c conda-forge
pip install -U openmim
mim install mmengine
mim install "mmcv>=2.0.0"
git clone https://github.com/open-mmlab/mmdetection.git
cd mmdetection; pip install -e .; cd ..
Then use this script to output the config for training on demand, where the template mask-rcnn_r50_fpn is provided in label_anything/config_template.
#Install Jinja2
pip install Jinja2
cd path/to/playground/label_anything
python tools/convert_to_rle_mask_coco.py --json_file_path path/to/LS_json --out_dir path/to/output/file --out_config config_mode
--out_config Select your template mask-rcnn_r50_fpn.
Here it is recommended that --out_dir be . /mmdetection/data/my_set to facilitate training with mmdetection.
After the conversion, you can find the converted dataset and the generated config under mmdetection/data/my_set.
playground
├── mmdetection
│   ├── data
│   │   ├── my_set
│   │   │   ├── annotations
│   │   │   │   ├── ann.json
│   │   │   ├── images
│   │   │   ├── mask-rcnn_r50_fpn.py
├── ...
Then we visualize the dataset using tools/analysis_tools/browse_dataset.py.
cd path/to/playground/mmdetection

python tools/analysis_tools/browse_dataset.py data/my_set/mask-rcnn_r50_fpn.py --output-dir output_dir
The visualization results will be saved in output_dir under the mmdetection project path.
The following is the result of the transformation using the transformed dataset via tools/analysis_tools/browse_dataset.py.

After the previous step a config is generated that can be used for mmdetection training, the path is data/my_set/config_name.py which we can use for training.
python tools/train.py data/my_set/mask-rcnn_r50_fpn.py
After training, you can use tools/test.py for testing.
python tools/test.py data/my_set/mask-rcnn_r50_fpn.py path/of/your/checkpoint --show --show-dir my_showThe visualization image will be saved in work_dir/{timestamp}/my_show
When finished, we can get the model test visualization. On the left is the annotation image, and on the right is the model output.

With the semi-automated annotation function of Label-Studio, users can complete object segmentation and detection by simply clicking the mouse during the annotation process, greatly improving the efficiency of annotation.
Some of the code was borrowed from Pull Request ID 253 of label-studio-ml-backend. Thank you to the author for their contribution. Also, thanks to fellow community member ATang0729 for re-labeling the meow dataset for script testing, and JimmyMa99 for the conversion script, config template, and documentation Optimization, YanxingLiu provided the mobile_sam adaptation.