In this mission, we will deploy your bot that uses NodeJS and the Microsoft Bot Framework to Azure.
There are 3 steps to this tutorial:
- Publishing the bot to Github
- Deploying to Azure using CI from Github
- Registering the bot on the Bot Framework portal
- Install git - https://git-scm.com/downloads
- Make a Microsoft account if you don't have one
- Make a Github account if you don't have one
A Github repository is a great way to store your code online and collaborate with others on a codebase. You can plug your repository in to a hosted web app and each time you make changes to the repository, the changes automatically deploy onto your web app (this is called Continuous Integration). Log in to Github. Click on the + sign at the top right hand corner, and then click on New Repository. Name and create your repository. Once that's created, click on the Code tab of your repository. Click on the green "Clone or download" button, then copy the url (it should end with .git).
Next, open your command prompt.
Navigate to the folder with the project. If your project is on the desktop, the command would be like this:
cd Desktop/marsbotNow, we need to make the current folder containing your bot a Git repository. Use this command:
git initWe now need to link our local Git folder to the remote Github repository. Type in the following command:
git remote add origin https://github.com/yourusername/yourrepositoryname.gitMake sure you use the url you copied earlier in the above command. Your local Git repository is now remotely tracking your Github repository online. Type git remote -v to check that it points to the correct url.
Once that's done, let's commit and push our code to the Github repo. Run the following commands (separately):
git add .
git commit -m "Initial commit"
git push origin master
If you refresh your Github repository online, you should see that your code has been pushed to it. Now let's use continuous integration to deploy the code in our Github repo into a web app hosted online.
We have to publish the bot online as the Bot Framework won't be able to talk to a local url.
Go to the Azure Portal. Click on 'New' (it's at the sidebar), go into the web + mobile tab, and click on Web App. Name your web app whatever you'd like, name your resource group something sensible. Your Subscription should be free, and the location your app is hosted on can be anywhere, but it might be good to set it to a region close to you. Go ahead and create your web app.
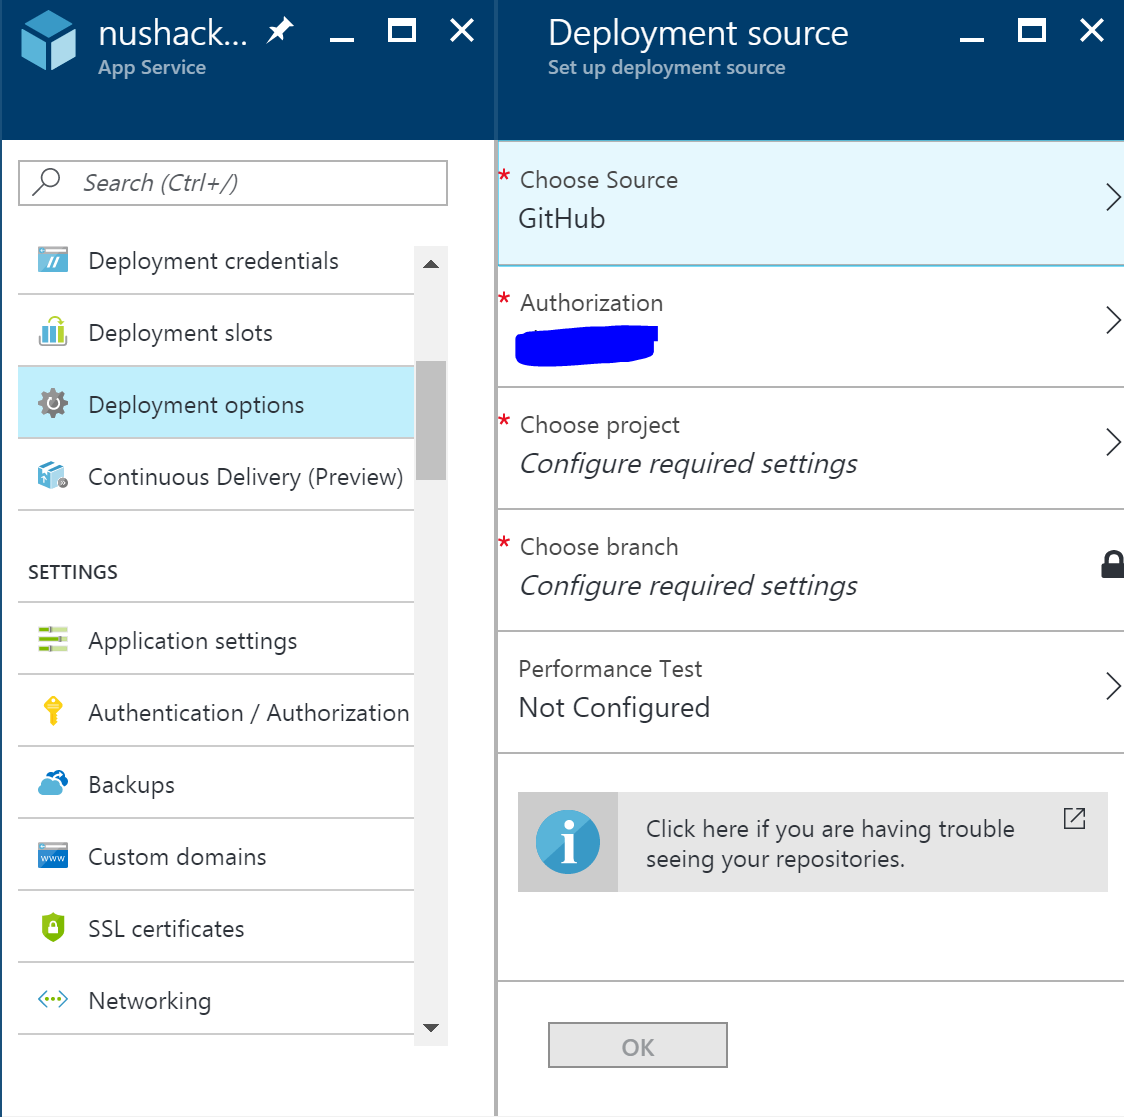
It might take a while, but you will get notified when your web app has been successfully created. Once it has been created go into All Resources (it's on the sidebar) and look for the web app you just created. Click into it and it should display a dashboard with info about your web app. Click into the Github blade under Choose Source. Then, click into Authorization and log in with your Github credentials. Then, select the project and branch (should be master) that your bot is in. Leave the Performance Test as not configured and hit ok.
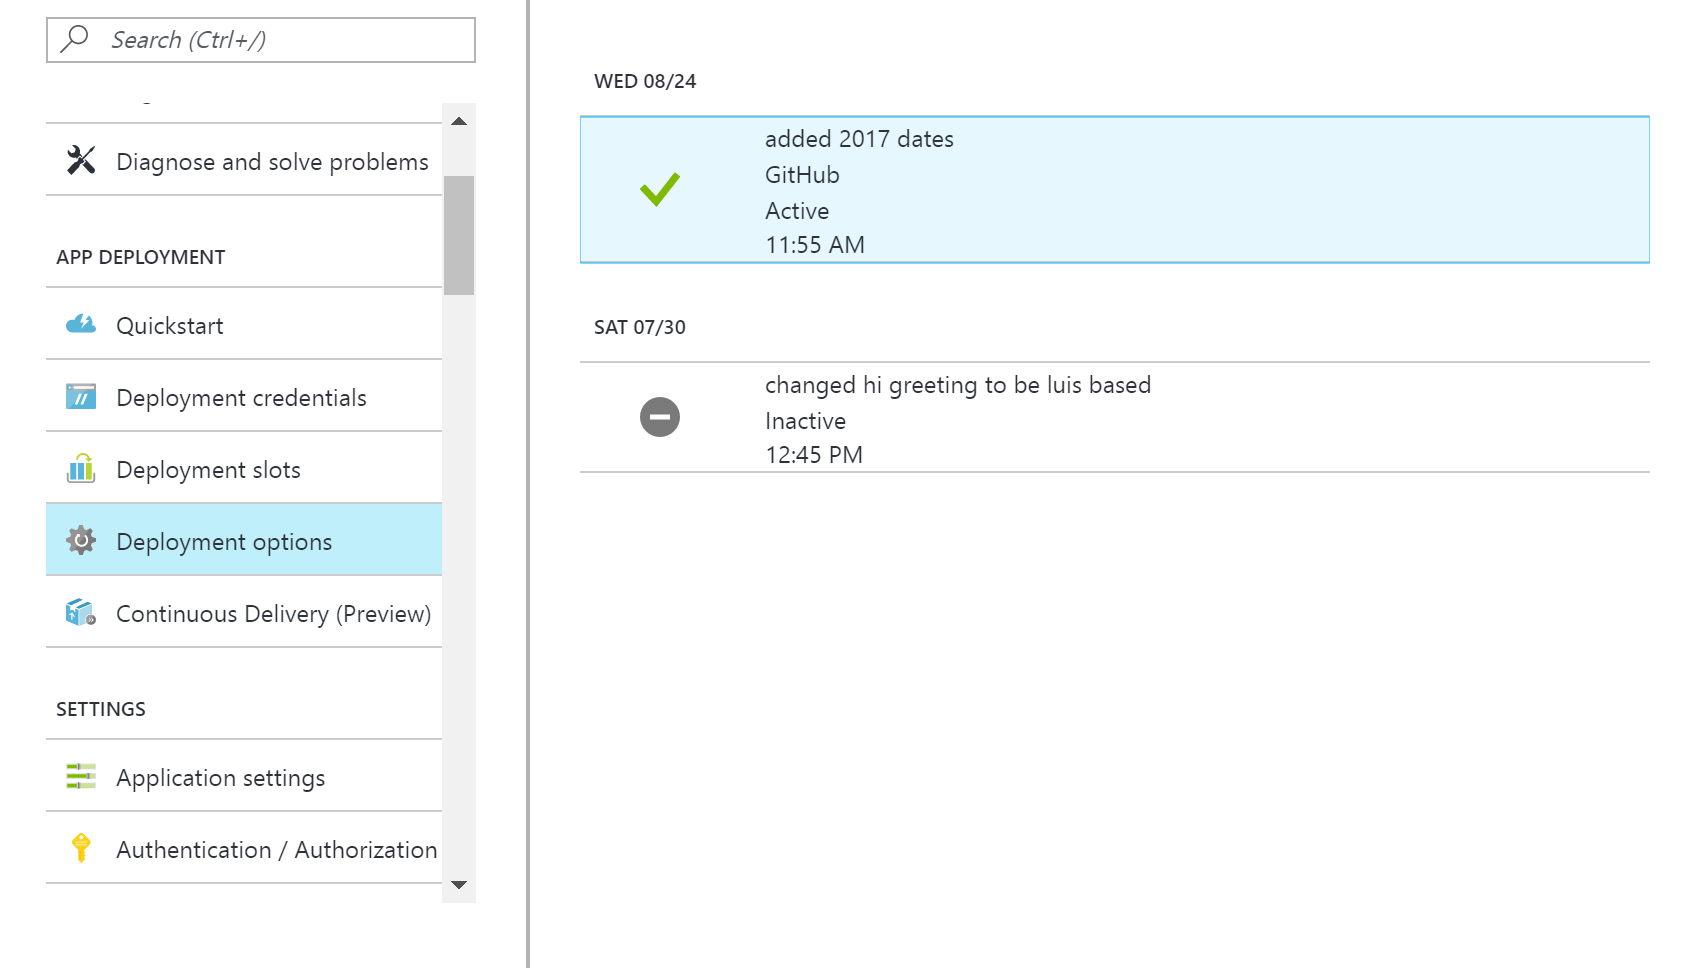
It may take a while for the latest commit to sync and be deployed to your web app. If the latest commit doesn't seem to be syncing, just hit sync. You'll see a green tick with your latest commit once it's done.
In order for your bot to talk to the Bot Connector and reach your users on the different channels, the bot has to be first registered on the Bot Framework portal.
First, go to this link on your browser: https://dev.botframework.com/bots/new
You will be prompted to sign in with your Microsoft account. Take note to use a personal Microsoft account (usually Hotmail, Outlook, MSN, Live email addresses) and not your school or organization's Office365 account.
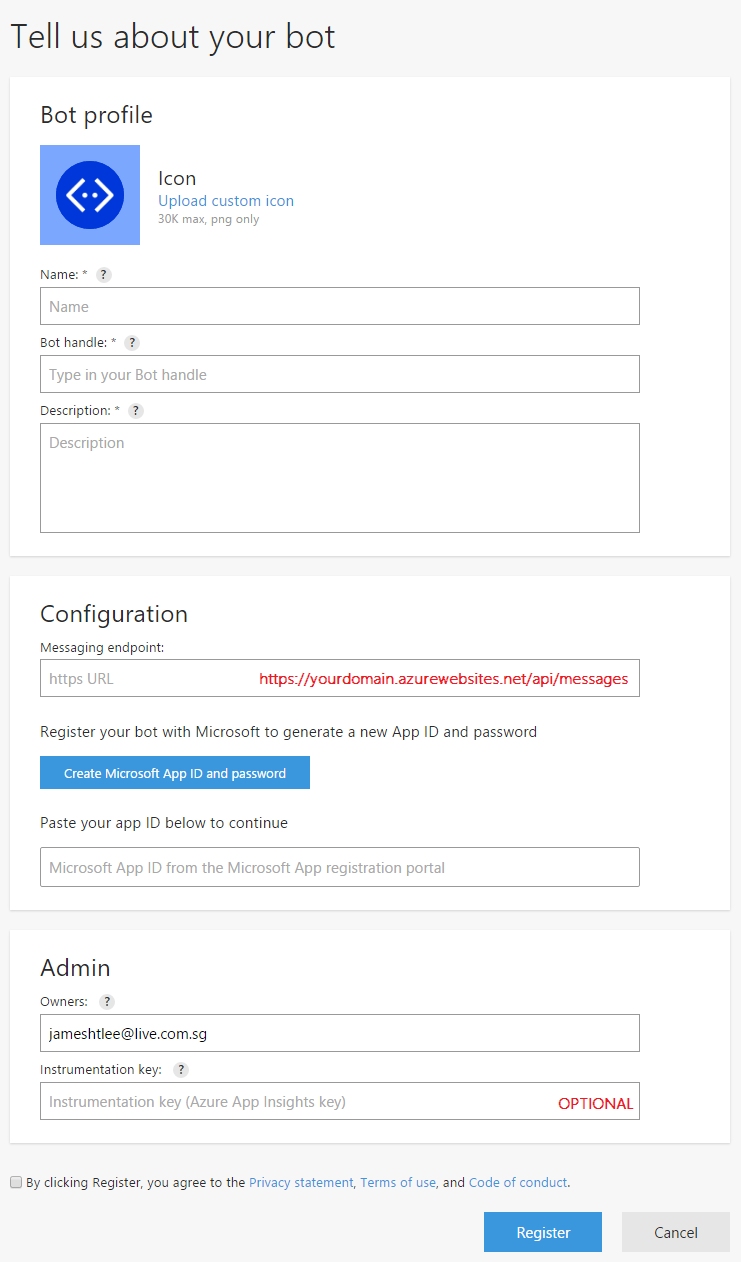
After signing in, you will be greeted with a simple form that allows you to register your bot.
Most of the fields are self-explanatory.
- The "Messaging Endpoint" field should be filled with the domain given to you on your Azure Web App, but subdomain to /api/messages.
- The "Create Microsoft App ID and Password" will give you a new ID and password. Save this as we need it later.
- You can also input your Azure Application Insights key if you enabled it when creating the Web App on Azure, but it's optional.
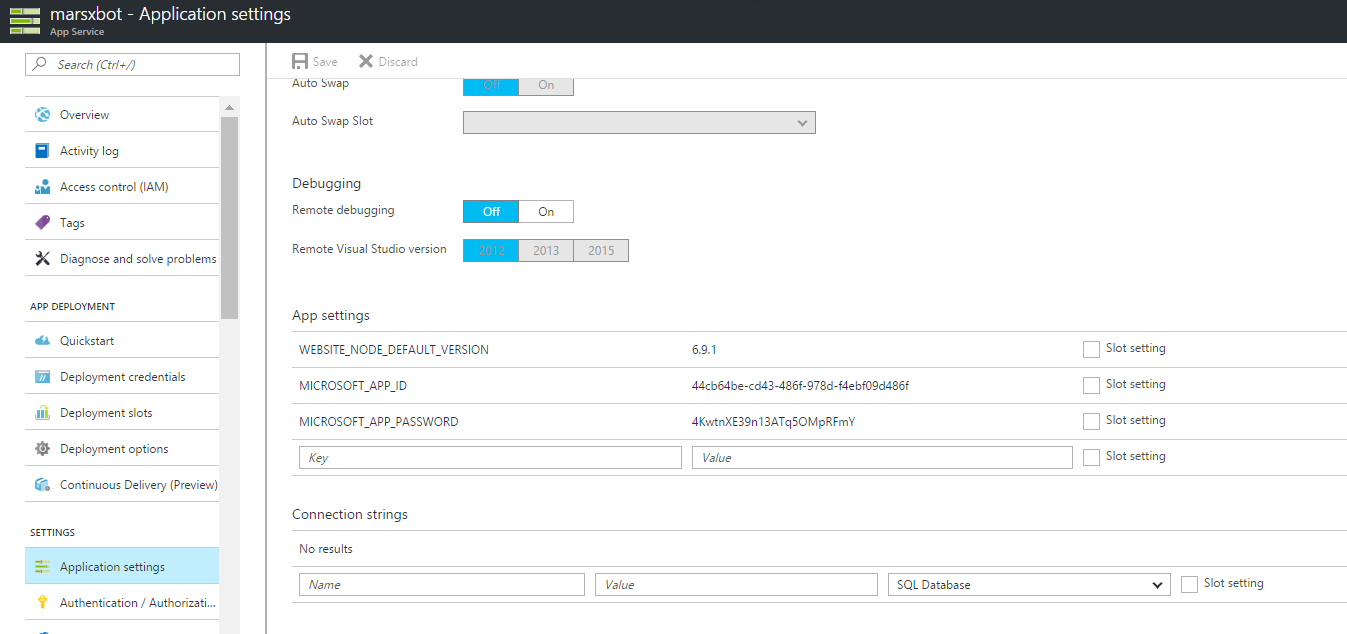
Now that you have the bot deployed on Azure and registered on the Bot Framework, we need to add the App ID and Password on Azure.
Go back to your deployment on Azure and click on App Settings, configuring the App ID and Password we got just now.
After registering, you'll be sent to the page where you can manage all your bots. Click on the bot you just created. The page should look like this:
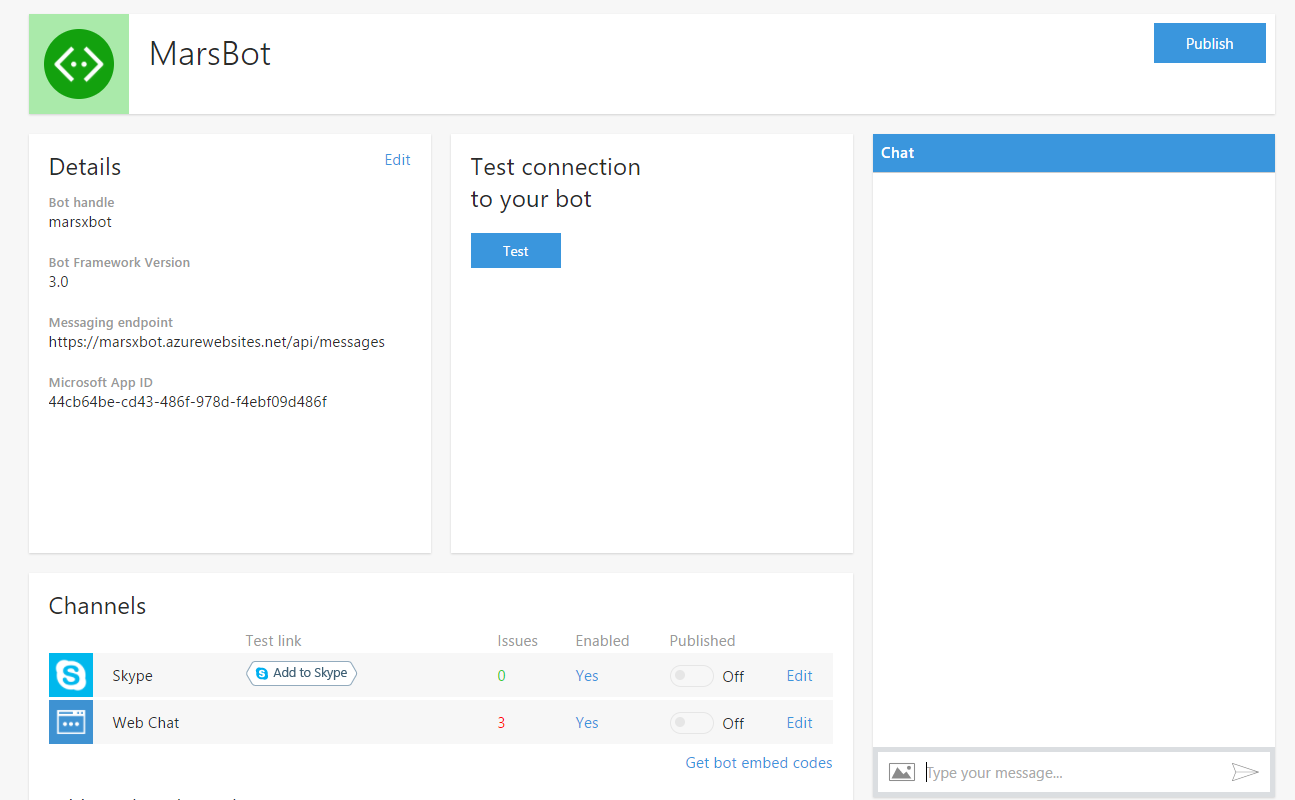
The top portion has several useful functions.
- A testing function which will send a simple HTTP request to your messaging endpoint and give you back an appropriate success or error message.
- The Web Chat (iframe) channel that has been pre-embedded for you on the page, allowing you to talk to your bot from the portal
Try writing "Hi" to the bot in the web chat and see if it responds. If it does then we have successfully deployed the bot.