This package requires the following environment variables to be set:
GOOGLE_CLIENT_IDGOOGLE_CLIENT_SECRETGOOGLE_REFRESH_TOKEN
Below is a step-by-step of how to get the values to correctly fill those variables:
Note: the names you enter below don't really matter, it's an app that only you will have access to so you can just put whatever you feel comfortable with. Google also likes to change these screens often, so things might not be 100% up to date (you can open a pull request, if thats the case :) )
-
Visit https://console.developers.google.com/apis/credentials
-
Create a new project:

-
Enter a name and click
Create. This can take some seconds, and Google will notify you when this step is done. -
Visit https://console.cloud.google.com/apis/credentials/consent
-
Select External as the user type. Then click Create.

-
Fill the Application name and the required email fields, and click Save

-
On the next page, the "Scopes" step, leave everything as default and click "Save & Continue".

-
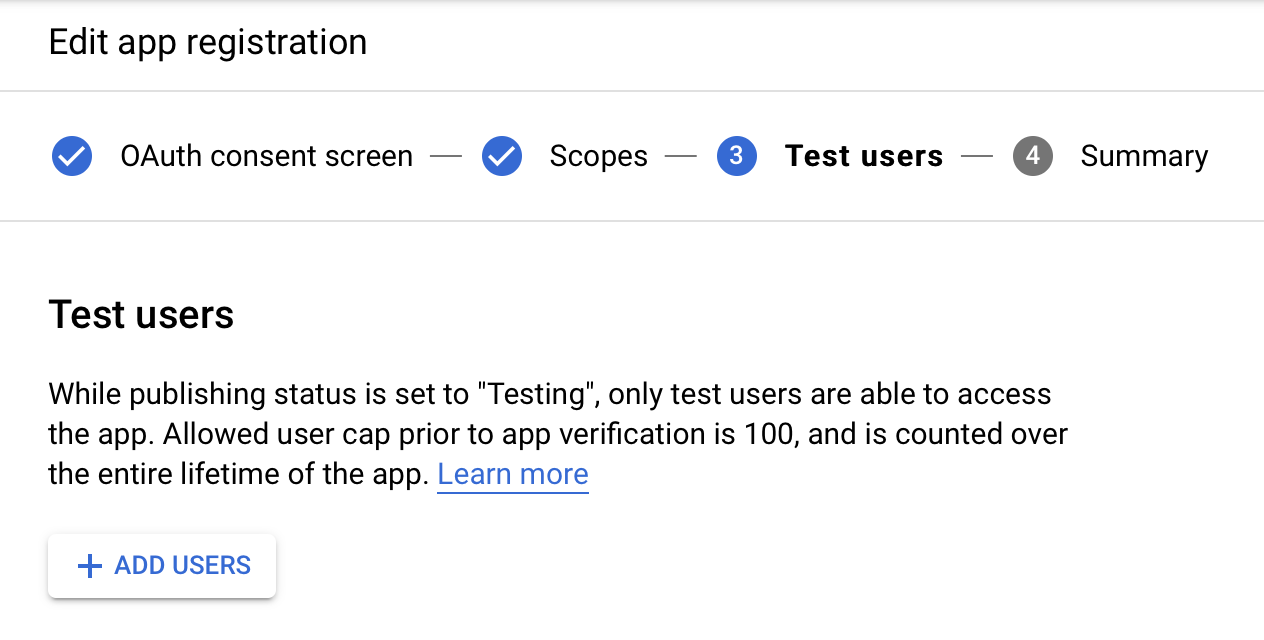
On the 3rd screen, click on "Add Users" and add your own email address.
-
On the next page, click "Back to Dashboard".
-
Visit https://console.developers.google.com/apis/library/chromewebstore.googleapis.com
-
Enable the API, clicking on the button
Enable:
-
Visit https://console.developers.google.com/apis/credentials
-
Click Create credentials > OAuth client ID:

Note: If you just created a project, it might take a few minutes for "OAuth Client ID" to appear in the dropdown list. You'll need to refresh to page to see it appear.
-
On the next page, choose Application type "Desktop app" and add a name. Click "Create".

-
A new modal opens, with two fields, the first containing a
Client ID, and the second containing aClient Secret. Save those values, as we are going to need them later.
-
Visit https://console.cloud.google.com/apis/credentials/consent
-
Click PUBLISH APP and confirm

-
In the following URL, replace
<YOUR_CLIENT_ID>with the value of yourClient ID, and open it:https://accounts.google.com/o/oauth2/auth?response_type=code&scope=https%3A%2F%2Fwww.googleapis.com%2Fauth%2Fchromewebstore&redirect_uri=http%3A%2F%2Flocalhost%3A8818&access_type=offline&client_id=<YOUR_CLIENT_ID> -
Follow the steps shown on the screen. If you happen to see a screen saying something like
This app isn't verified, just click onAdvanced, and thenGo to <App name> (unsafe). It only says that because the app you just created is not verified by Google, but this was created on your account and will only be used by you, so you don't really need to worry about it. -
You will reach this error page, with a URL that looks like:
http://localhost:8818/?code=4/0AX4XfWjwRDOZc_1nsxnupN8Xthe7dlfL0gB3pE-MMalTab0vWZBDj9ywDMacIT15U-Q&scope=https://www.googleapis.com/auth/chromewebstore
-
On the URL, copy the
approval codewhich is betweencode=and&scope, it should look like this:4/0AX4XfWjwRDOZc_1nsxnupN8Xt-dont-use-this-code-IT15U-Q -
On the same page you can run this in the browser console, it's a wizard to create your
refresh_token:Do not forget to fill the three variables below on the code
var clientId = 'YOUR CLIENT ID HERE' // <<<<<<<<<<<<<<<<<<<<<<
var clientSecret = 'YOUR CLIENT SECRET HERE' // <<<<<<<<<<<<<<<<<<<<<<
var authCode = 'YOUR AUTH CODE HERE' // <<<<<<<<<<<<<<<<<<<<<<

// ^^^^^^^^^^^^^^^^^^^^^^^^^^^^^^^^^^^
// Fill those variables above

;(async () => {
  const response = await fetch('https://accounts.google.com/o/oauth2/token', {
    method: 'POST',
    body: new URLSearchParams([
      ['client_id', decodeURIComponent(clientId.trim())],
      ['client_secret', decodeURIComponent(clientSecret.trim())],
      ['code', decodeURIComponent(authCode.trim())],
      ['grant_type', 'authorization_code'],
      ['redirect_uri', 'http://localhost:8818'],
    ]),
    headers: {
      'Content-Type': 'application/x-www-form-urlencoded',
    },
  })
  const json = await response.json()
  console.log(json)
  if (!json.error) {
    if (
      typeof copy === 'function' &&
      !navigator.userAgent.includes('Firefox')
    ) {
      copy(json.refresh_token)
      alert(
        'The refresh_token has been copied into your clipboard. You’re done!',
      )
    } else {
      console.log('Copy your token:')
      console.log(json.refresh_token)
      alert('Copy your refresh_token from the console output. You’re done!')
    }
  }
})()-
You should have now a
Client ID, aClient Secret, and aRefresh Token. Use them to set the following environment values:GOOGLE_CLIENT_ID: set the value toClient ID.GOOGLE_CLIENT_SECRET: set the value toClient SecretGOOGLE_REFRESH_TOKEN: set the value toRefresh Token
Now you should have all three environment variables correctly set. You can use the same values for all your extensions, but remember not share them publicly, as they will allow anyone to publish your extensions!
This document was based on the chrome-webstore-upload documentation. If there's something out of date, try checking their file, it might be more up-to-date.